
MTN WordPress Provisioning Workflow on MTN Cloud
Before You Start (prerequisites)
- Have an MTN Cloud login with permissions to view Provisioning (Instances and Catalog) and Infrastructure (Network)
Tip:If you don’t see required features and resources, contact support or refresh the portal.
- Have a Project (Resource Pool) created
- Verify that a Network has been created, and ensure a Router is created and attached to it
- Define a Security Group
- Plan your deployments
The Right Sequence
- Create Security Group: Establish a controlled network boundary by defining allowed inbound and outbound traffic to secure deployed resources
- Deploy MTN WordPress: Provision a cloud-based WordPress Instance on the MTN Cloud to enable secure, flexible, and high-performance website deployment and management through Catalog Items or Instance Tab.
- WordPress Web Setup: Complete WordPress installation via browser, enabling secure login and access to the WordPress dashboard for configuration and management.
Important Note: Ports 80 or your custom web server port and 443 must be added as inbound rules in the personal security group and applied to the WordPress server in addition to the default security group. Port 22 (SSH) only needs to be opened if you configured an SSH key for user login.
Part 1 — Create Security Group
Purpose: Controls network access to(ingress) and from(egress) your VM.
- Navigate to: Infrastructure > Network > Security Groups
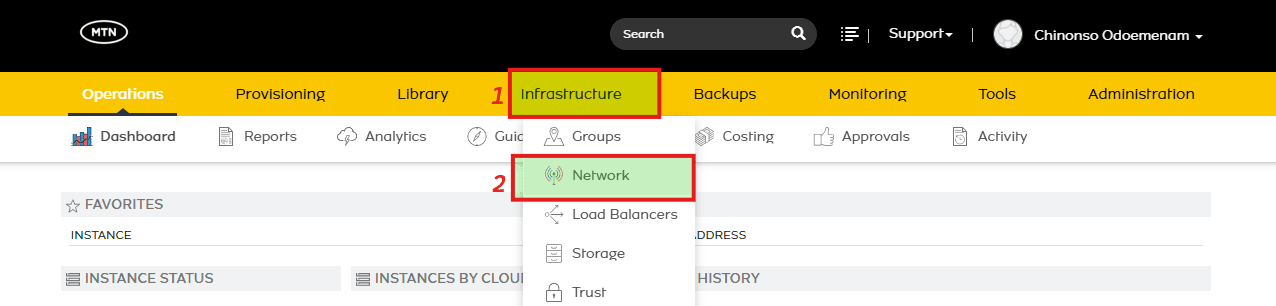
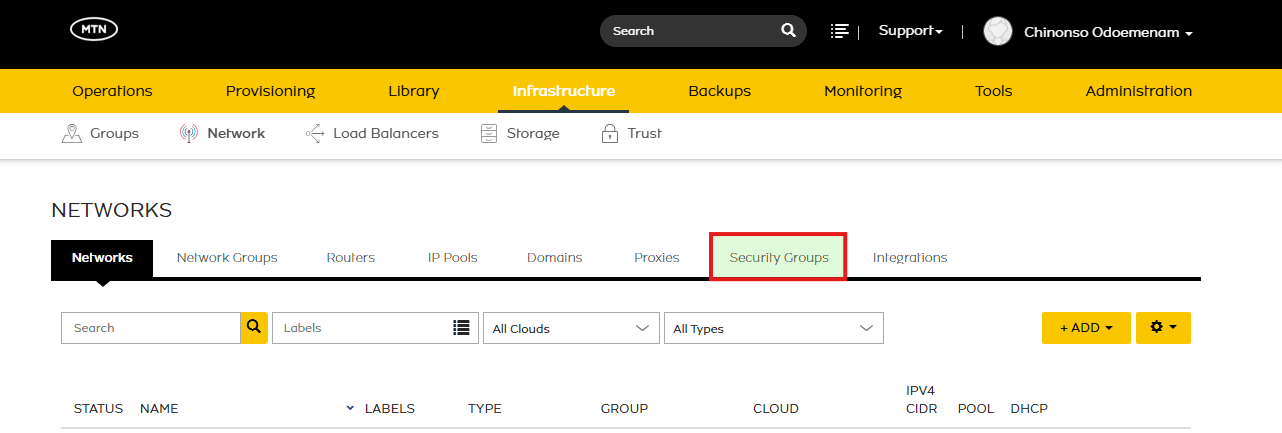
- Click +Add
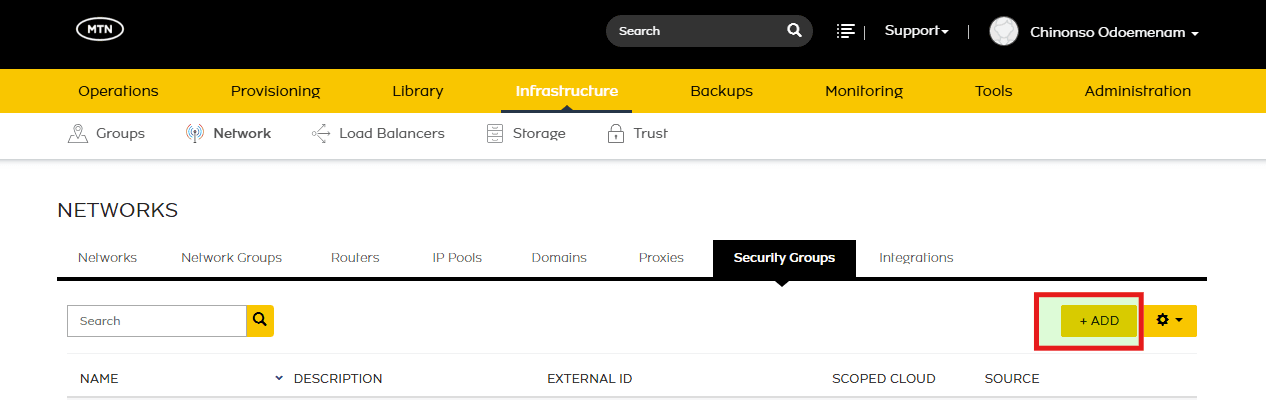
- Assign:
- Name
- Description
- Scoped Cloud = MTNNG_CLOUD_AZ_1
- Click the Security Group that was recently created
- Navigate to Rules
- Click on +Add Rules
- Assign:
- Name
- Direction = (Ingress or Egress)
- Rule Type = Custom Rule
- Protocol = (TCP, UDP OR ICMP)
- Port Range (available depending on protocol selected)
- Source Type
- Source
- Destination Type
- Destination Port Range
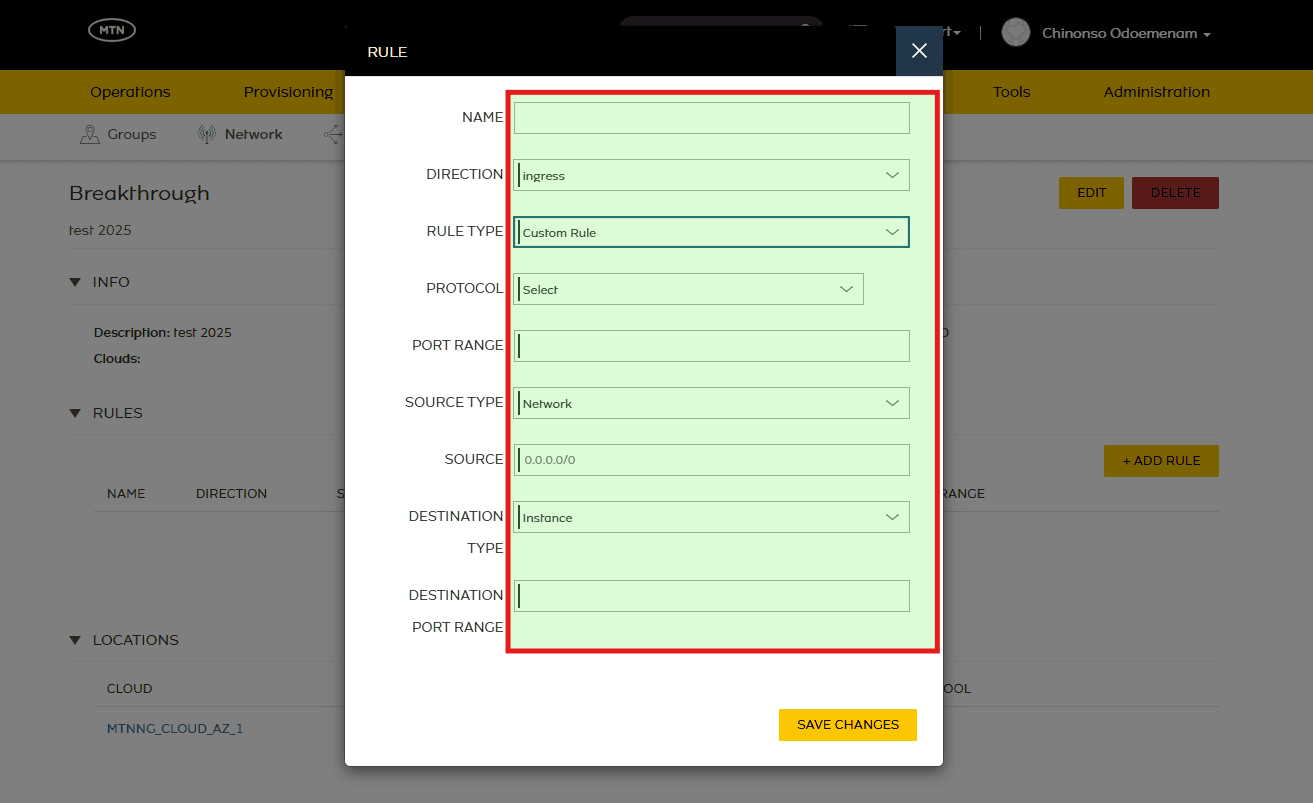
- Scroll Down to Save Changes
- Navigate to Location
- Click on +Add Location
- Select the required Cloud where the workload to be protected is provisioned.
- Click on Save Changes
Part 2 — Deploy MTN WordPress
Purpose: Orchestrate the automated deployment of a high-performance WordPress application within the MTN Cloud environment. This process leverages Catalog Items to simplify the provisioning process.
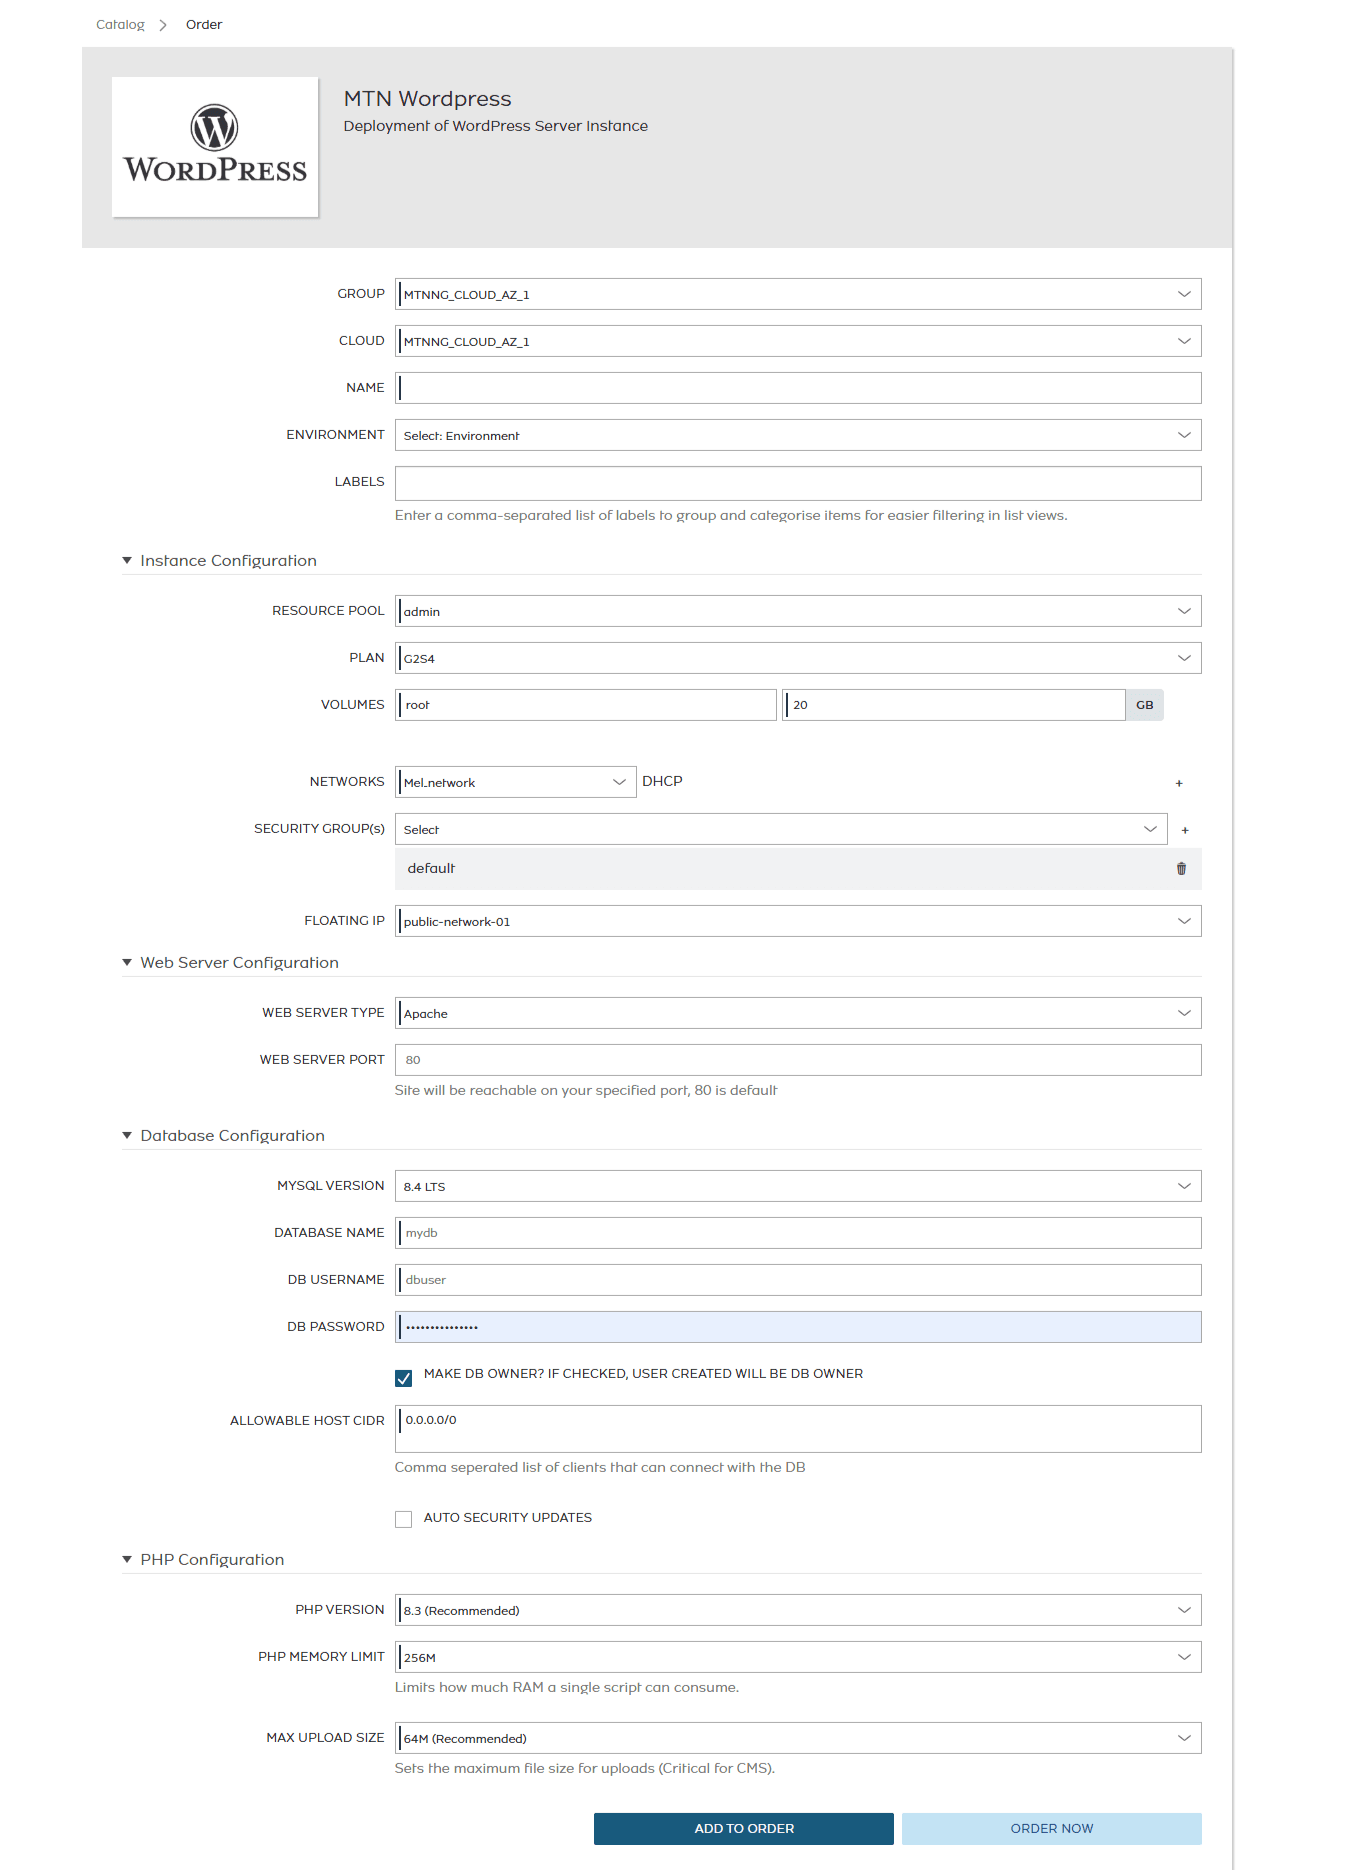
- Navigate to: Provisioning > Catalog

- Select catalog item (MTN WordPress)

- Select the Group assigned to your account. This defines the VM’s location and resource scope.
- Select the Cloud where the VM will be deployed (e.g., MTNNG_Cloud_AZ_1).
- Input the VM Name or leave the automatically generated name by MTN Cloud based on naming conventions.
- Choose the appropriate Environment for the VM (e.g., Development, Staging, Production).
- A Label can be added if required.
- Select Resource Pool (Project) initially created.
- Select a Plan that defines the VM’s CPU and memory resources.
- Input the required Volume capacity. [Note: 20 GB is a recommended minimum for a typical WordPress server. Backups stored on the same server also use disk space.]
- From the list, select any Network you have created.
- First, assign the default Security Group available to manage necessary firewall rules and traffic access. After provisioning, your own created Security Groups can be attached.
- Assign Floating IPs (based on the selection made during router creation for the network selected).
- Select the preferred Web Server Type (e.g., Apache or Nginx).
- (Optional) Specify a custom Web Server Port. If left blank, the default HTTP port 80 will be used.
- Select the required MySQL Version and provide the DataBase Name, DB Username, and DB Password.
- (Optional) Specify the Allowable Host CIDR to restrict which hosts or networks can connect to the database. If left blank, the default configuration will be applied.
- (Optional) Enable Auto Security Updates to automatically install security-related updates for the database server.
- Select your preferred PHP Version and configure the PHP Memory Limit and Max. Upload Size.
- Click Order Now
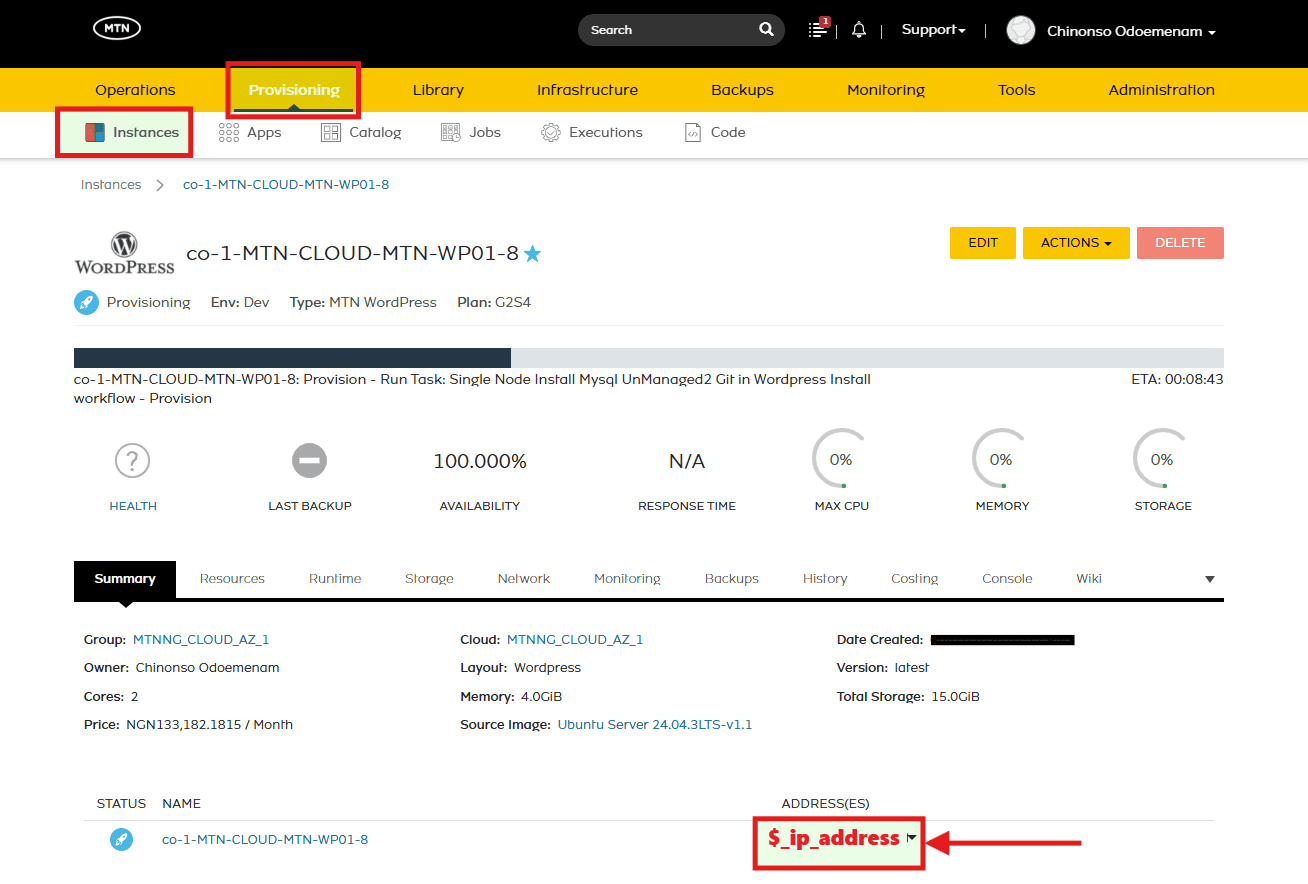
- Navigate to: Provisioning > Instances

- Select the WordPress instance to view additional details. Take note of the IP address listed under the Address(es) column, as this will be used to access the web interface for the final installation.
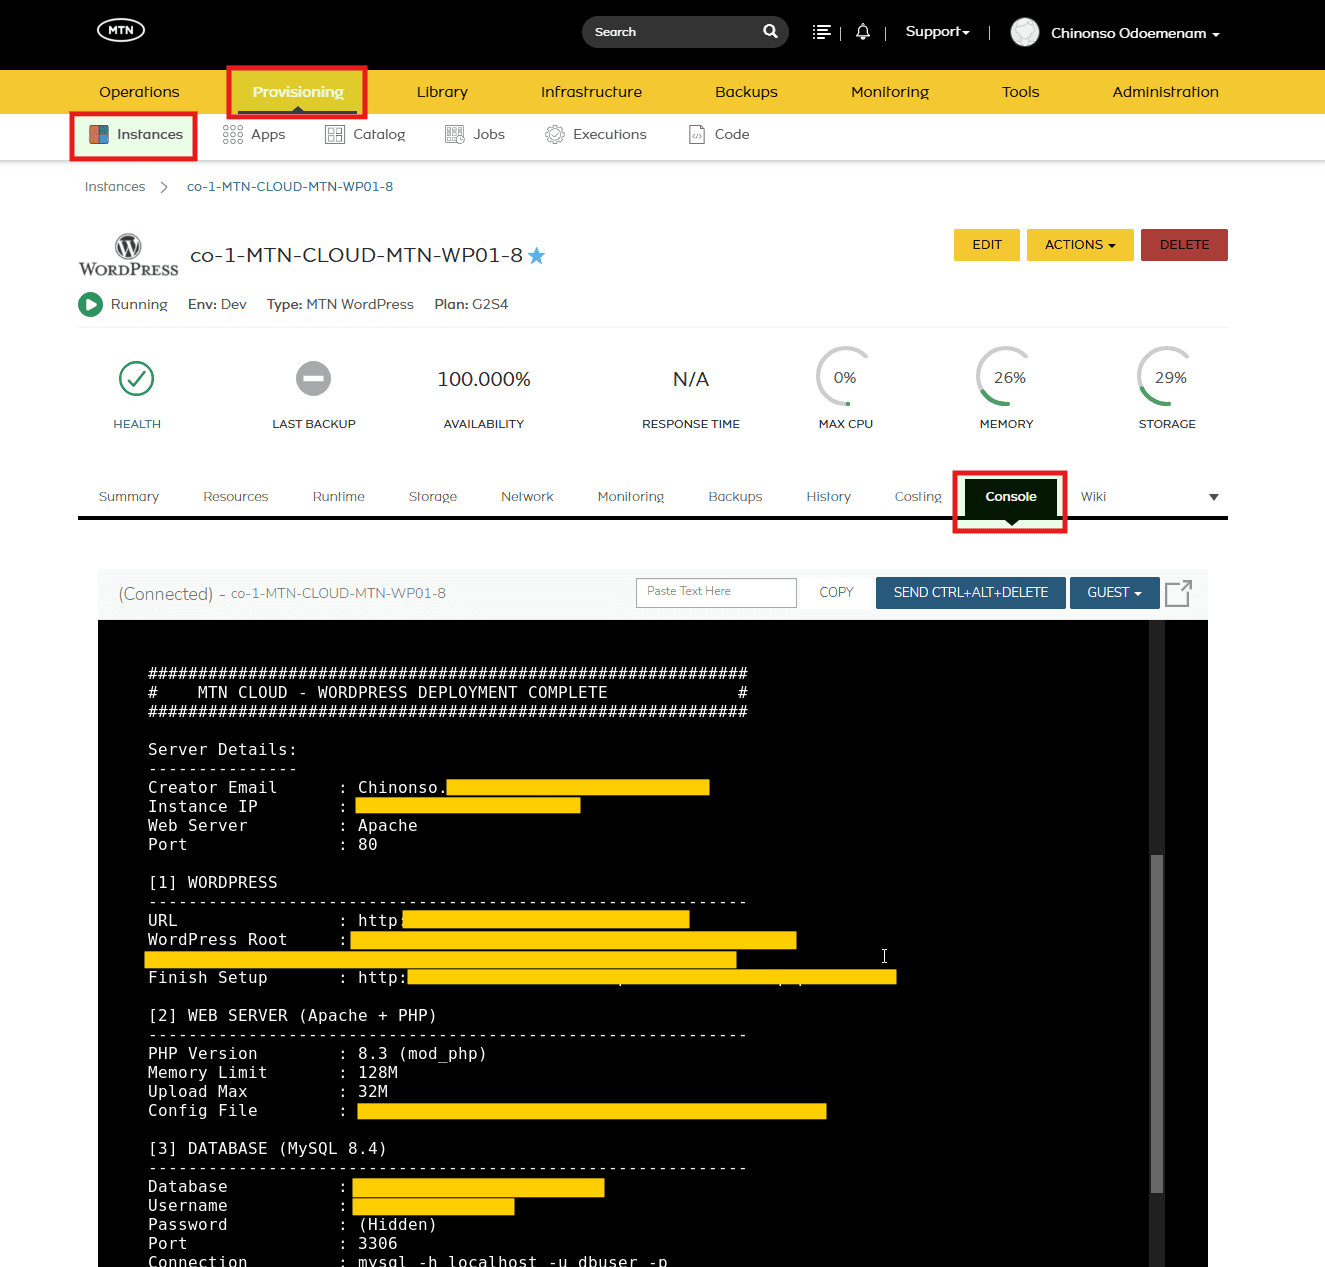
- Once provisioning is complete, open the Console tab to verify that the process was successful.
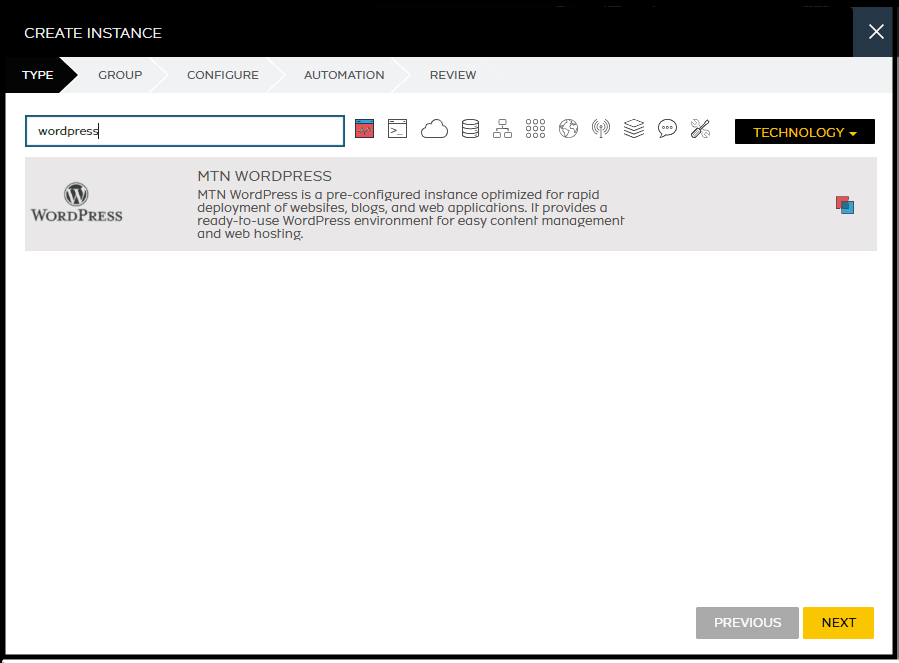
Additional Deployment Method
The instance can also be provisioned via the Instance tab, the same way you would normally create an instance or virtual machine, by selecting the MTN WordPress instance type.
Part 3 - WordPress Web Setup
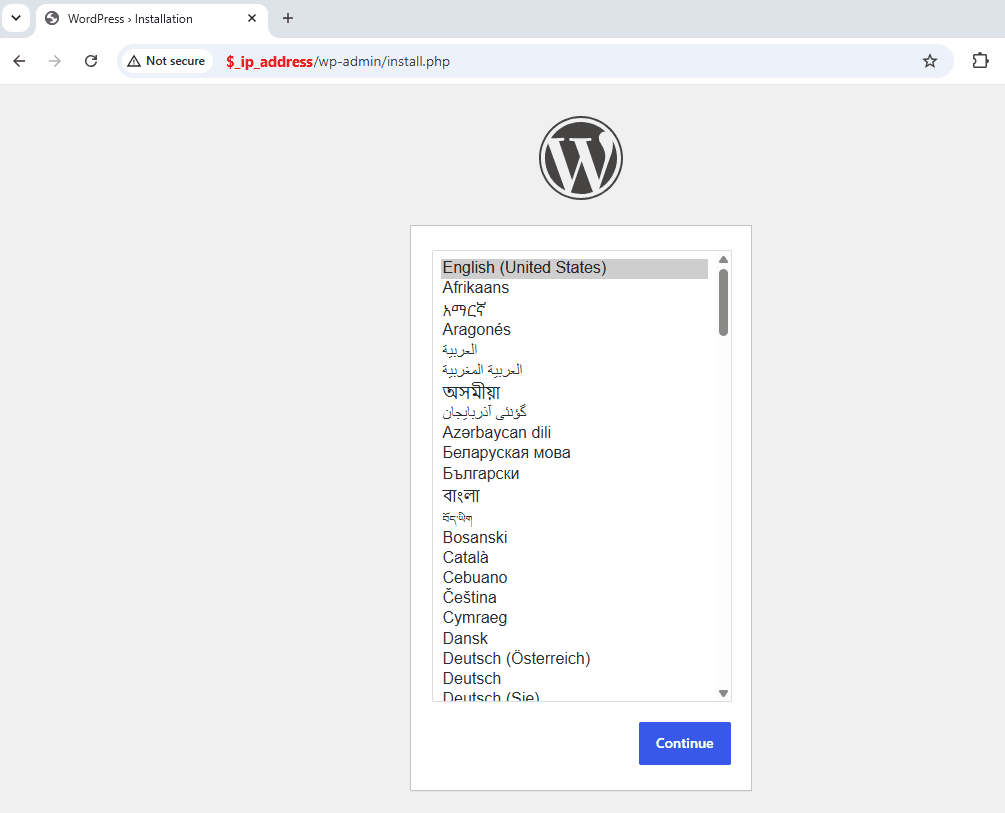
With the security group configured and your WordPress instance deployed, refer to the IP address captured earlier and enter it in a web browser. If a custom port was specified during initial setup, ensure it is appended to the URL in order to reach the WordPress installation page.
- Select your preferred language and click Continue.
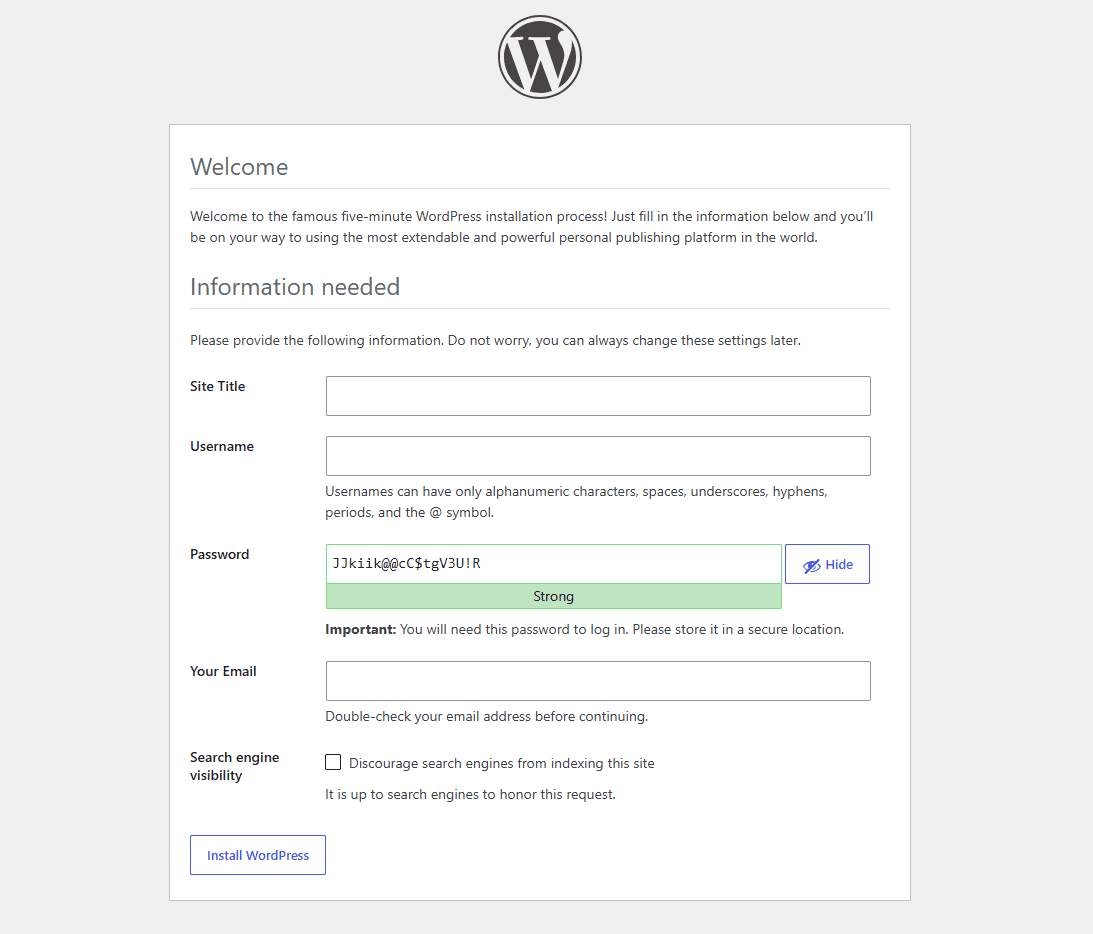
- Fill in the fields, then click Install WordPress.
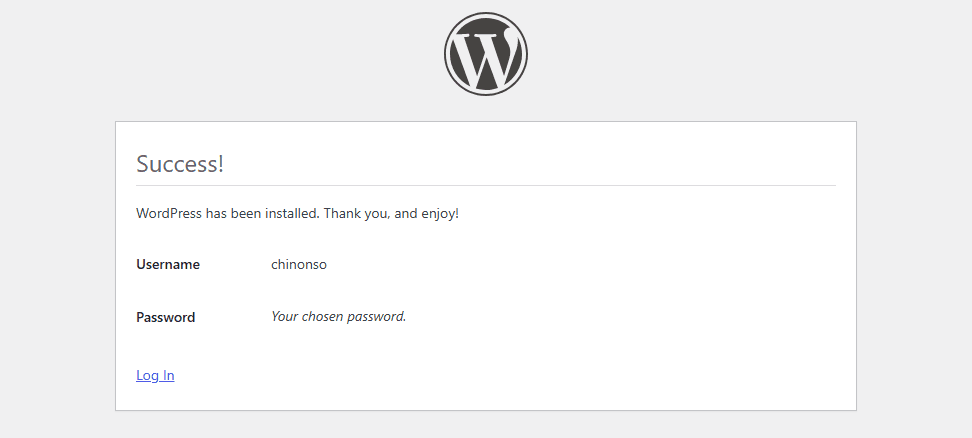
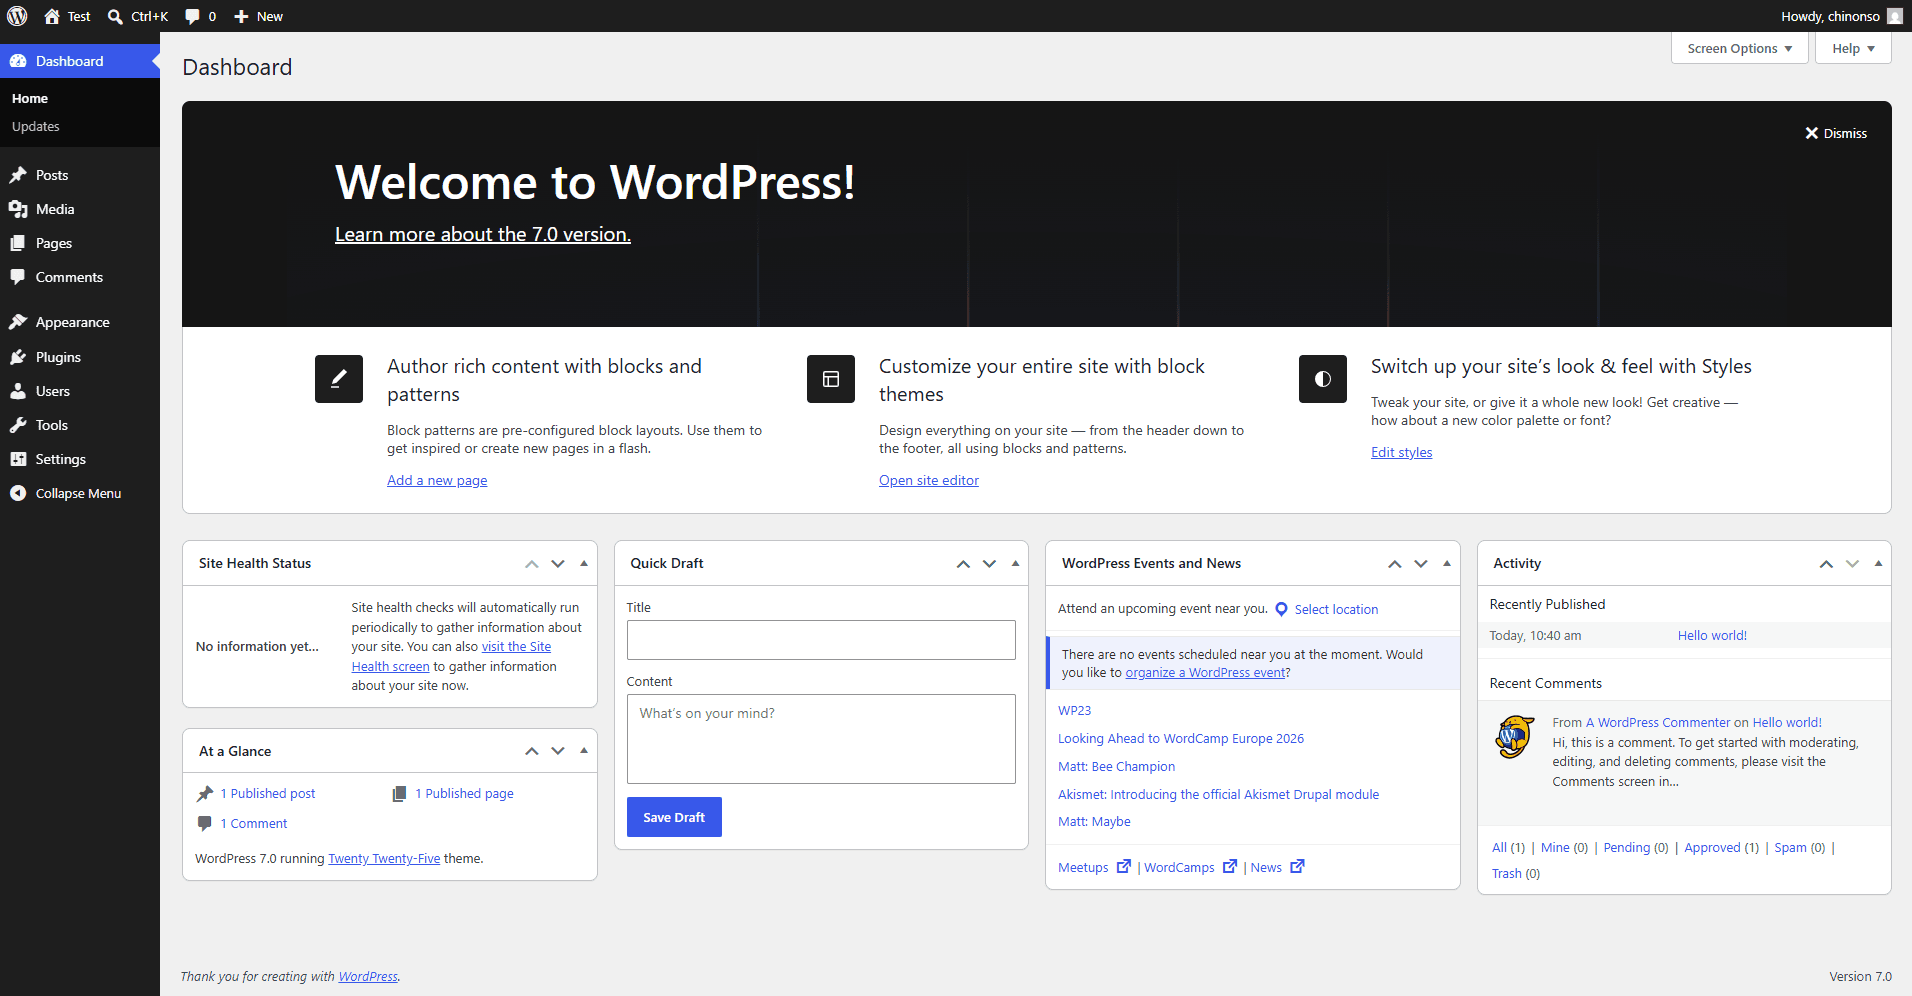
- A success message will be displayed, indicating that the WordPress installation has been completed successfully. Click on Log In to proceed.
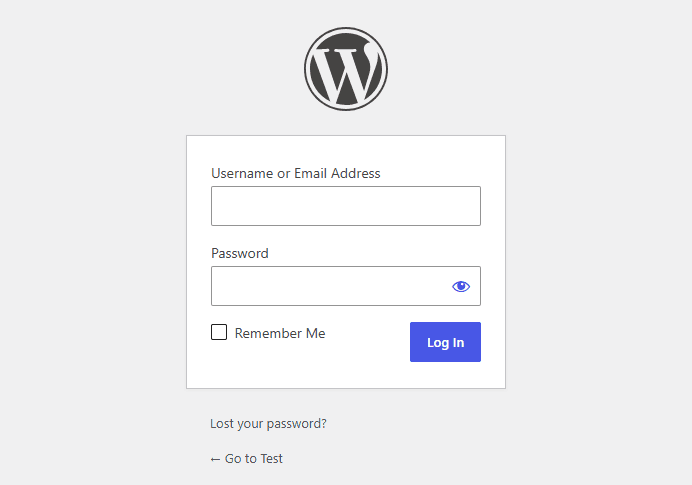
- Use the username and password you created earlier.
Important Tips & Notes
- This service automatically provides a fresh WordPress instance, giving you immediate access to a pre-configured environment ready for your content.
- To access your website via a custom domain instead of the raw IP address, point your domain’s A Record within your DNS provider to this instance IP address.
- For security and data encryption, an SSL certificate on the Web Server (e.g, Apache or Nginx).