
FortiManager (BYOL) Provisioning Workflow on MTN Cloud
Overview
This guide covers the end-to-end provisioning of a FortiManager instance on the MTN Cloud Platform, delivered as a Bring Your Own Licence (BYOL) service. It provides step-by-step instructions for user creation, Security Group configuration, instance deployment, DNS configuration, first login and licence activation.
Why it matters:
- Centralised Management: FortiManager lets you configure, monitor and control your Fortinet security platforms from a single console.
- Bring Your Own Licence: Use a valid Fortinet licence or a FortiCloud free-trial licence to unlock full functionality.
- Controlled Access: A dedicated Security Group lets you restrict access to FortiManager to only the addresses you trust.
Prerequisites
Before you begin, ensure you have:
- An MTN Cloud login with permissions to view the Infrastructure and Provisioning tabs.
- A created Resource Pool (Project).
- A created Network.
- A created Router (if required), with the network above attached to it.
- A planned deployment, including:
- The resource specification.
- The network to place the instance on.
- The IP address.
- The required inter-communication (and so the Security Group rules).
- Whether a floating IP is needed.
Tip: If you do not see your networks or Security Groups when provisioning, contact support or refresh the portal.
Minimum System Requirements
The values below are Fortinet’s official published minimums for FortiManager-VM (8.0). On MTN Cloud, select a Plan and Volume that meet or exceed these figures. The recommended MTN catalog plan is shown for convenience.
| Resource | Minimum / Recommended |
|---|---|
| vCPU | 4 vCPU (minimum) |
| Memory (RAM) | 8 GB (minimum) |
| Disk storage | 500 GB dedicated disk (minimum) |
| MTN Catalog Plan | G4S8 (4 vCPU / 8 GB) |
| Interfaces | 1 interface minimum (up to 2 supported on the MTN plan) |
The Right Sequence
To deploy FortiManager efficiently, follow this sequence:
- Create a User (Linux/Windows): Add the required user under User Settings.
- Define Security Groups: Create a new Security Group specifying the ports needed for ingress and egress traffic. This Security Group can be added to the FortiManager instance (in addition to the default) after the instance has been created. The default Security Group provides basic functionality such as console access and instance health checks, and it is highly recommended that you use it during creation.
- Provision the FortiManager Instance: Deploy the instance, attach it to the appropriate network you have created, assign a floating IP, and apply the default Security Group. After provisioning, your defined or additional Security Group(s) can be added to the instance.
- Configure DNS and Log In: Set the DNS servers from the console, log in to the GUI and activate your licence.
Phase 1 — Create Linux/Windows User
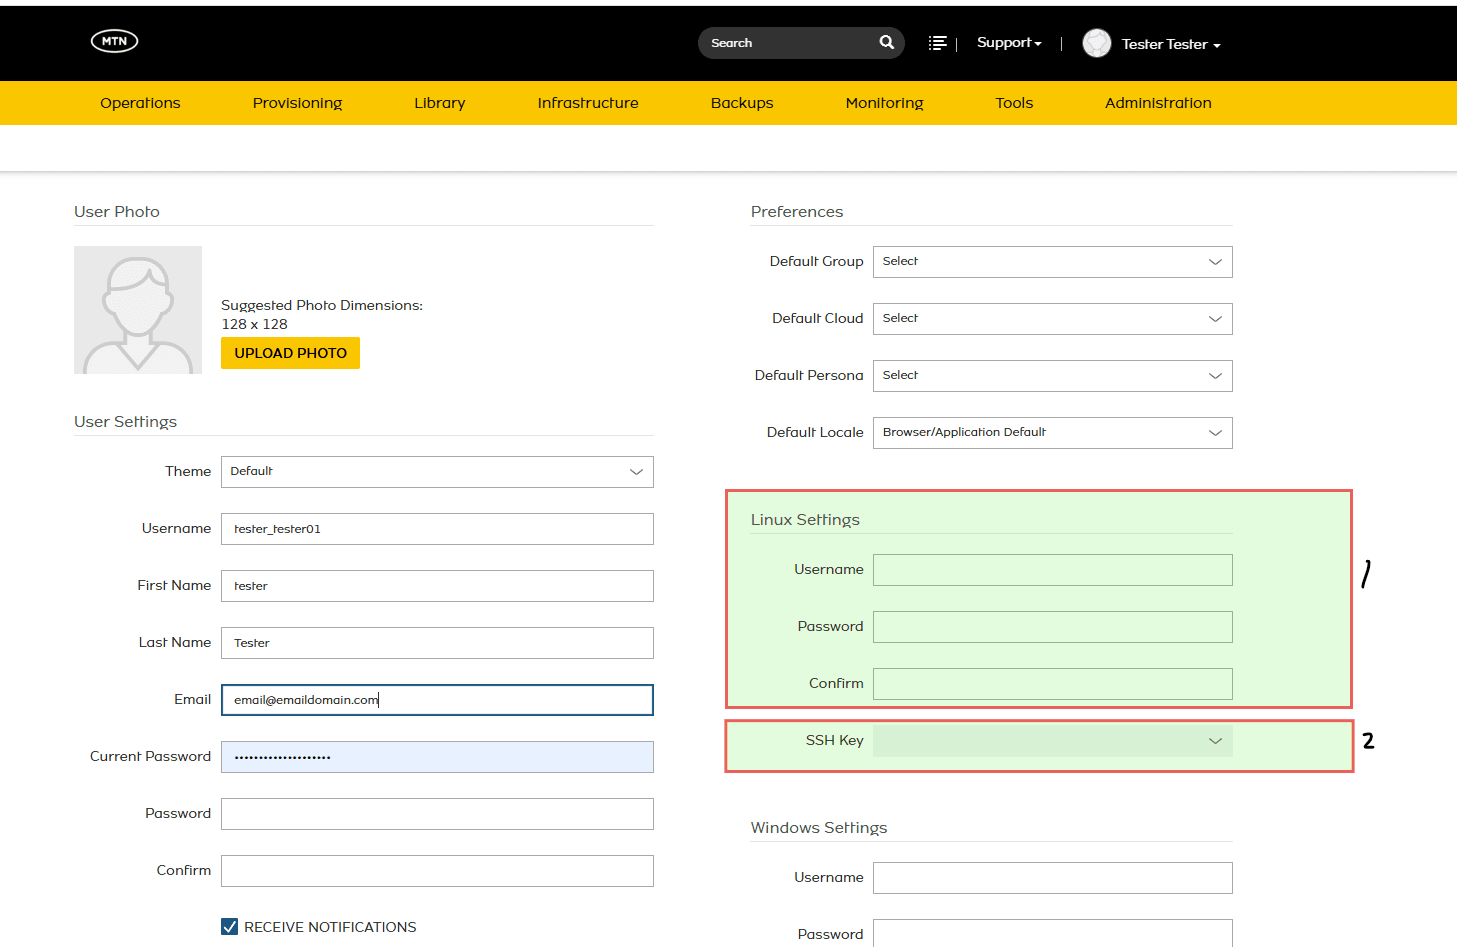
Purpose: Allow logins to instances provisioned via the console, and manage resource ownership within MTN Cloud. Complete this phase only if it has not already been done.
- Log in to your user account.
- Navigate to User Settings by clicking the dropdown beside your name at the top right corner of the screen.

- Locate the Linux Settings section and assign the following:
- Username
- Password
- Confirm Password
- SSH Key: Optionally, select an SSH key entry if you have one.
- Repeat the same process for your Windows Settings. Scroll to the bottom of the page and click Save.
Phase 2 — Define Security Groups
Purpose: Control network access to (ingress) and from (egress) your FortiManager instance. Complete this phase only if a suitable Security Group does not already exist.
Scenario: You want only your laptop (with IP 200.200.113.15) to be able to access your FortiManager instance. All other devices should be blocked.
- Create a Security Group by following the Security Group Creation documentation, using these values:
- Name: Laptop-Access-Only
- Description: Allow secure remote access only from my laptop
- Scoped Cloud: MTNNG_CLOUD_AZ_1
- Add the following rules to the group. For each rule set Direction to Ingress, Rule Type to Custom Rule, Source Type to Network, Source to 200.200.113.15/32 (your laptop’s public IP) and Destination Type to Instance. Set the Destination Port Range to the same value as the port.
| Rule Name | Protocol | Port | Purpose |
|---|---|---|---|
| Allow-SSH-From-Laptop | TCP | 22 | SSH access |
| Allow-GUI-From-Laptop | TCP | 443 | GUI access over HTTPS |
| Allow-SNMP-From-Laptop | UDP | 161 | SNMP |
| Allow-ICMP-From-Laptop | ICMP | Not applicable | ICMP (ping). No port range is needed |
| Allow-FGFM-IPv4-From-Laptop | TCP | 541 | FGFM, IPv4 |
| Allow-FGFM-IPv6-From-Laptop | TCP | 542 | FGFM, IPv6 |
- Attach the Laptop-Access-Only group to your FortiManager instance in addition to the default Security Group.
Result: Only your laptop can access the FortiManager instance on the open ports. All other attempts are denied.
Phase 3 — Provision the FortiManager Instance (BYOL)
Purpose: Deploy your FortiManager instance in the MTN Cloud Console once your Security Group and network are ready.
Step 1 — Select the Catalog Item
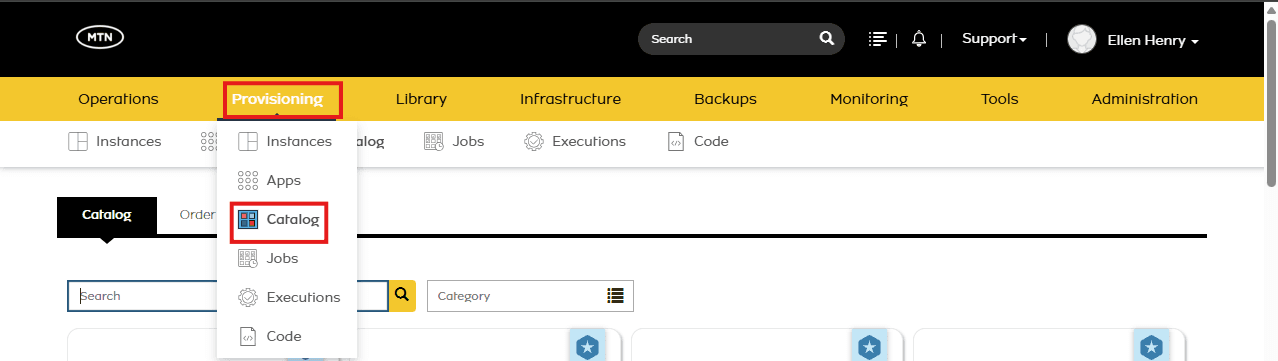
- Navigate to Provisioning > Catalog.
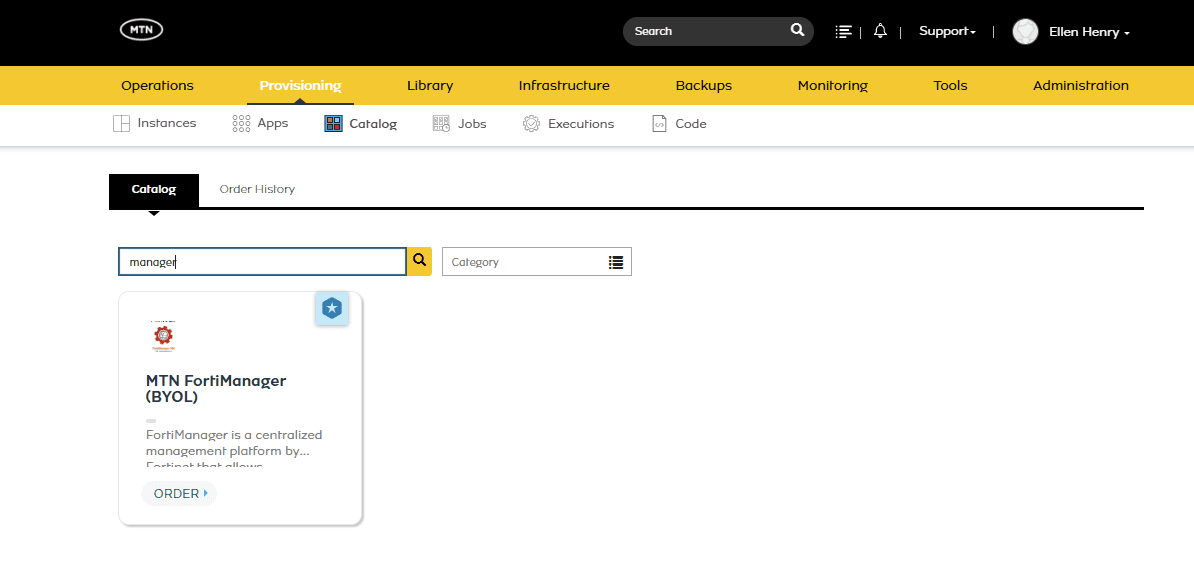
- Search for and click MTN FortiManager (BYOL), then click Order.
Step 2 — Complete the Order Form
Complete the form as follows:
- Select the Group and Cloud where the FortiManager instance will be deployed (e.g. MTNNG_CLOUD_AZ_1).
- Choose the appropriate Environment (e.g. Development, Staging, Production).
- Select a Plan that meets the minimum CPU and memory requirements in the Minimum System Requirements table.
- Select the required Volume capacity (root minimum 500 GB).
- Select the Resource Pool (Project) you created.
- From the list, select any Network you have created.
- Assign a Floating IP, based on the router selection made for the chosen network.
- Apply the Default Security Group first, then add the Security Group you created.
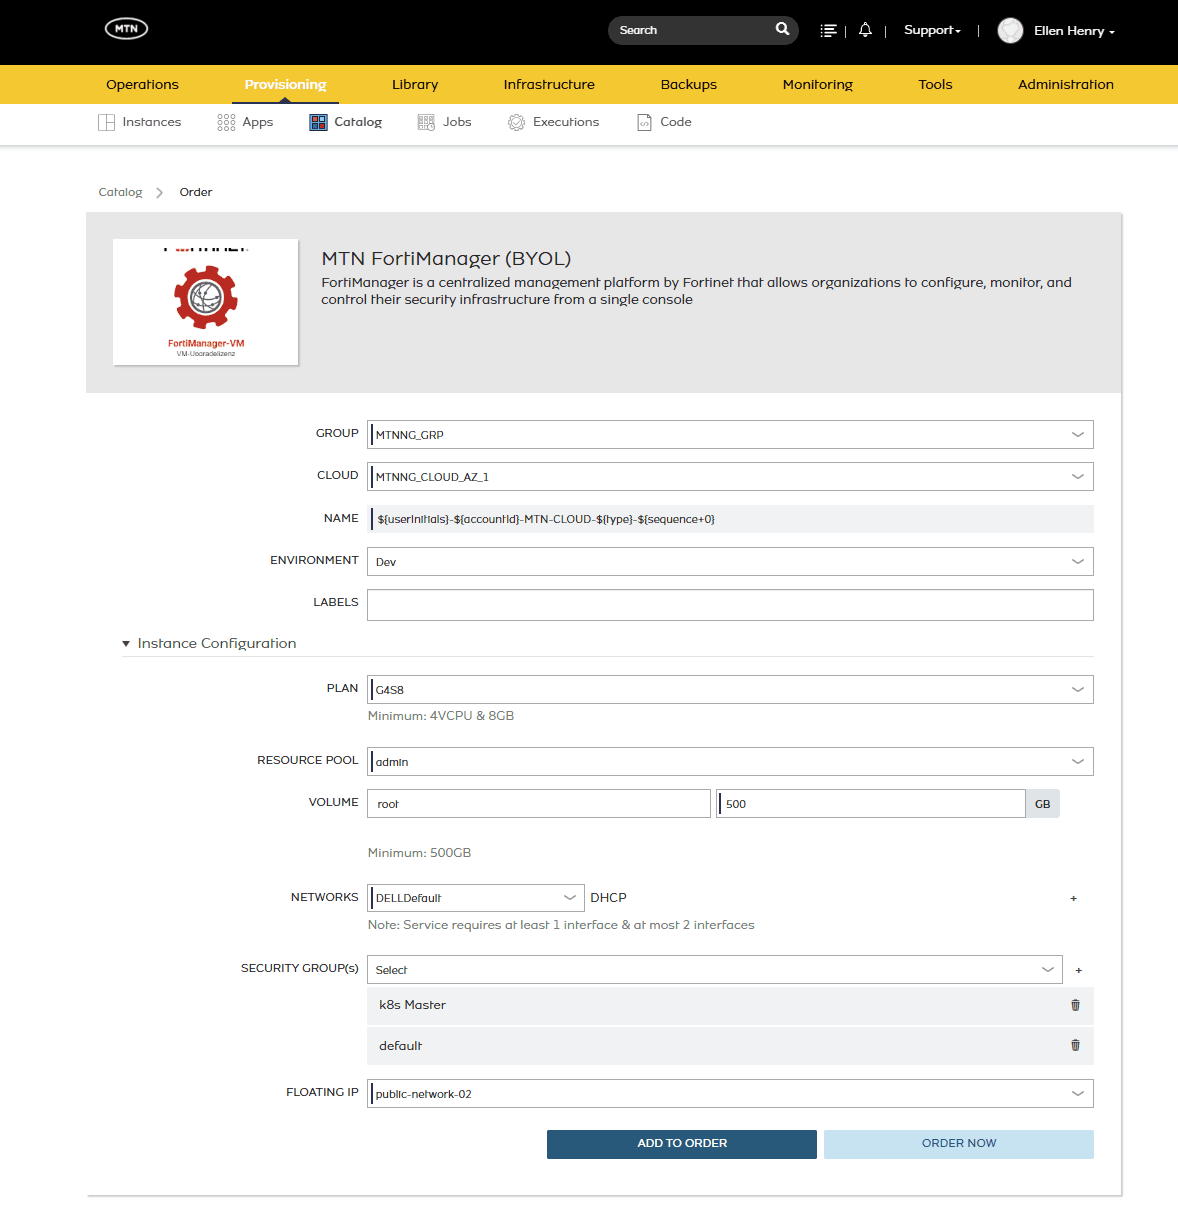
- Click Order Now.
Step 3 — Launch and Monitor
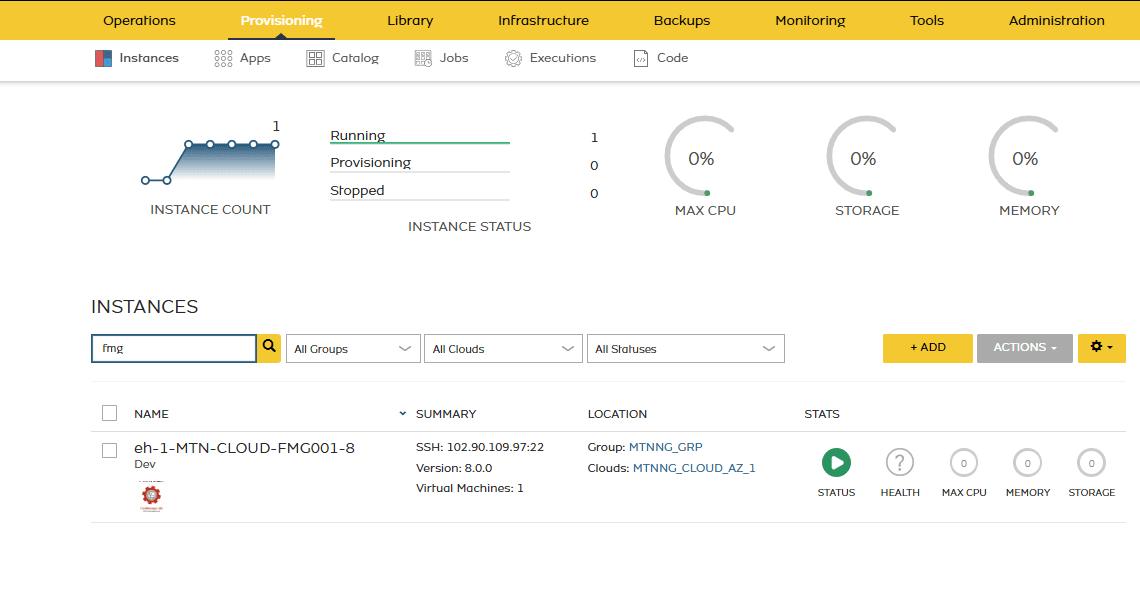
Click Order Now to launch. MTN Cloud will begin provisioning and will display the instance status once deployment is complete.
Phase 4 — Configure DNS and Log In
Purpose: Set the DNS servers from the instance console, then log in to the GUI and activate your licence.
Step 1 — Set the DNS Servers
Open the instance console and set the primary and secondary DNS servers to any of the following:
- 8.8.8.8
- 102.88.134.41
- 102.90.109.125
- 102.91.123.54
- 102.89.90.112
Run the following commands, replacing <dns> with your chosen addresses:
config system interface
    edit port1
        set dns-server-override disable
    next
end
config system dns
    set primary <dns>
    set secondary <dns>
end
get system interface port1
get system dns
Step 2 — Open the GUI and Log In
- To open the GUI, click the instance address in the Instances list and select the HTTPS link.

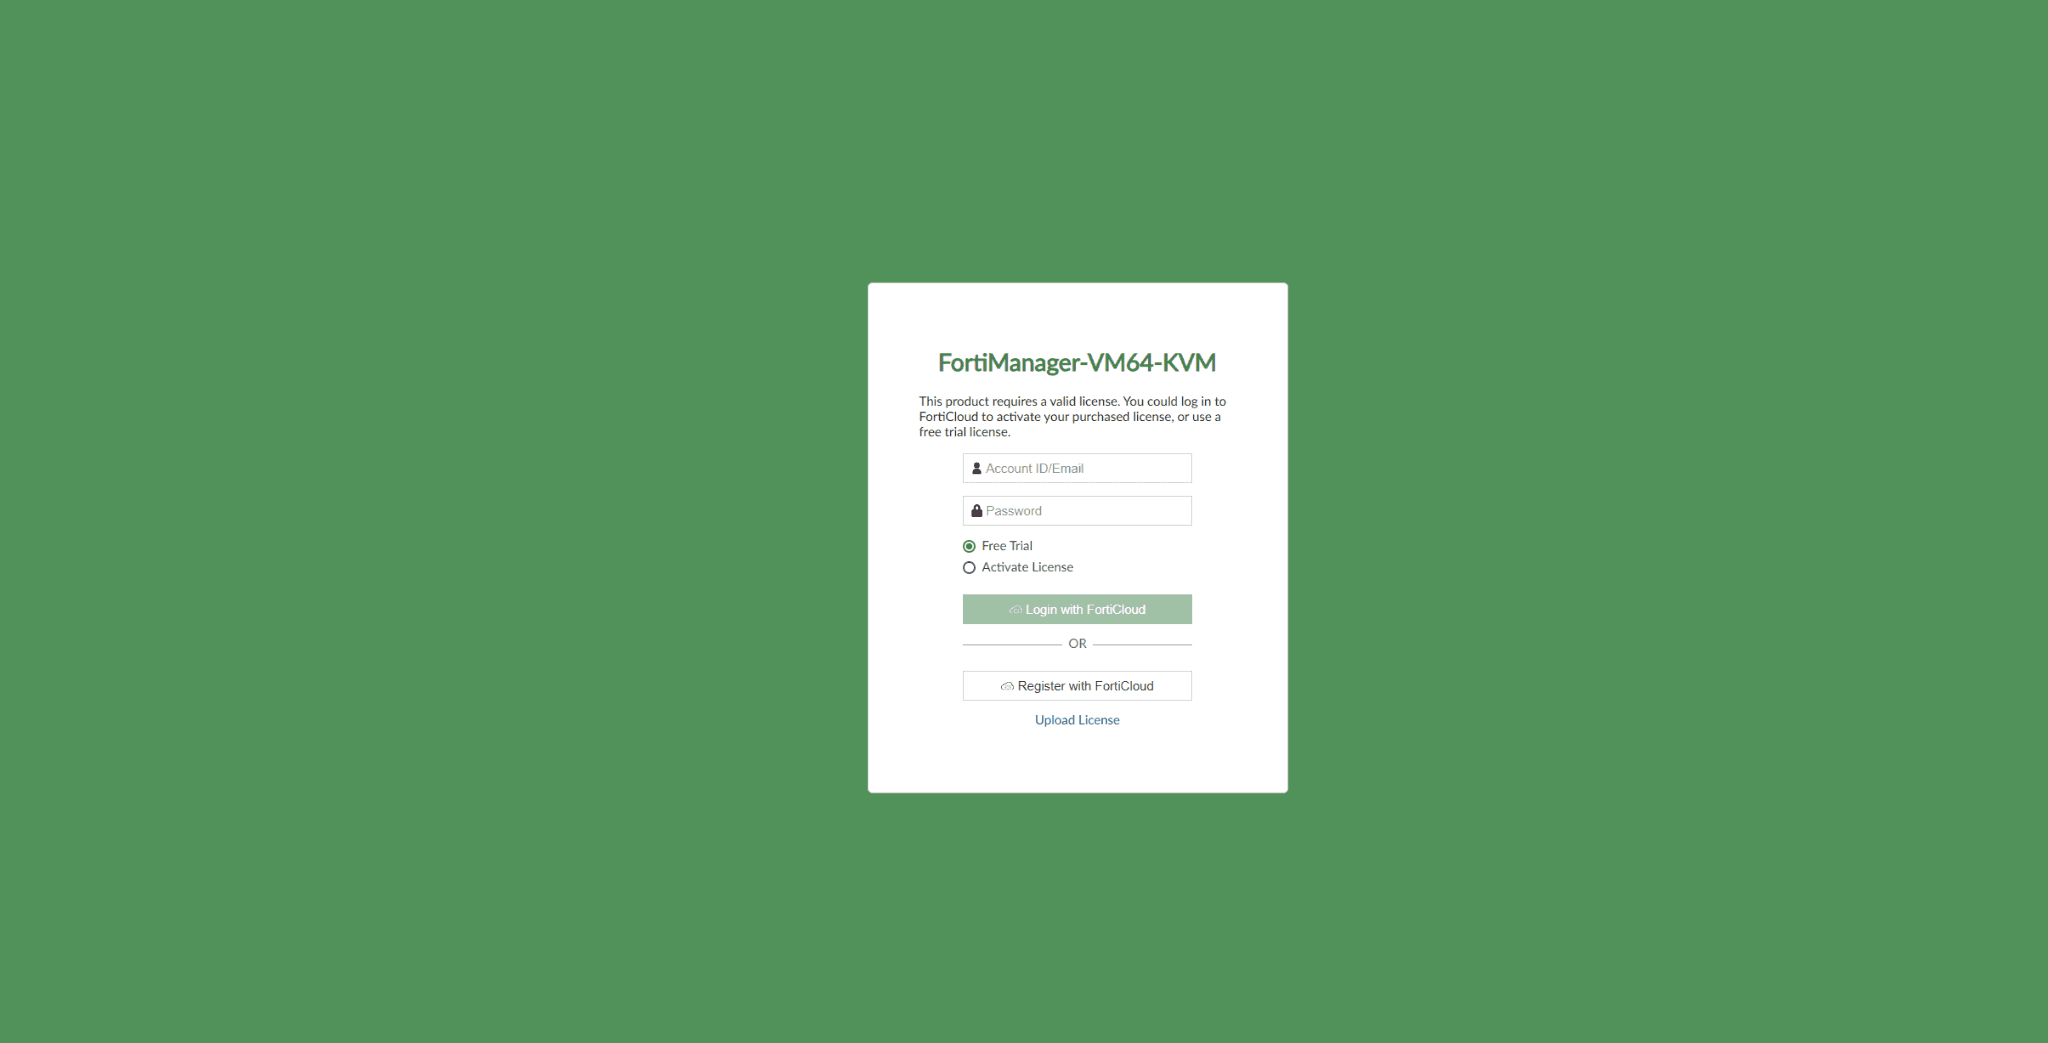
- To use the free trial, select Free Trial and log in with your registered FortiCloud username and password.
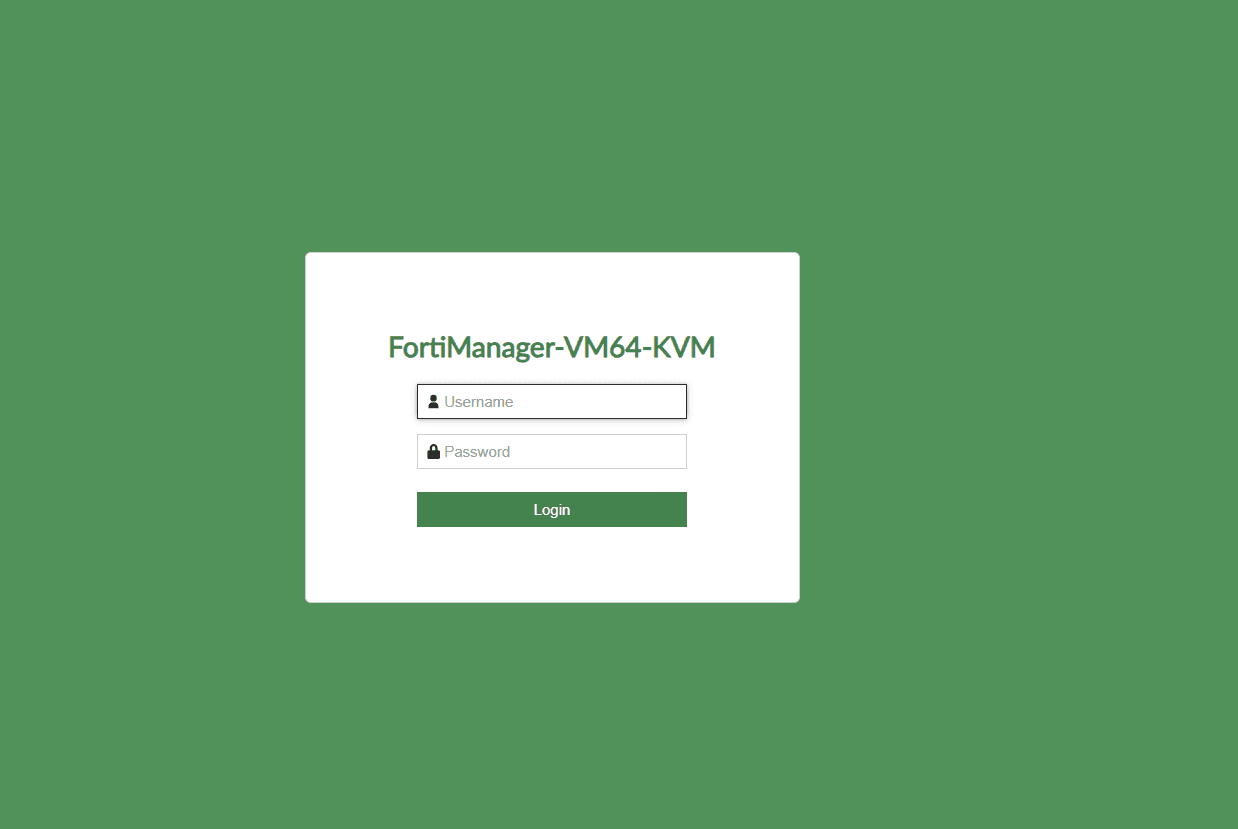
- After you authenticate with FortiCloud, you are redirected to the primary login page. Enter the default system credentials below. You will be prompted to change the password at your first sign-in:
- Username: admin
- Password: pAssword@123
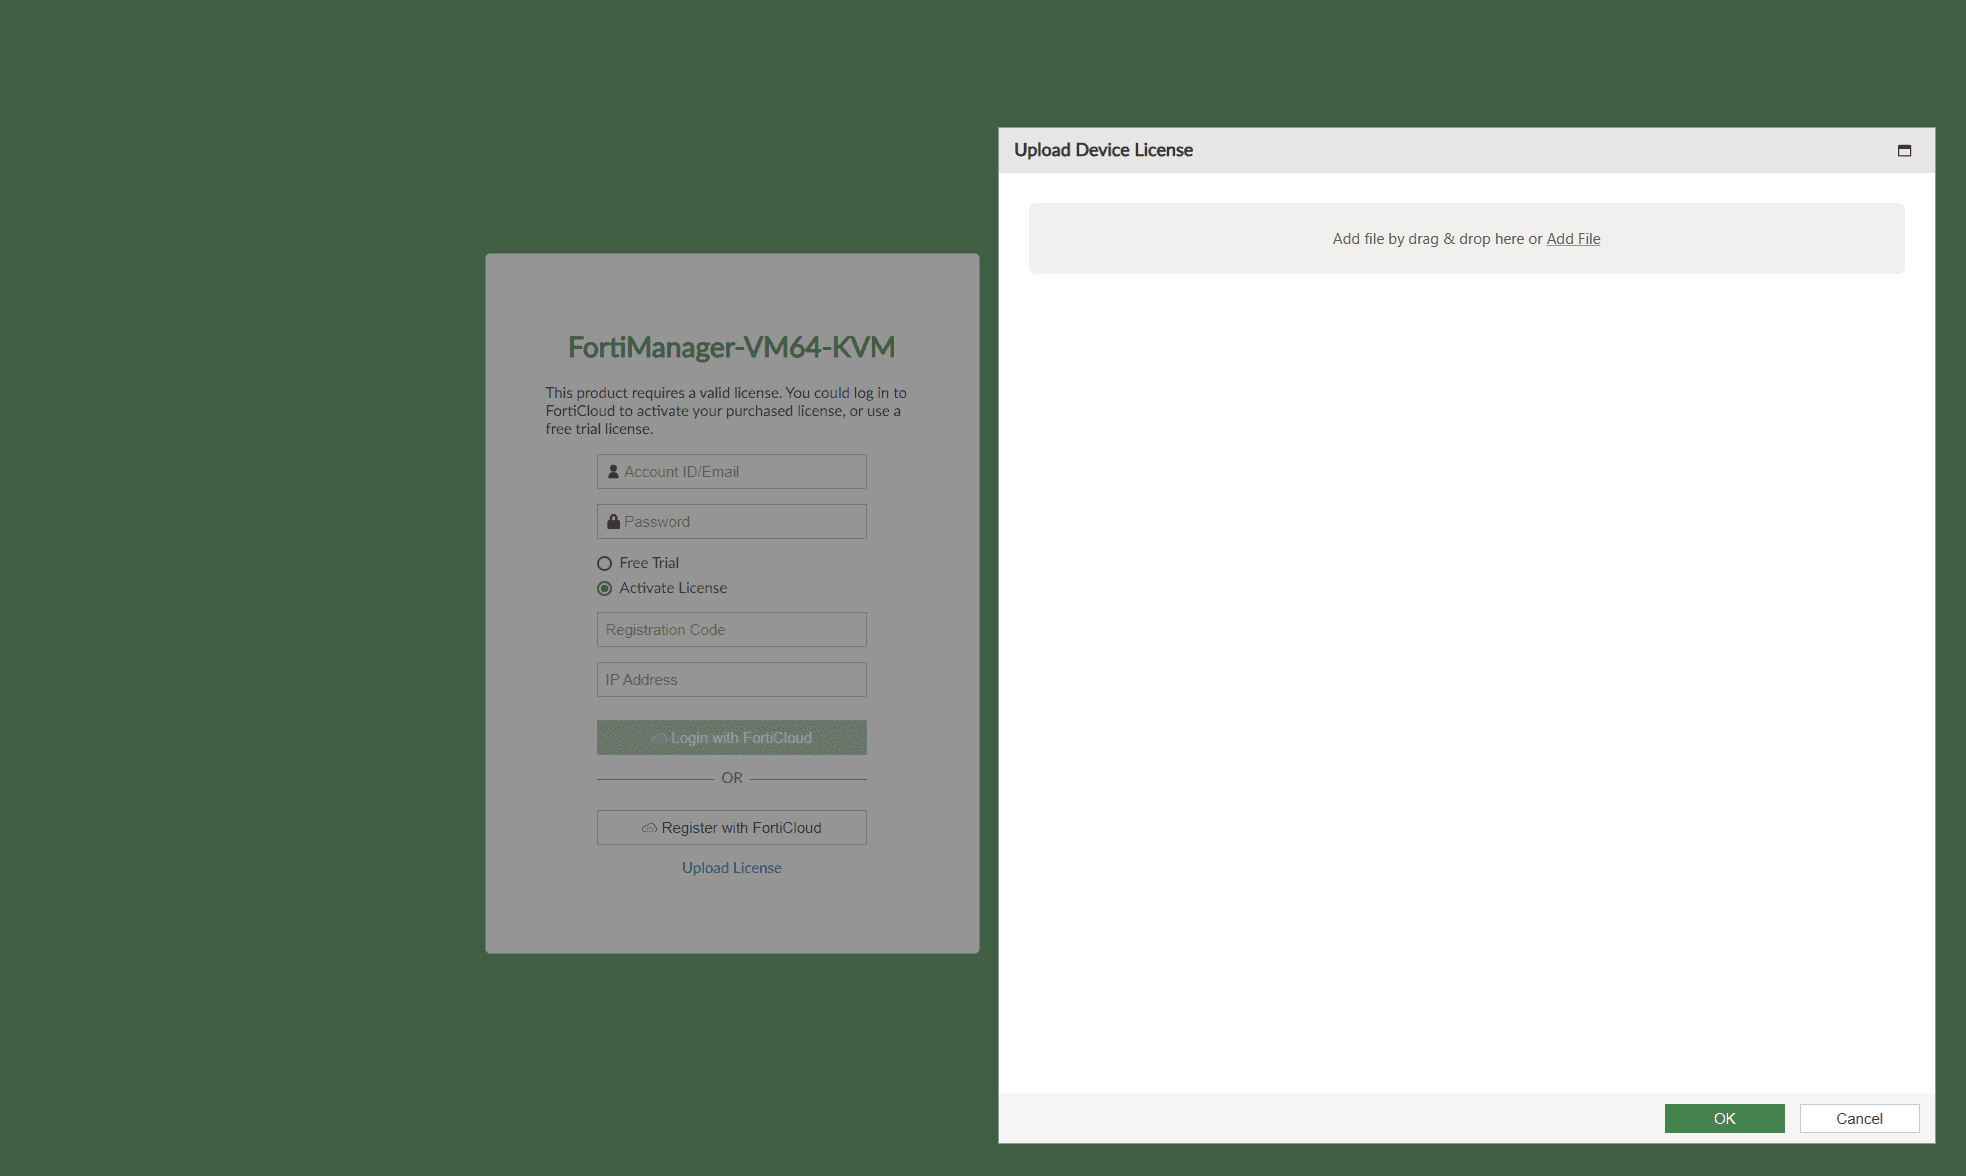
Step 3 — Activate the Licence
- To activate the licence, have your licence registration code and the instance IP address ready.
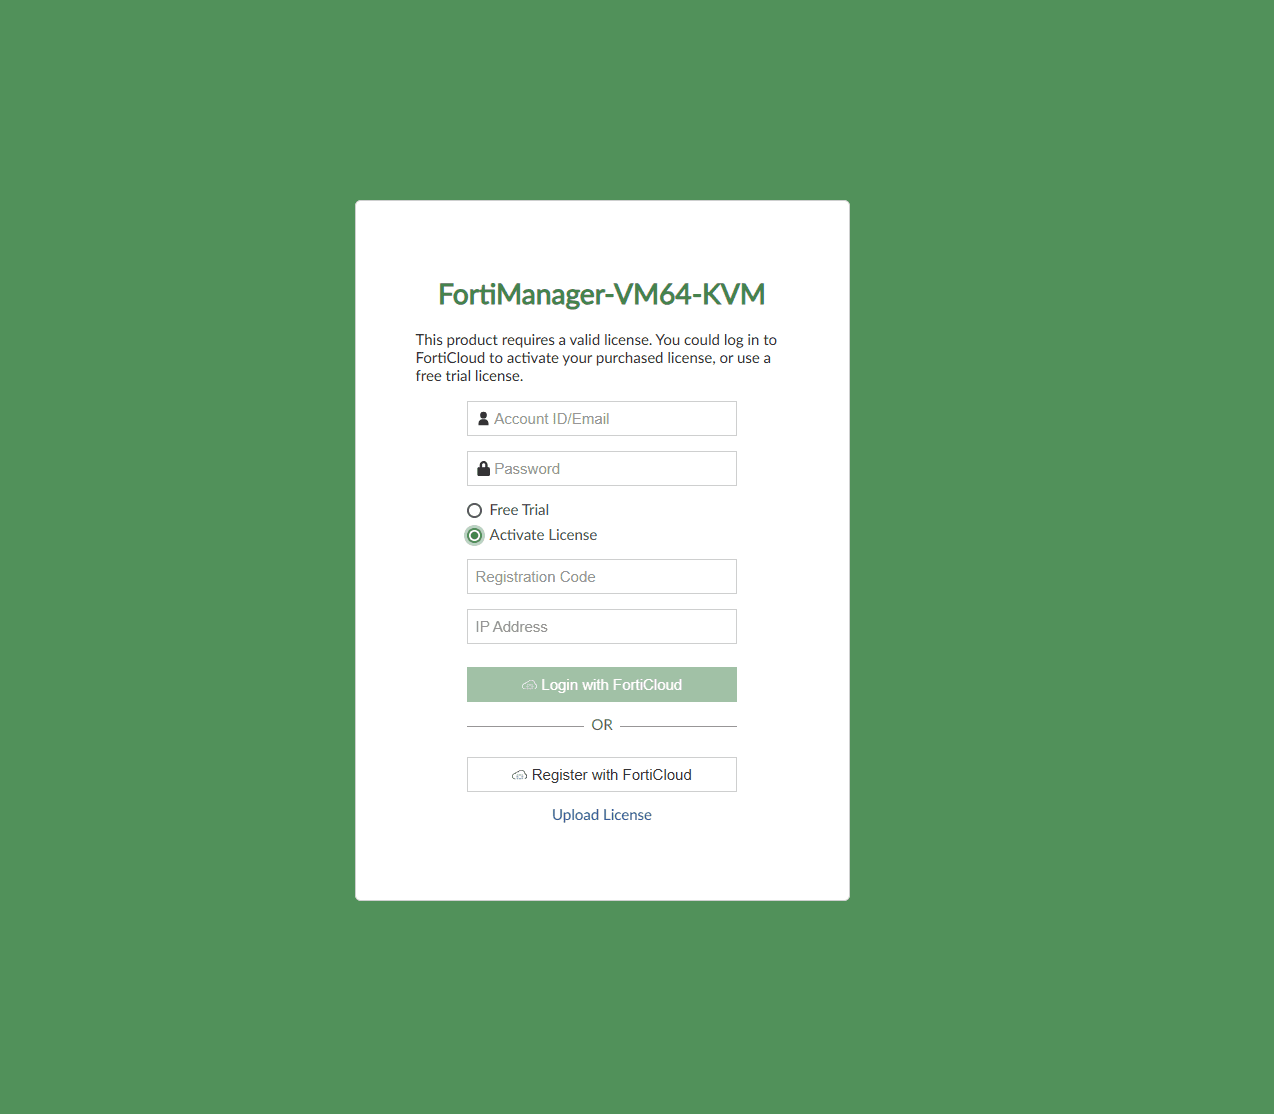
- To upload a licence, click Upload License and add your .lic file.
Final Notes
- Documentation: Keep a record of IPs, credentials and assigned resources.
- BYOL: This is a Bring Your Own Licence instance. On first login FortiManager prompts for a licence. Use a valid Fortinet licence or a FortiCloud free-trial licence to unlock full functionality.
- Security Groups: Regularly review and update rules to follow the principle of least privilege.
- Reusability: You may reuse the Security Groups and username/password for subsequent Fortinet installations, based on your security considerations.