MTN Cloud Service Provisioning Workflow (VPN) on MTN Cloud
Phase 1: Provision MTN Cloud Service → Catalog in MTN Cloud
Step 1.1: Create Instance
- https://console.cloud.mtn.ng→ Authentication → Provisioning → Catalog → MTN VPN
- Configuration:
- Plan:Small, Medium & Large
- Volume: Fixed 50GB
- Security Group:Default & (see Step 1.4)
- Network: Minimum 2 Networks (see Step 1.2)
- Floating IP: Selected
- Advanced options:check the ‘Skip agent install’ option.”
- Click Order Now
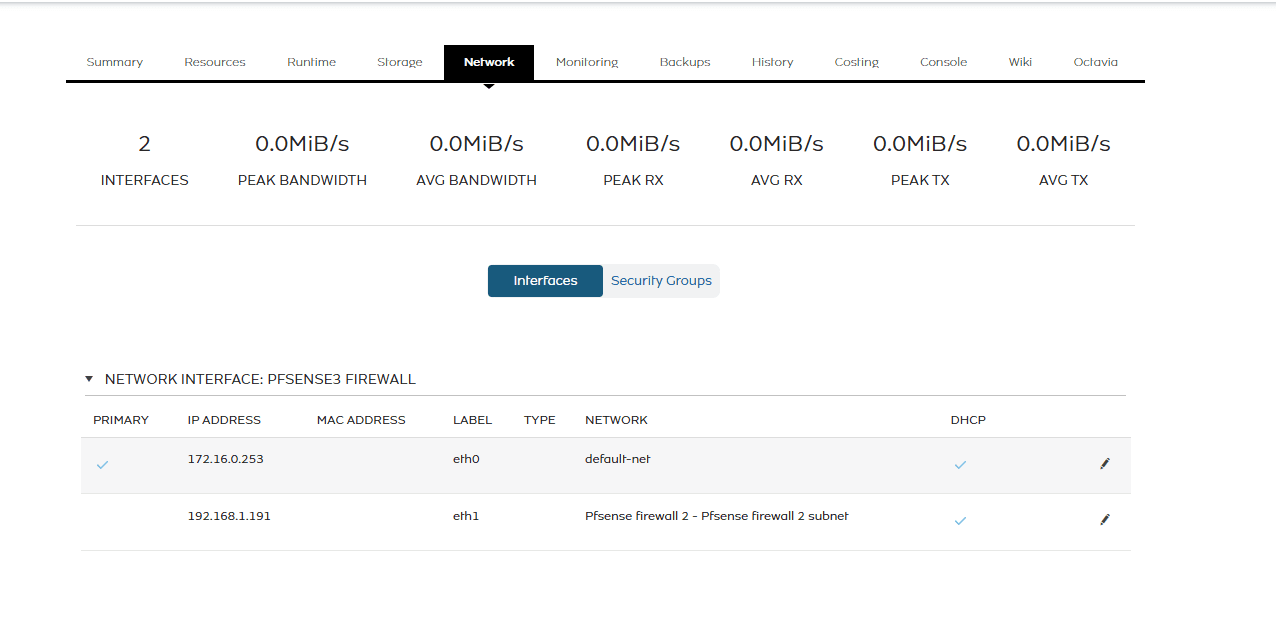
Step 1.2: Configure Network Interfaces (CRITICAL)
Network Interface 1 (WAN):
- Network: Internal/External Network
- IP Mode: DHCP
- Primary Interface: YES
- Assign Floating IP: YES
Network Interface 2 (LAN):
- Network: Private Network (192.168.1.191)
- IP Mode: DHCP
Step 1.3: Provision and Wait
- Click Complete
- Wait 5-10 minutes for provisioning
- Note the Floating IP assigned (e.g., 102.88.134.190)
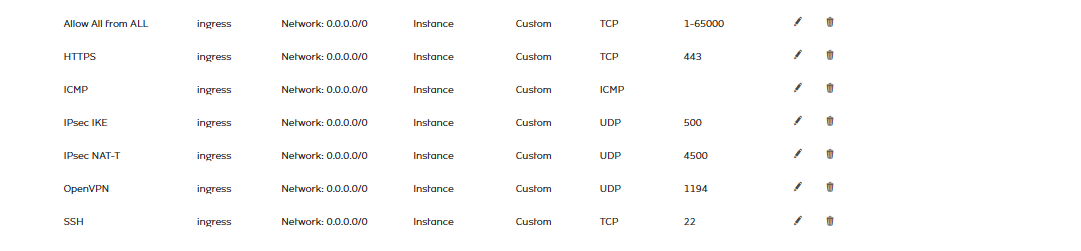
Step 1.4: Assign Security Group
- Create a new Security group
- Add rules for port 22, 443, 1194, 4500, 500, ICMP & All (0.0.0.0)
Step 1.4: Verify Initial Access
Using the default credentials (if not changed)
- Username: admin
- Password: cloud
The user can create a new user or change the default admin password
- Access MTN Cloud Service Console
- Verify that SSH works
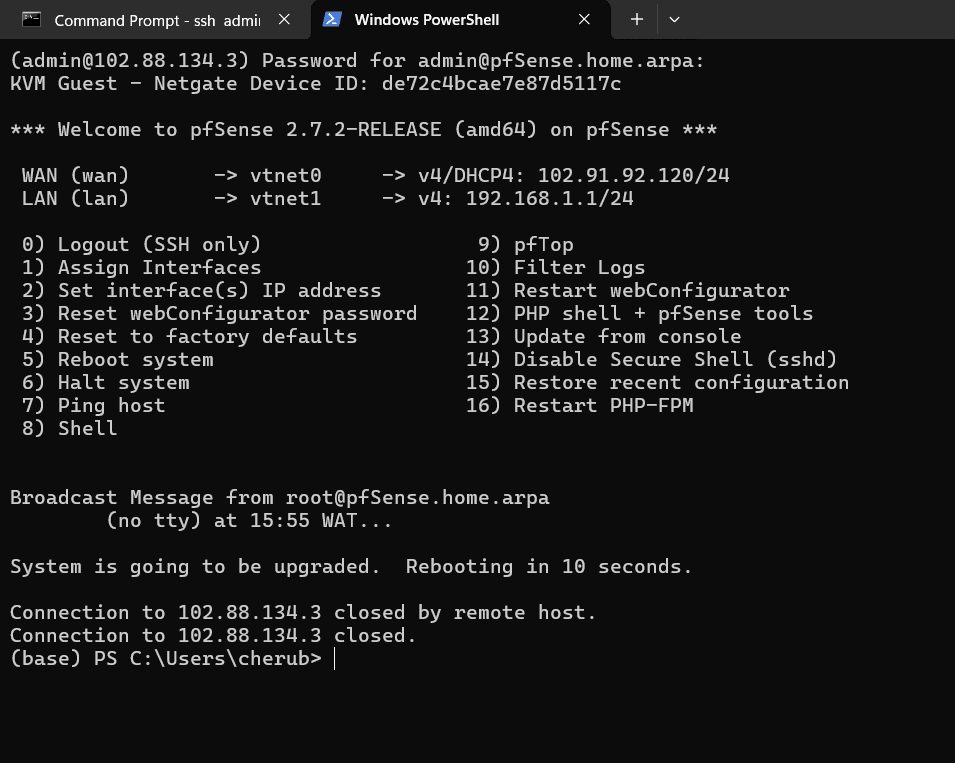
- Verify that the web GUI works