
Users Group Creation and Other User Settings
Overview
An individual user account represents a person who requires access to MTN Cloud resources within a specific, isolated Tenant. To manage this access, the system utilizes User Groups and Roles, which define the set of rights and privileges that determine what operations a user can perform.
Prerequisites
Before you begin, ensure you have:
- An MTN Cloud Console login with the appropriate role (full permissions) to the Administration (Users and Roles), i.e., have the Customer Admin User role assigned or a role with equivalent privileges.
- Identified who in your organization needs MTN Cloud access so they can be created and assigned roles and groups.
Tip: If you cannot see the Users and Roles features despite having the correct role, try refreshing the portal. If the issue persists, contact MTN Cloud Support.
Create User Group
Navigate to User Groups
- Navigate to the Administration tab.
- Select Users, then User Groups.
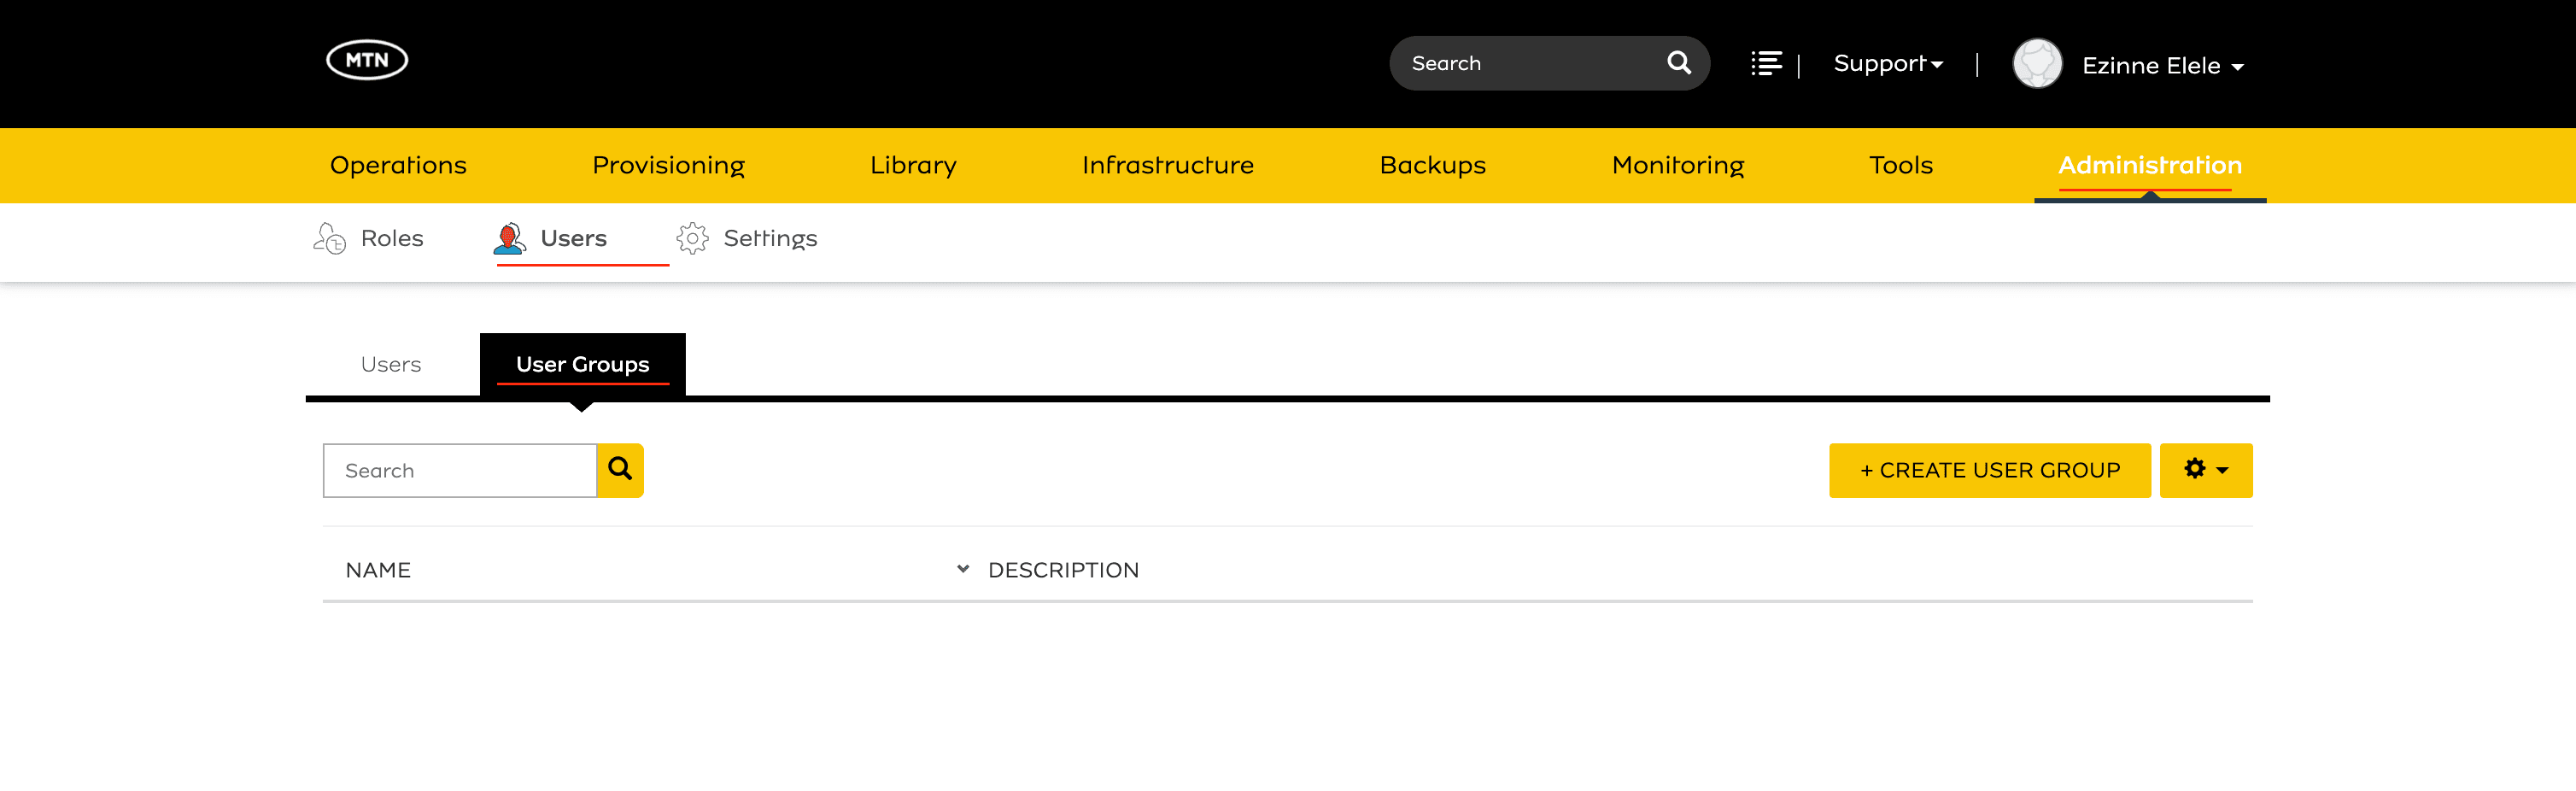
Create User Group
- Click on + CREATE USER GROUP.
- Set the key fields that describe the group:
- NAME: Provide a unique and identifiable name for the Group (e.g., Developers, Admins, Support-Team).
- DESCRIPTION:Optional summary of the group’s purpose (e.g., “Group for development team members”).
- SUDO ACCESS: Check if you want all users to have SUDO access to instances.
- USERS: Search for and select users to add to the group.
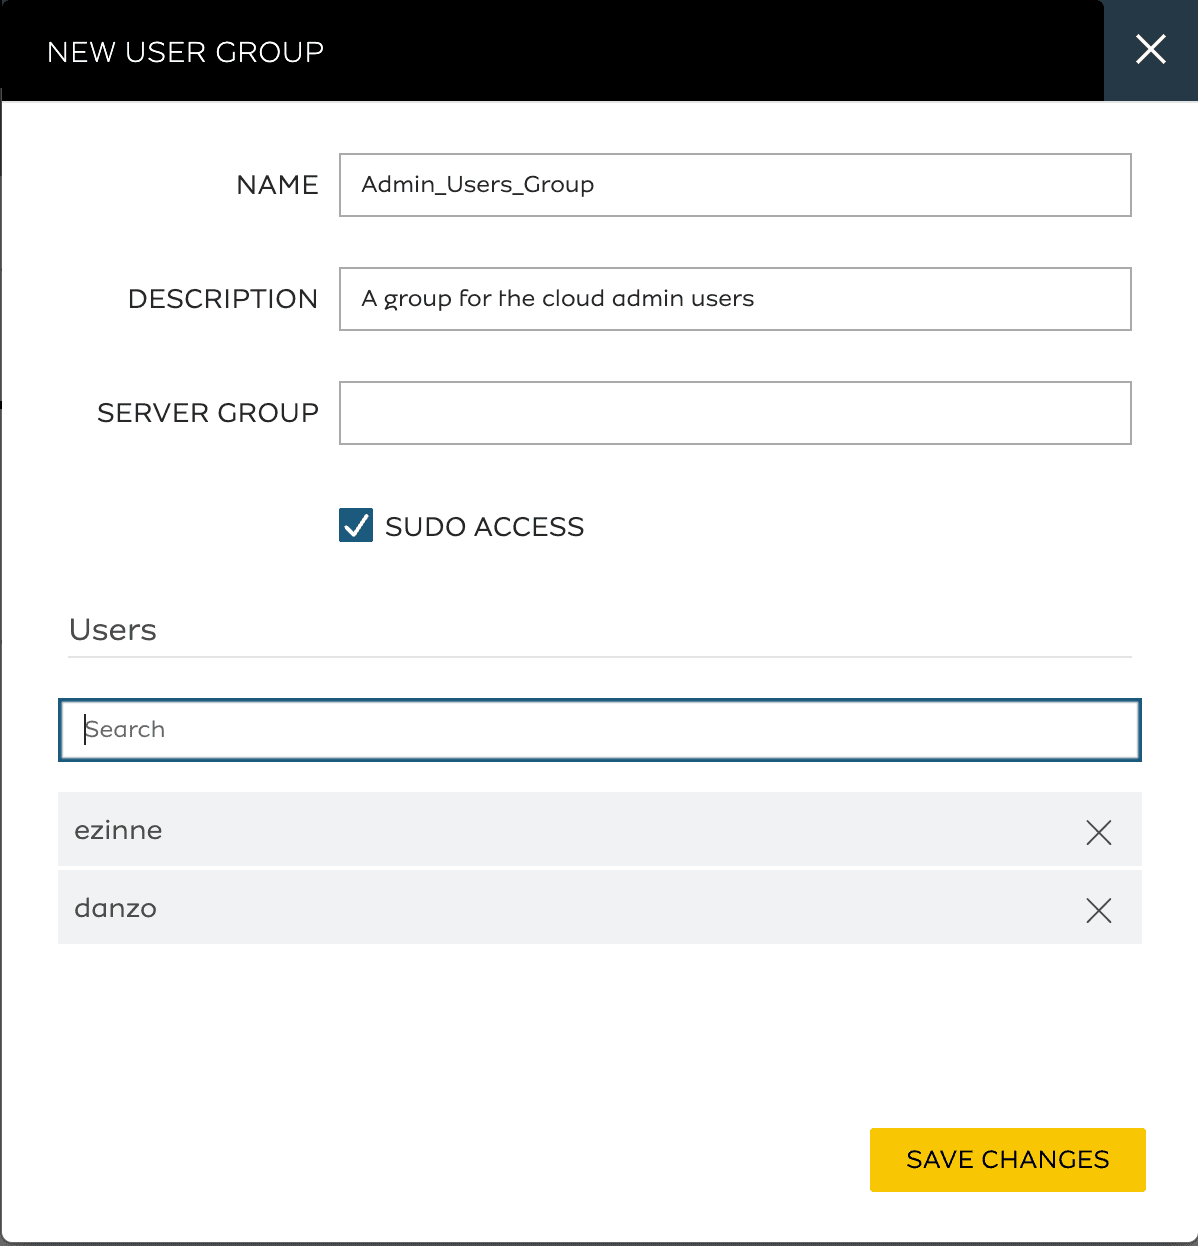
- Click Save Changes to create the user group.
- The created user group will appear in the list.
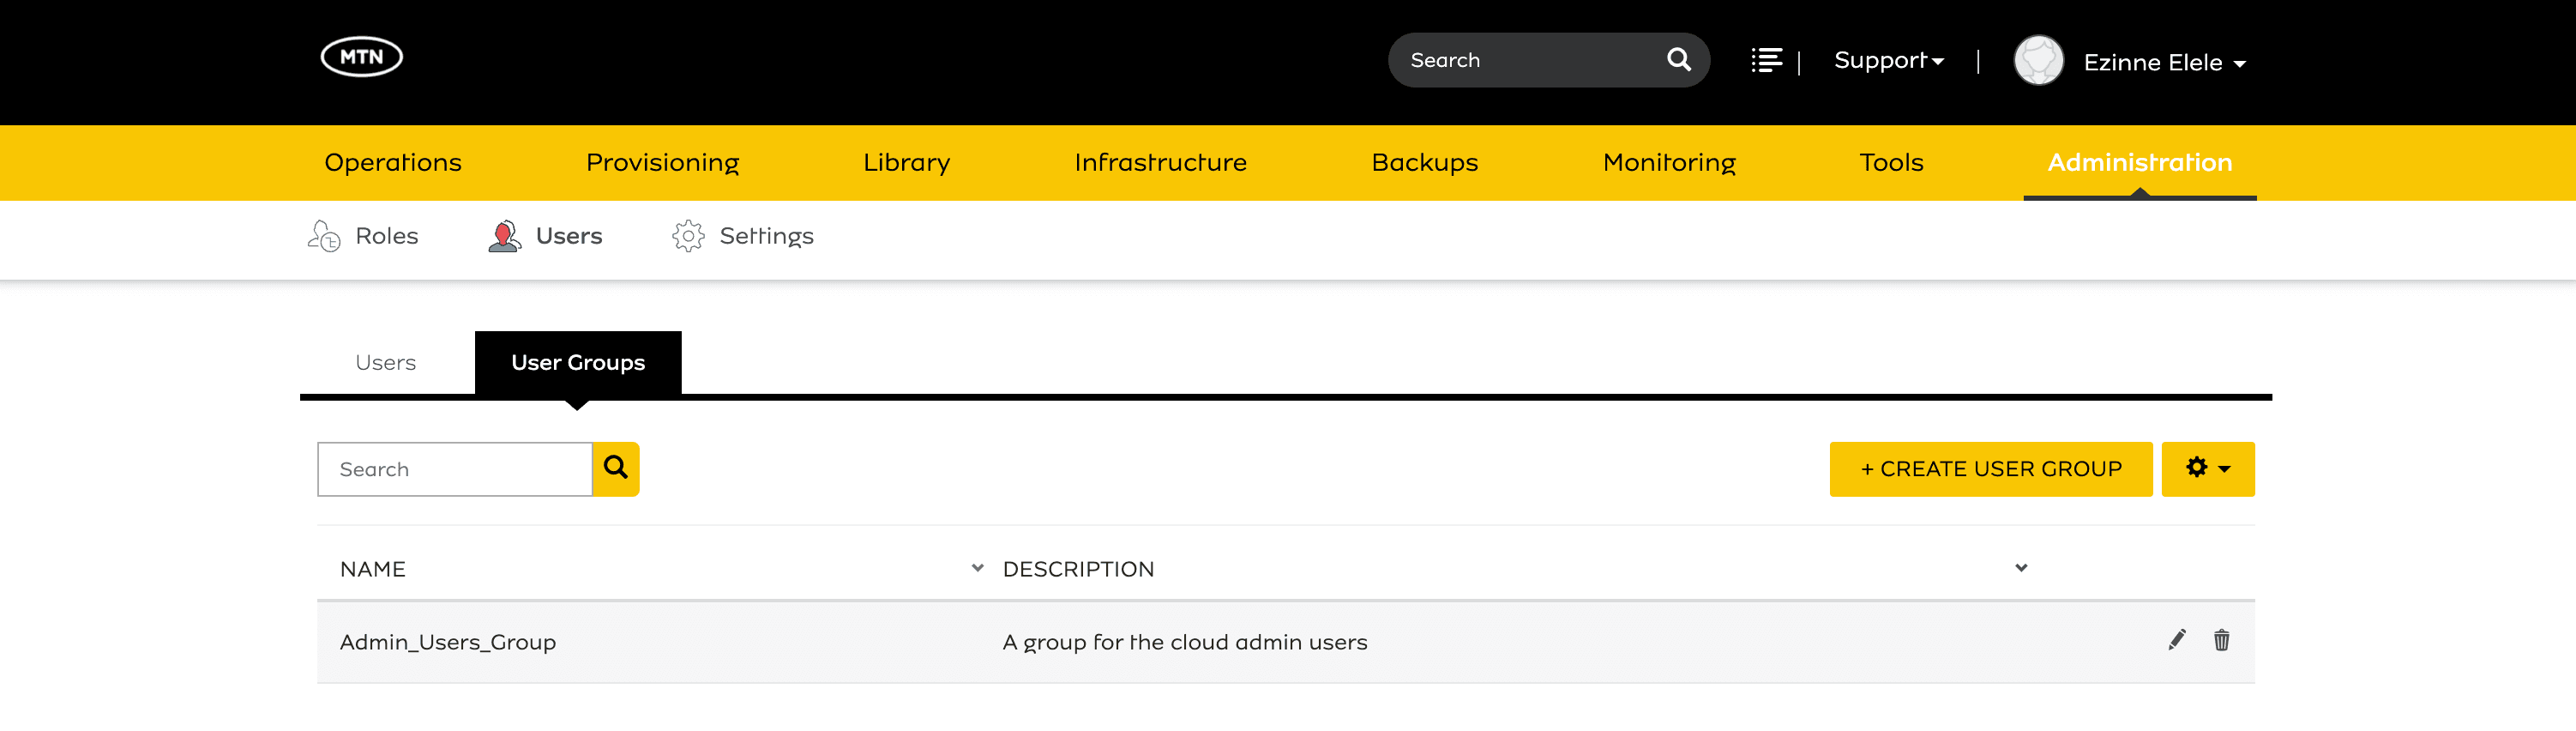
Edit User Group
- Select the user group you want to modify from the list.
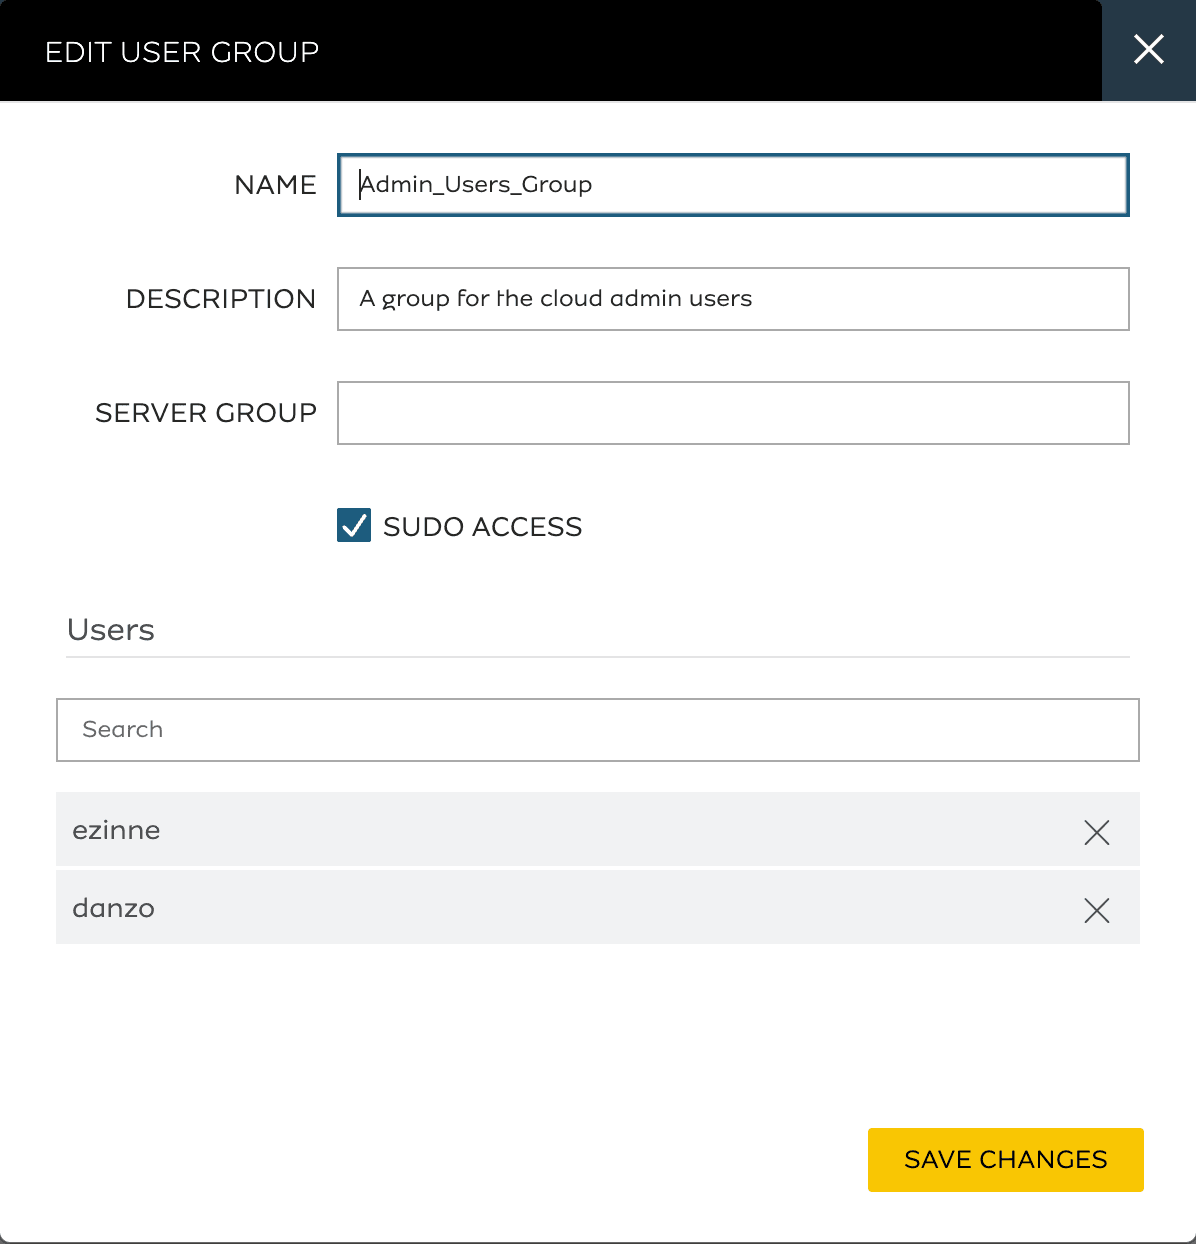
- Click the EDIT button to modify the user group.
- You can remove users or add new users to the group.
Add User Group to New Instance During Creation
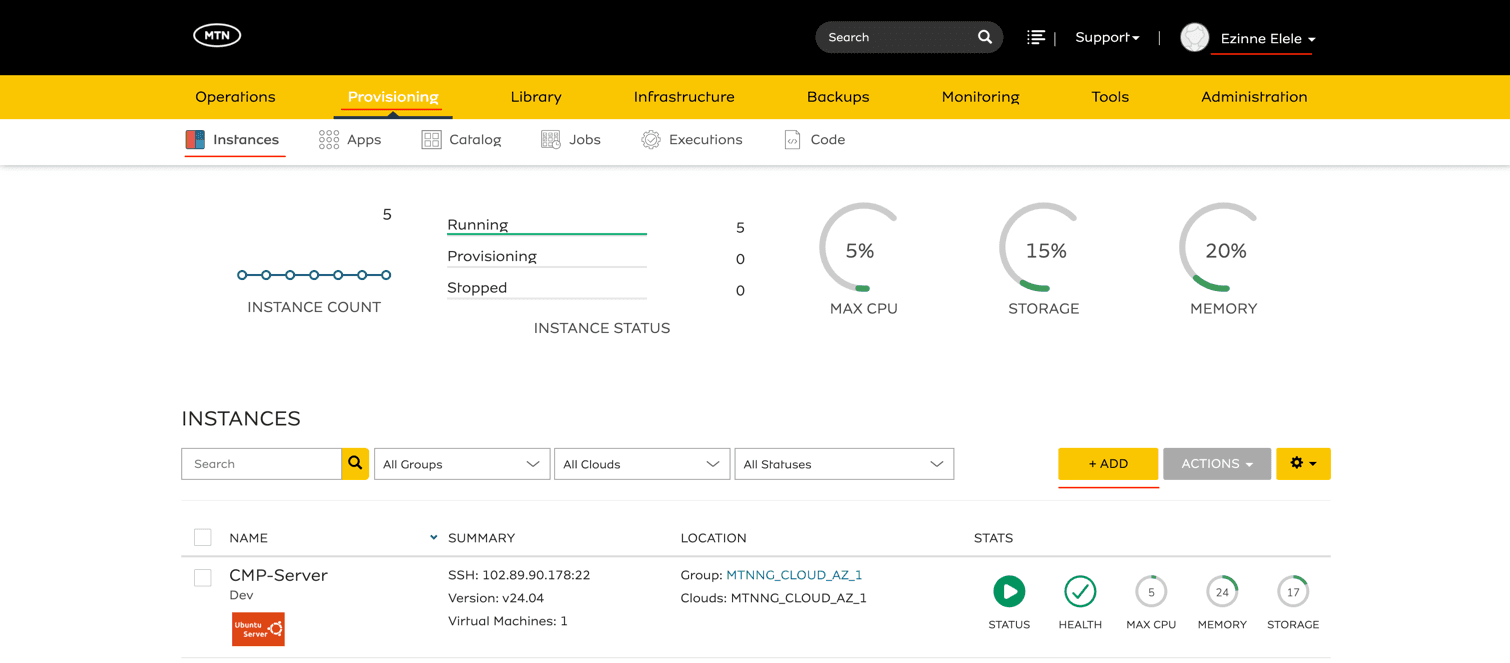
Navigate Provisioning >> Instances >> Add.
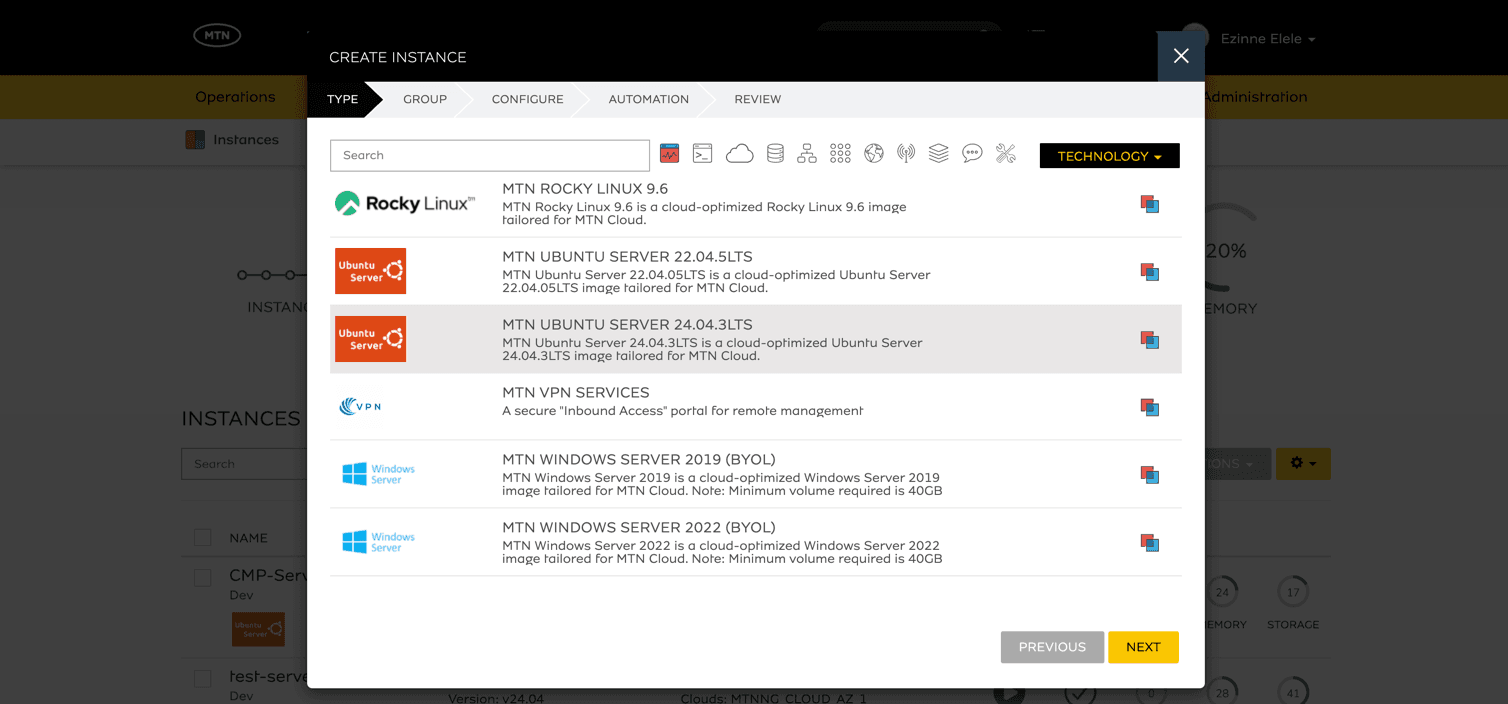
- Select the Operating system for the instance you want to deploy.
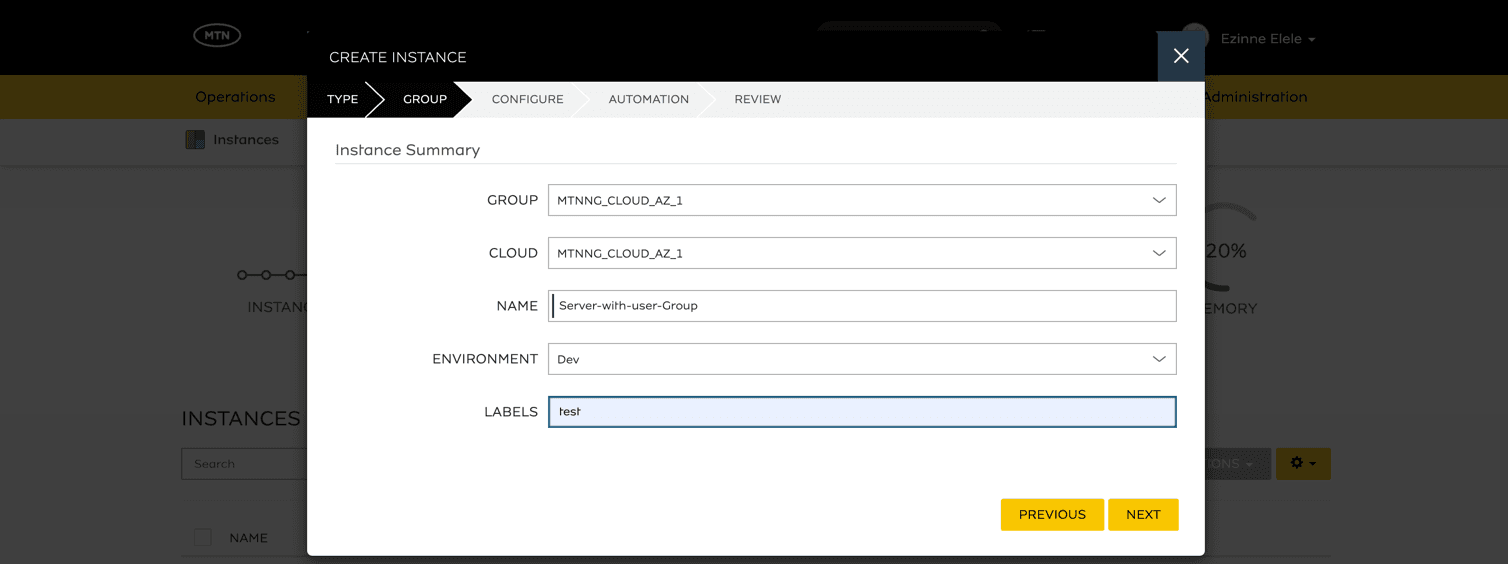
- Fill in the instance creation form.
- Select your created user group from the drop-down list.
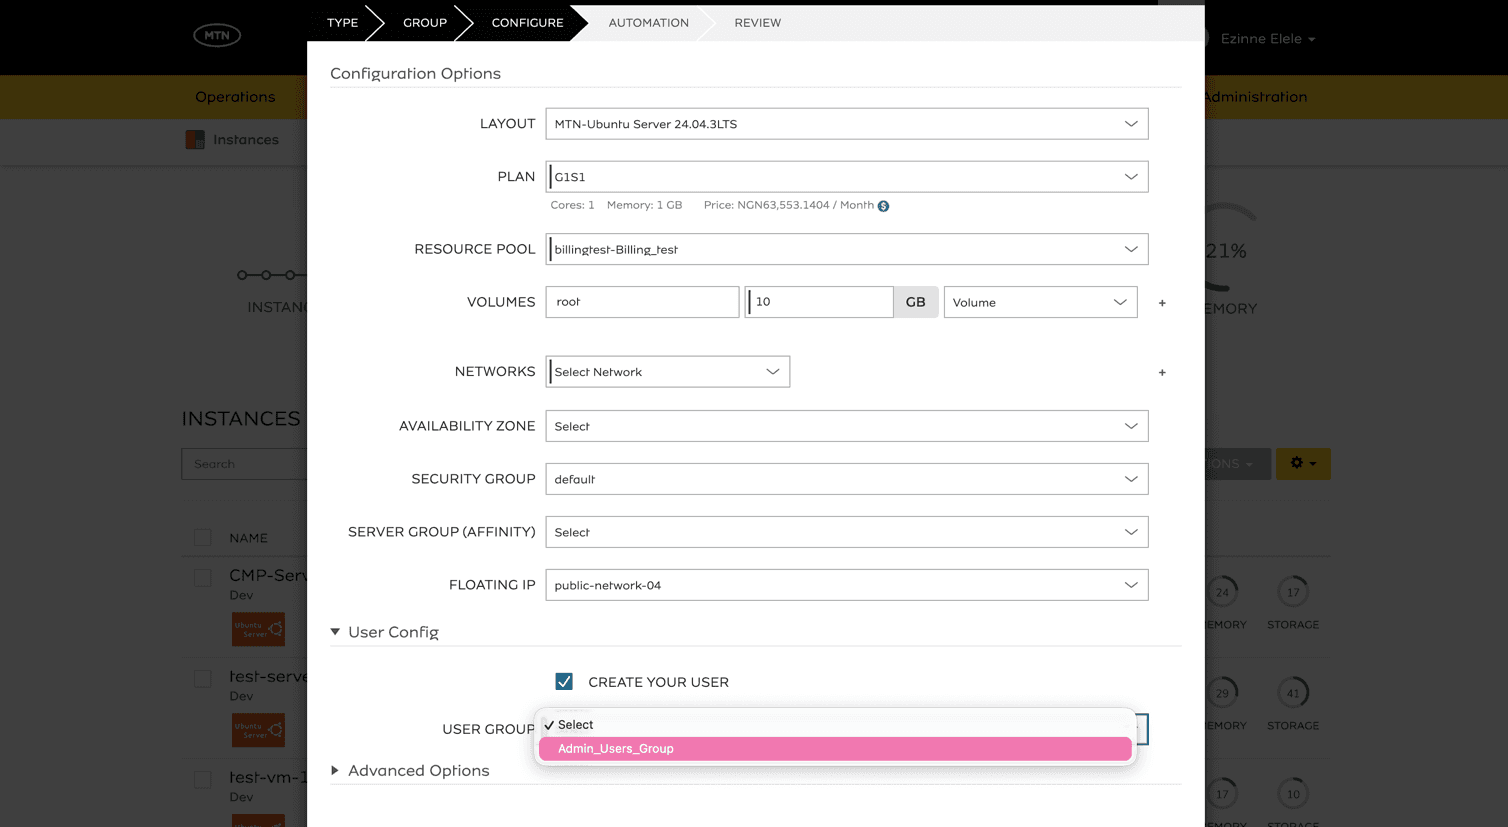
The users in the selected user group will be created in the instance and they can access the instance using the credentials they set in their user settings.
Set Linux and Windows User Settings
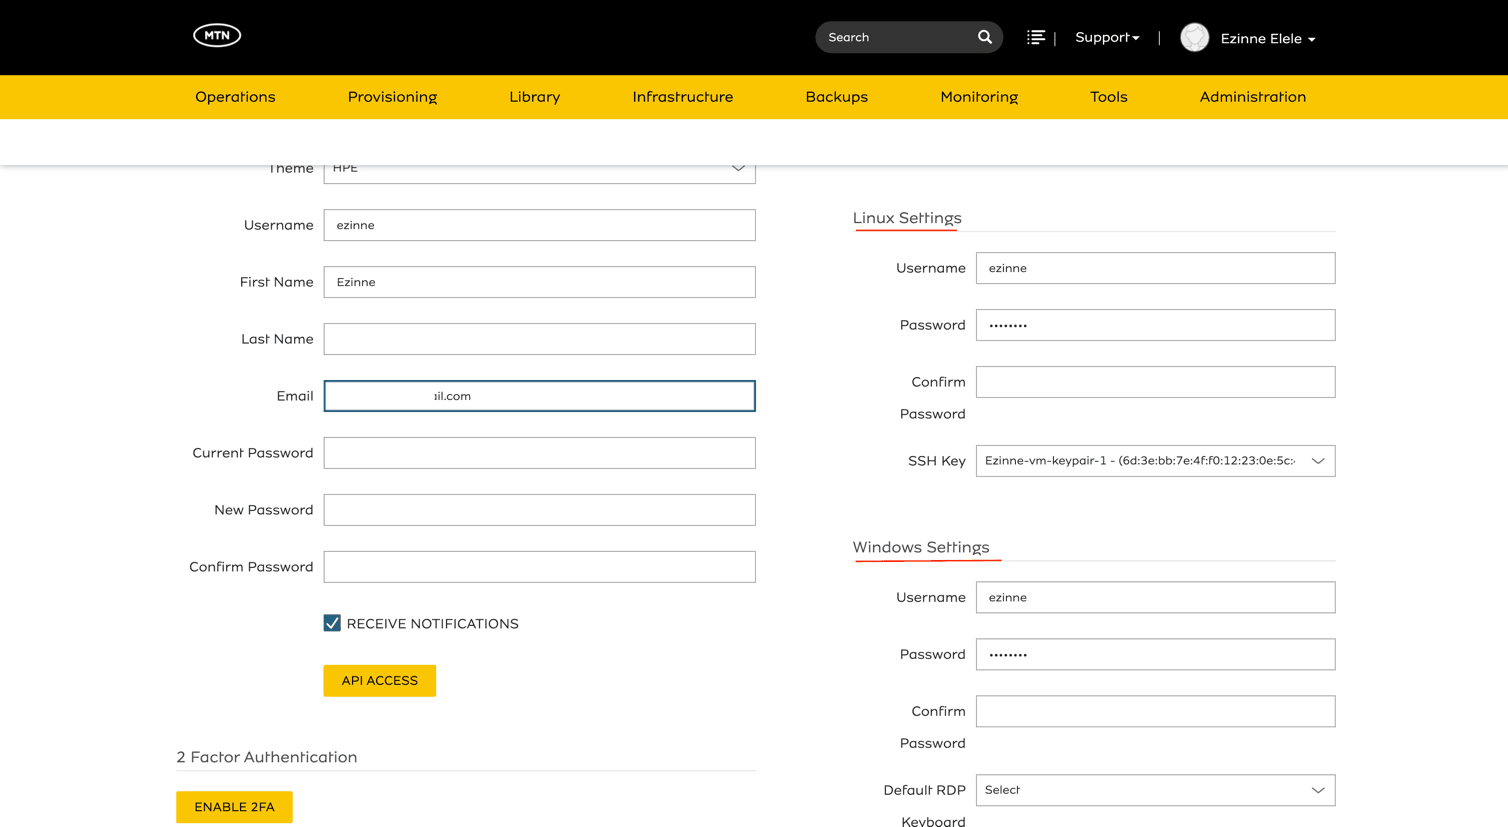
Navigate to the User Settings
- Select the drop-down beside your username >> User Settings.

Create credentials for the Linux settings and Windows settings. These credentials can be used to access the Instances in which the user has been added via the user group.
Create a New User in a Running VM
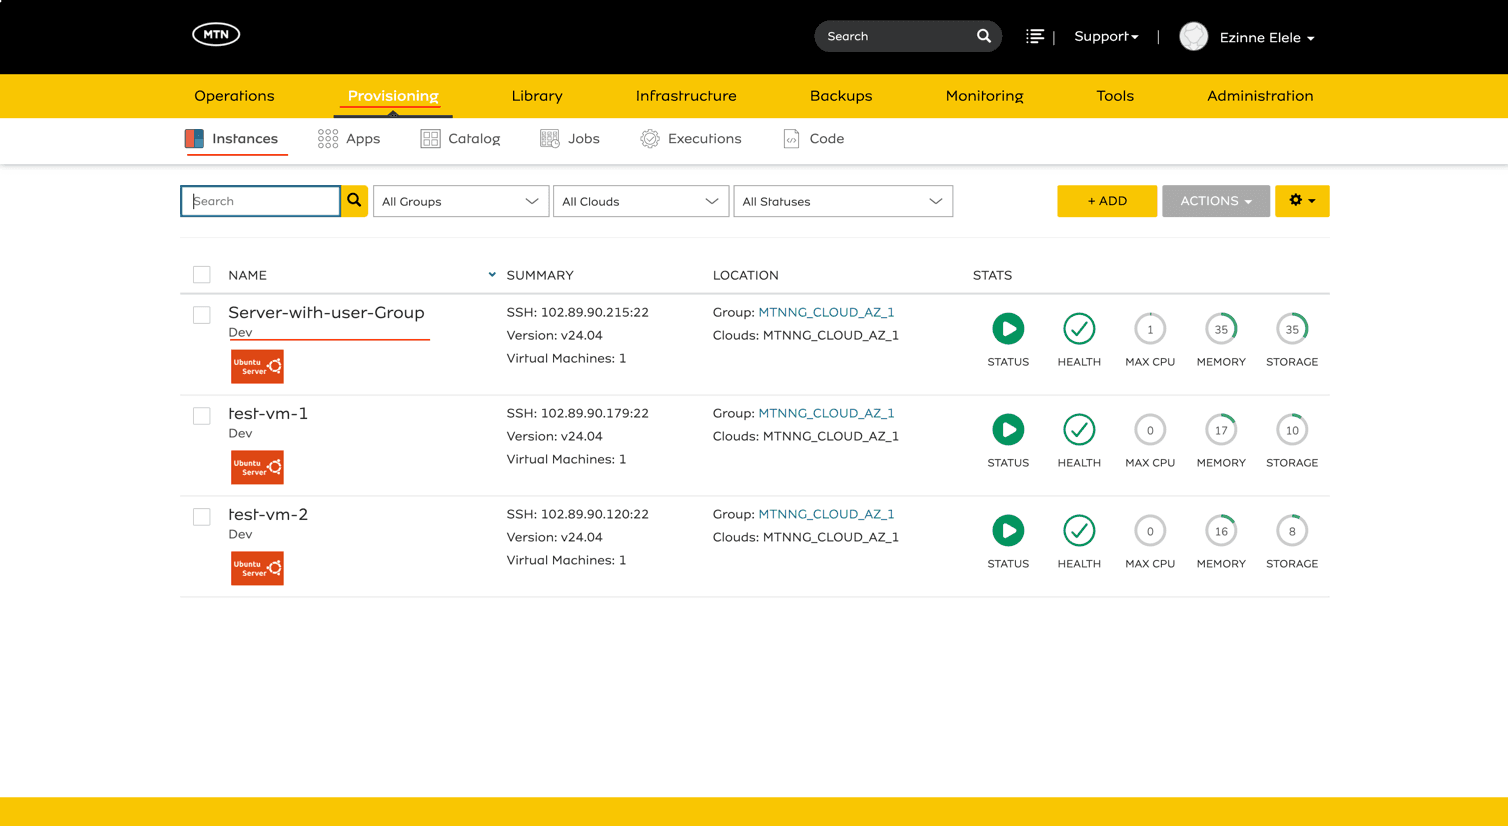
Navigate to the Running Instance
- Navigate Provisioning >> Instances >> select Instance.
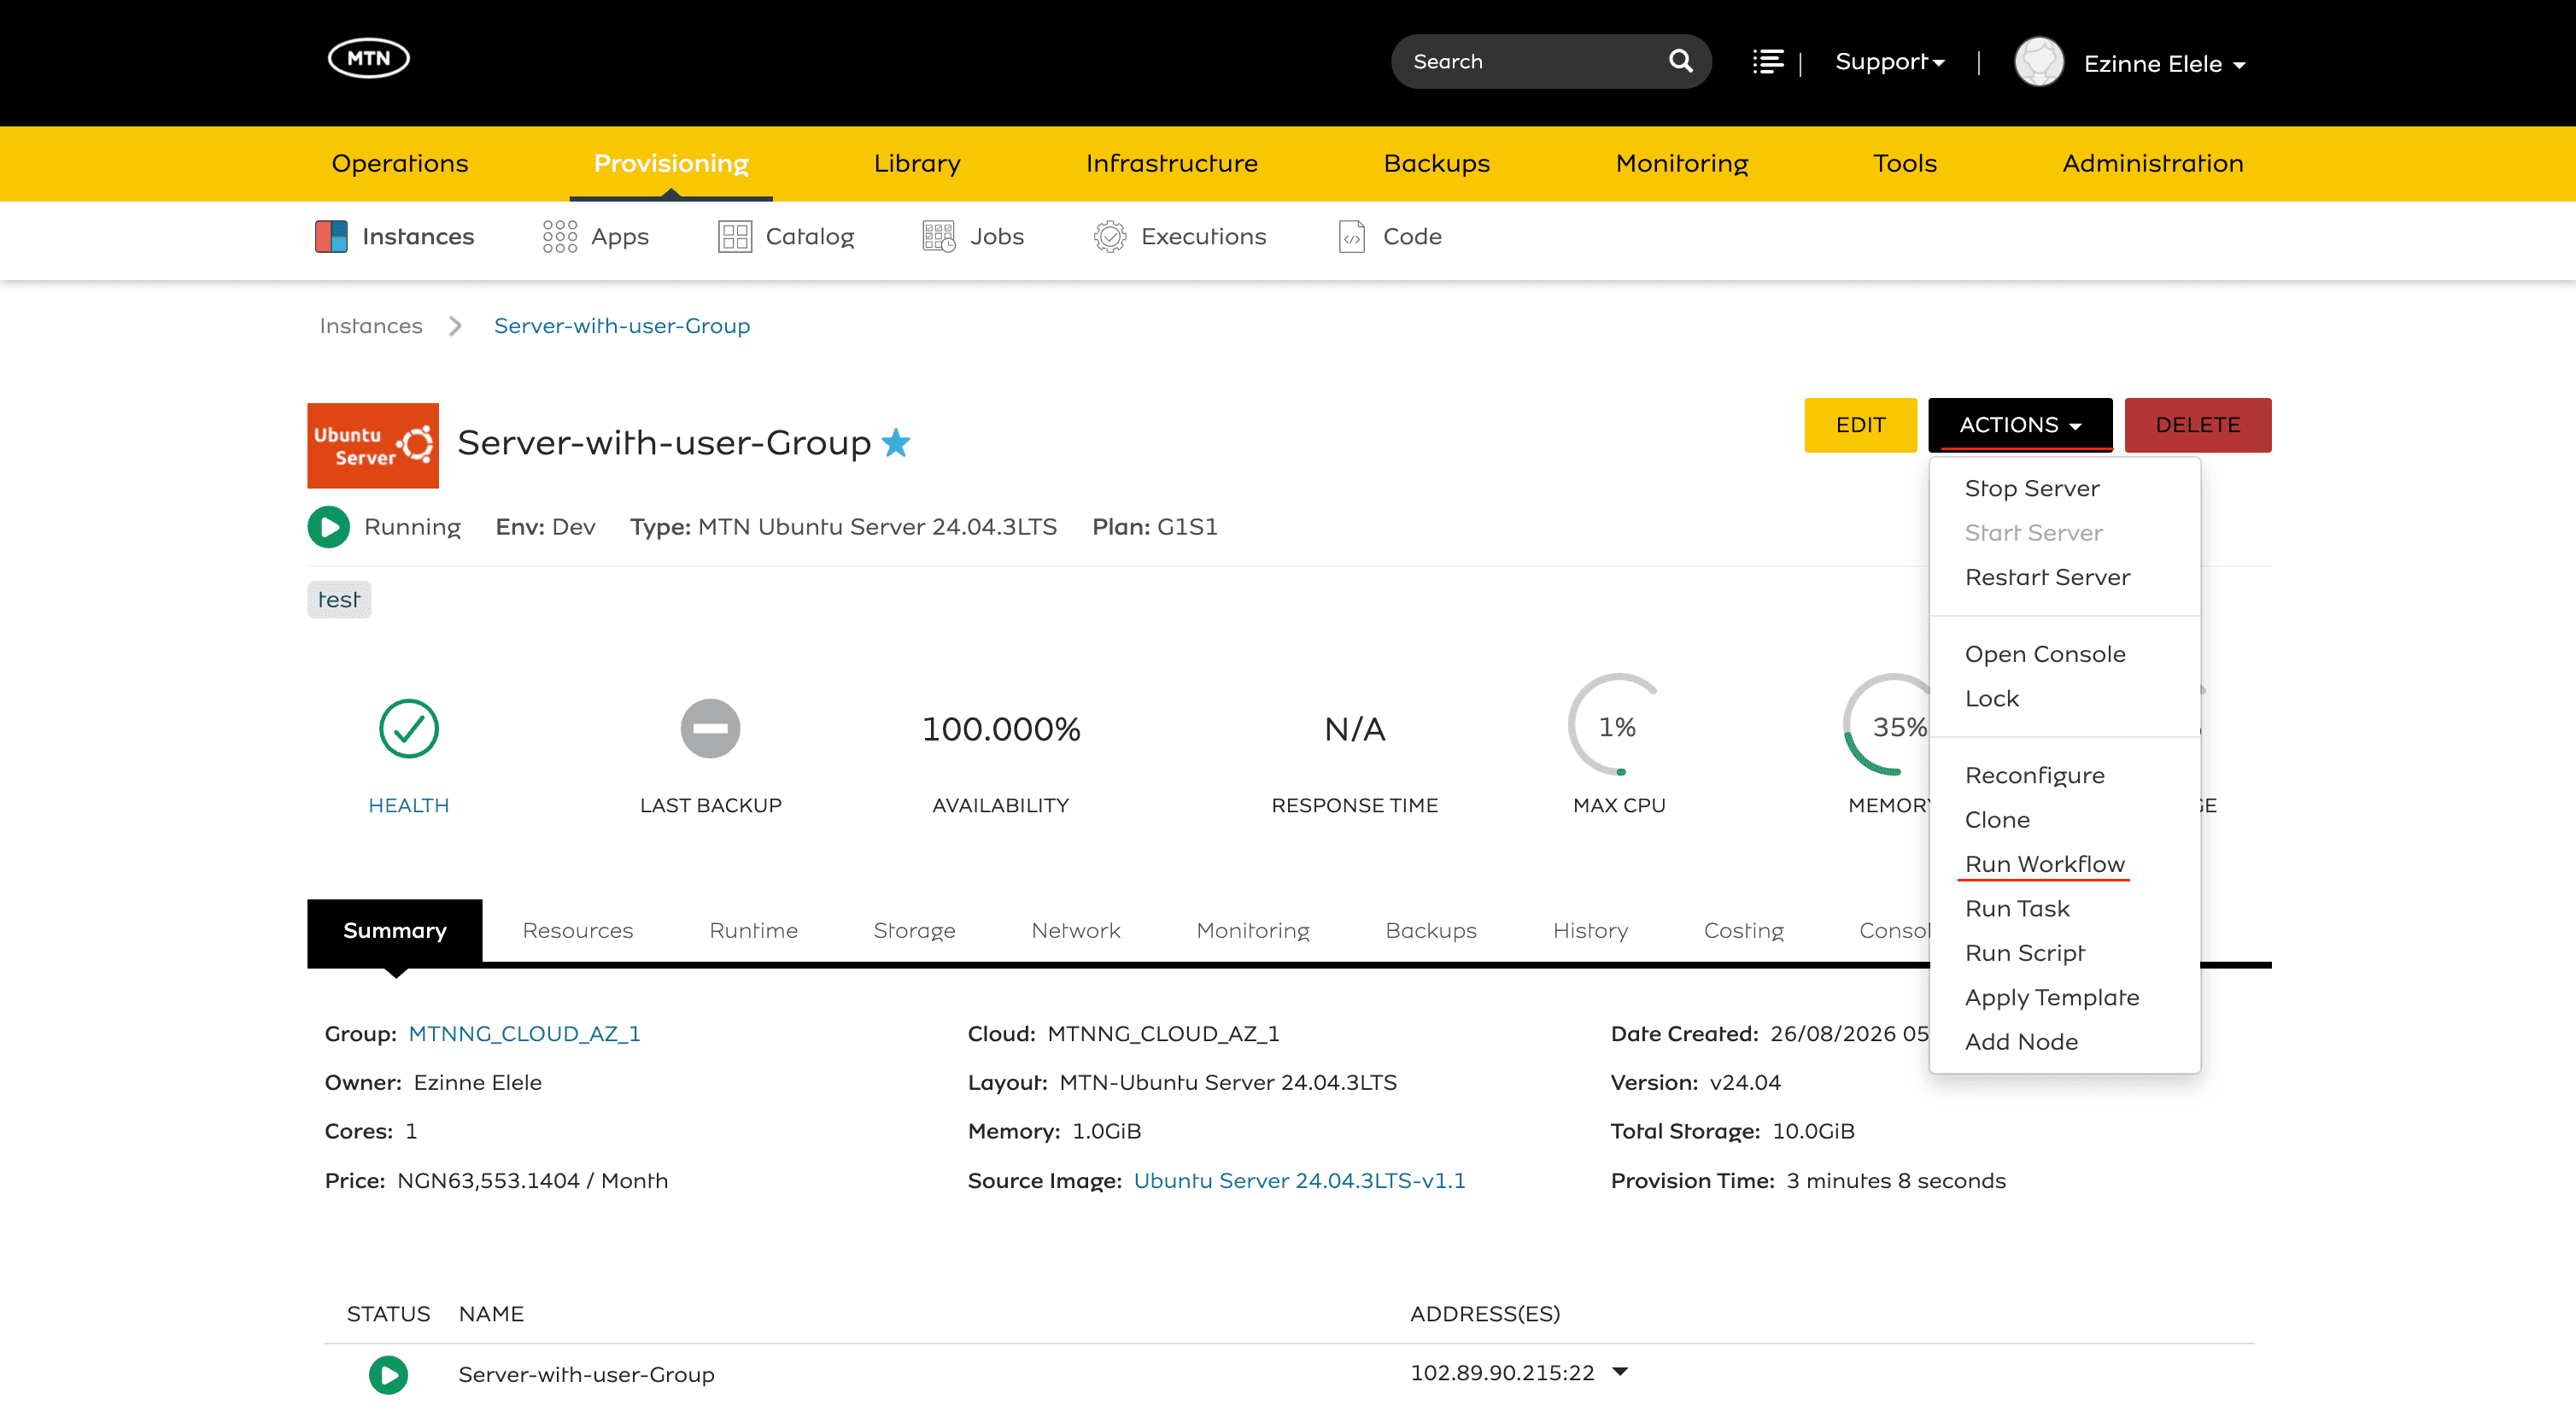
- Select the Actions drop-down and select Run Workflow.
- Search for “Create Linux User”.
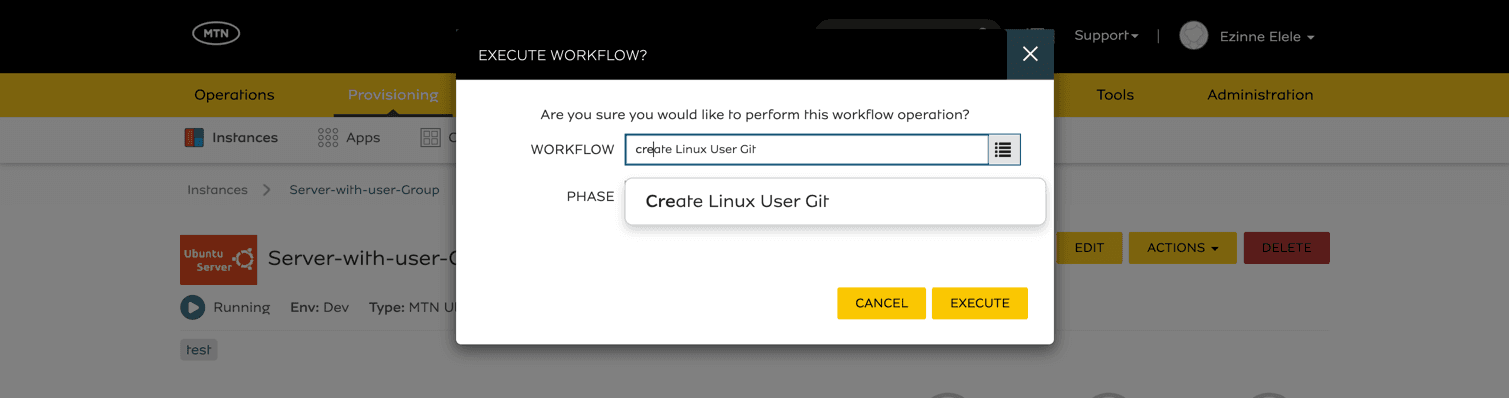
- Fill in the user details including username and password.
- Check “Make Sudoer” if you want the user to have sudo permissions.
- Click Execute, and the workflow will be executed.
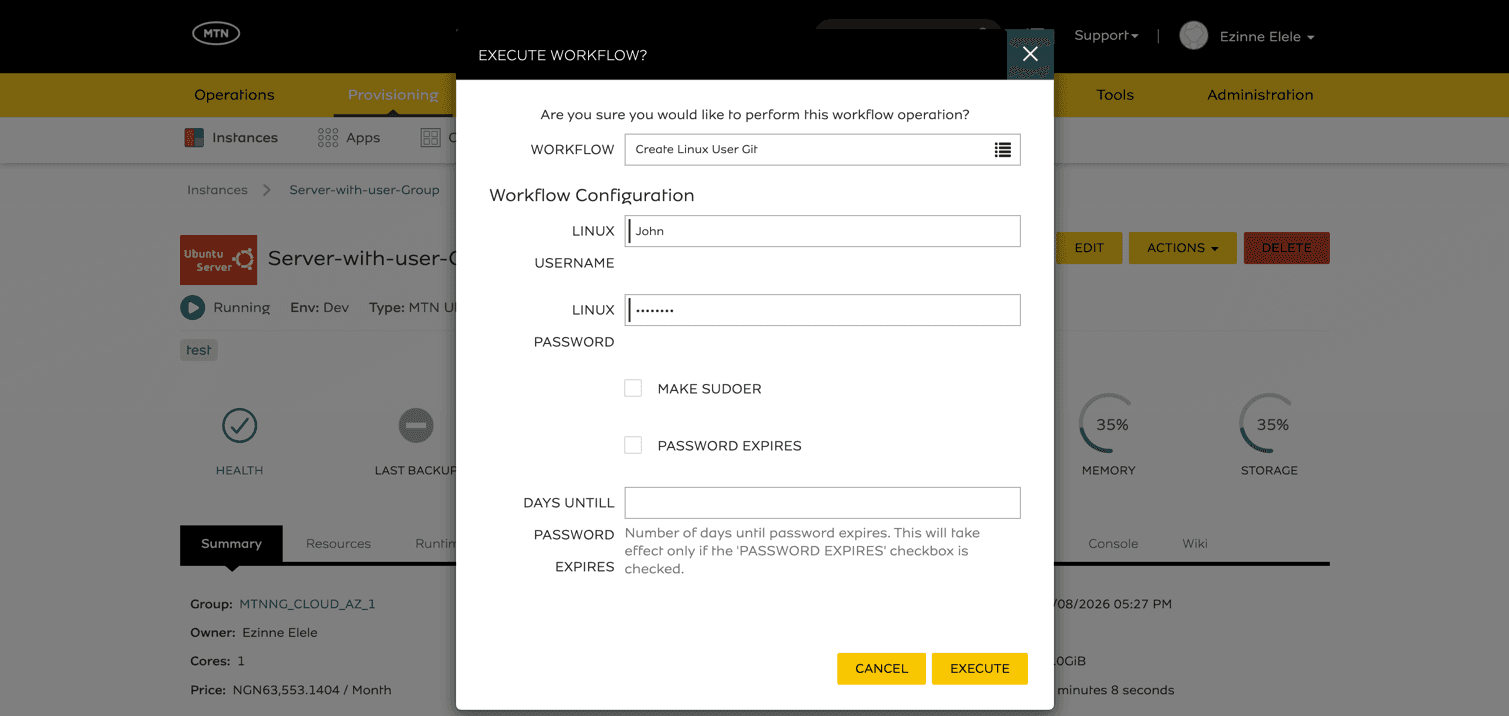
The created user will be able to login to the Instance.