
Making a Directory (e.g /home) its own Partition Using a Separate Disk/Volume on MTN Cloud
Before You Start (prerequisites)
- Have an MTN Cloud Console login with role (permissions) to view Provisioning - eg, have the Customer Admin User role assigned.
- Have a provisioned virtual machine instance ready for configuration.
Tips: This workflow can also be applied to other directories beyond /home.
Separating /home onto a dedicated disk enhances performance, simplifies data management, and improves recovery options. You can attach multiple disks to a virtual machine, and any partition can be repurposed as needed.
Step 1: Identify New Volume (Disk)
Inside the console for the provisioned instance:
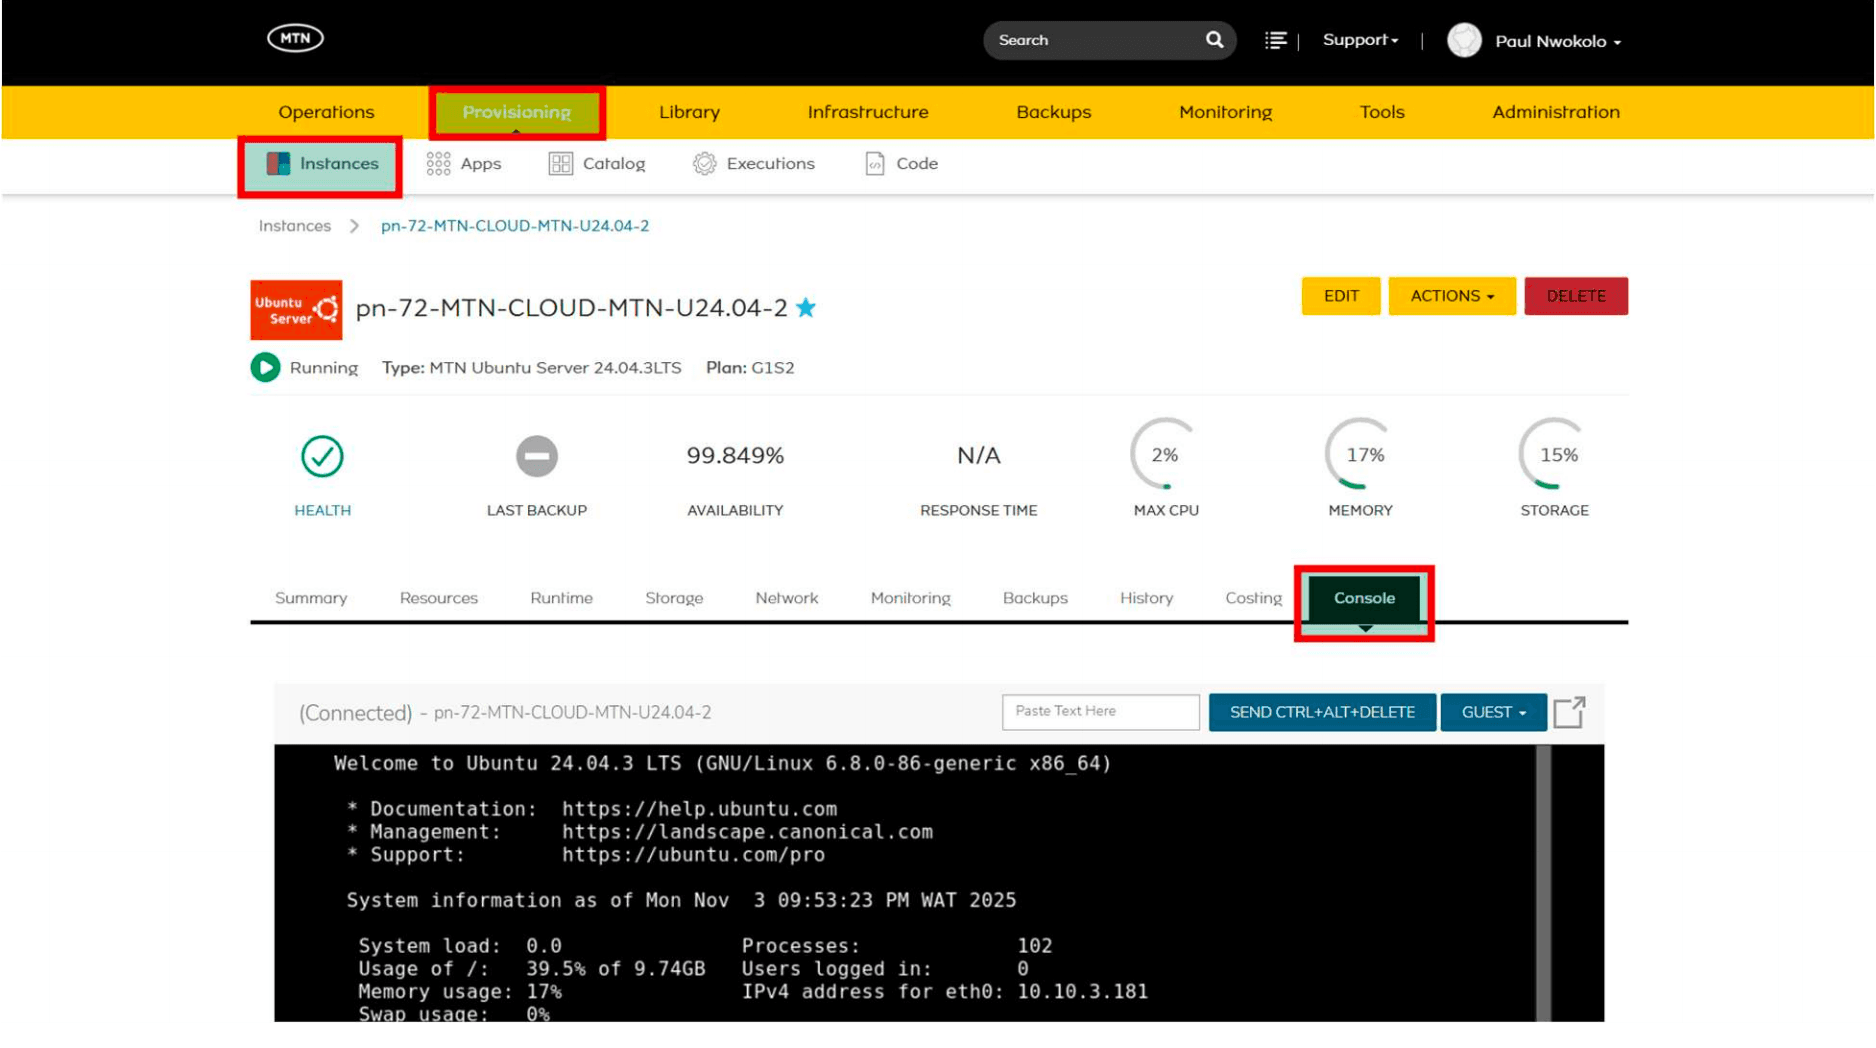
- Run lsblk
- Output should look like:
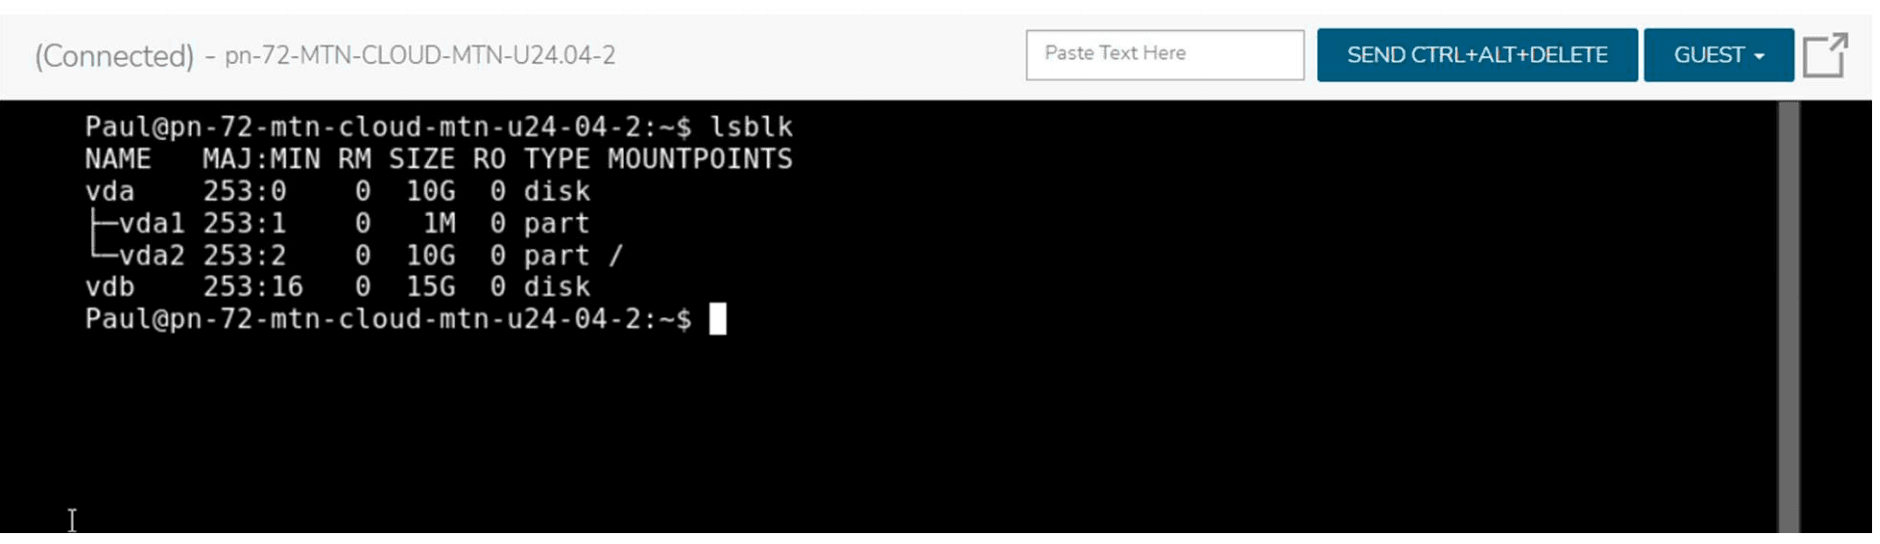
● New Disk (Volume) is vdb
Step 2: Partition and Format the Disk
Create a Partition
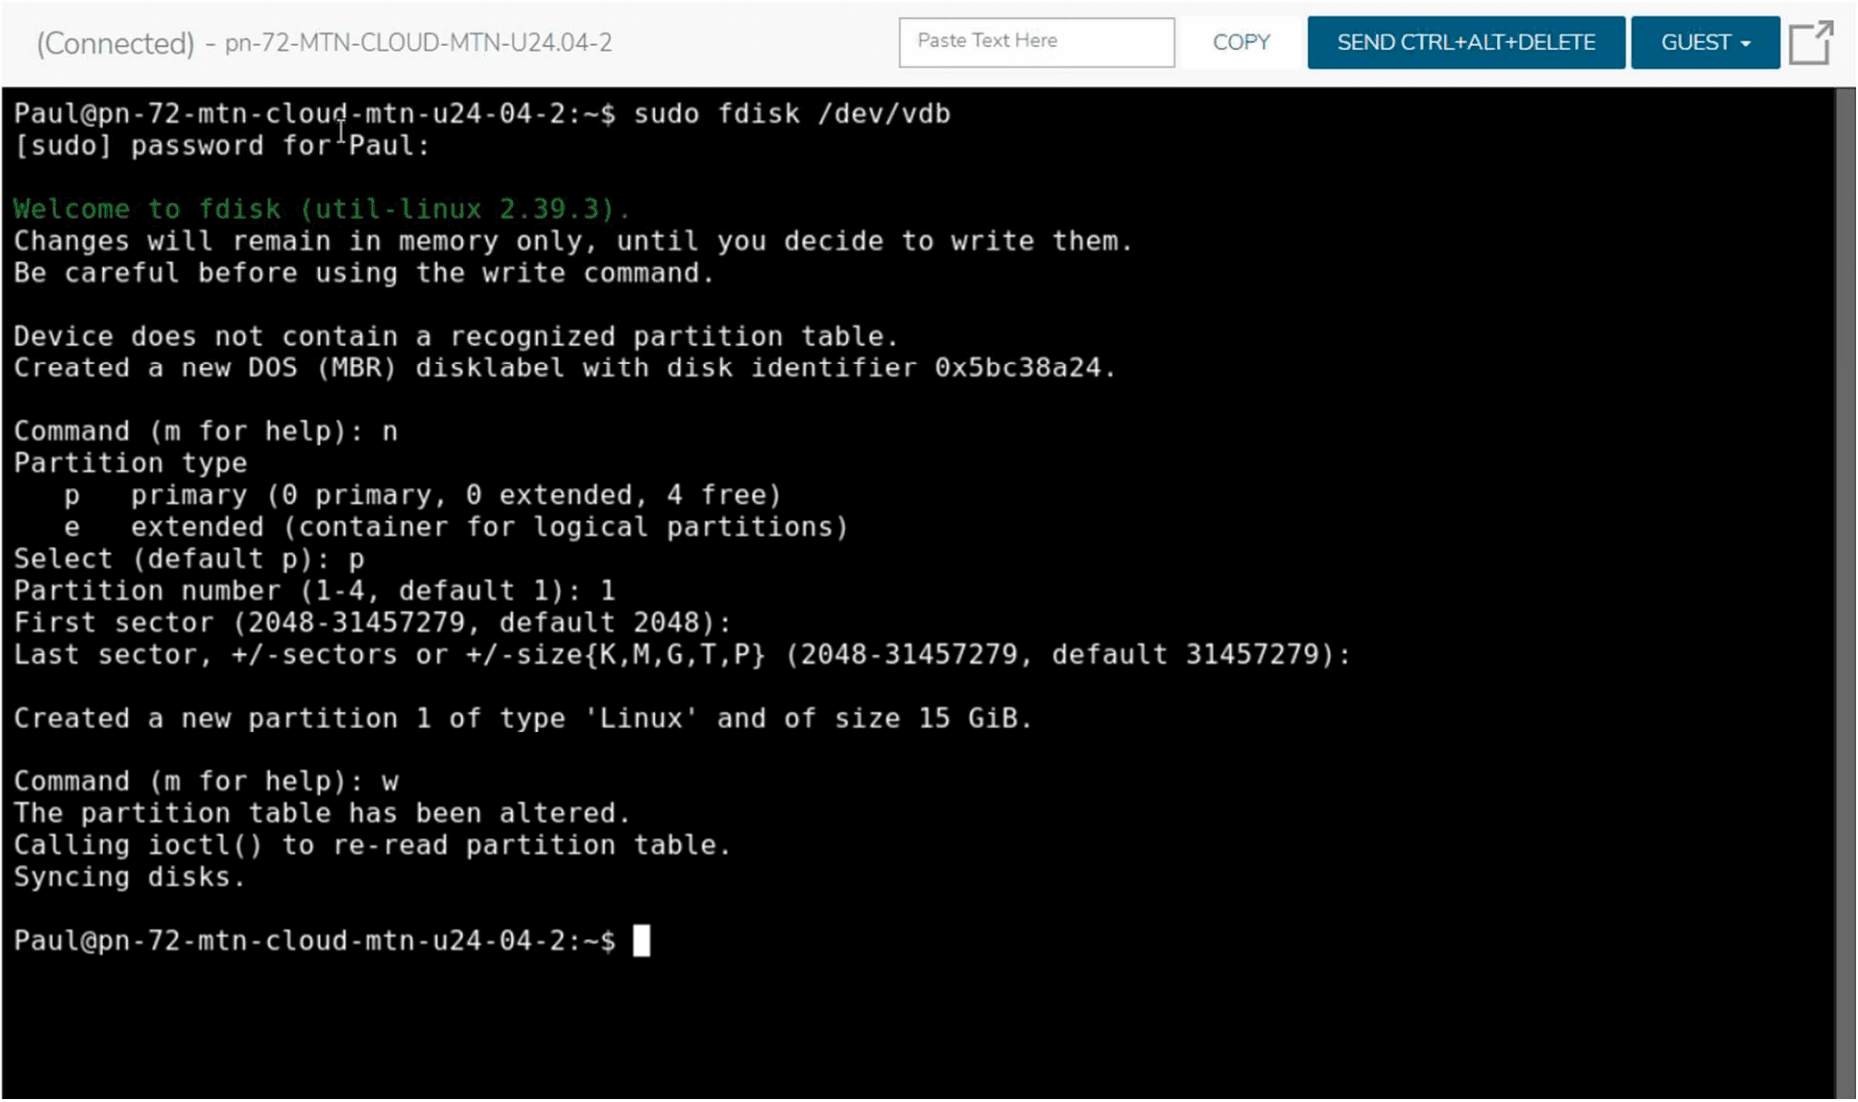
- Run Command: sudo fdisk /dev/vdb
- Inside fdisk, follow these prompts:
- Press n (new partition)
- Press p (primary partition)
- Press 1 (partition number 1)
- Press Enter (accept default first sector)
- Press Enter (accept default last sector - uses full disk)
- Press w (write changes and exit)
- Result: You created a new partition called /dev/vdb1 that uses the entire disk
Format the Partition
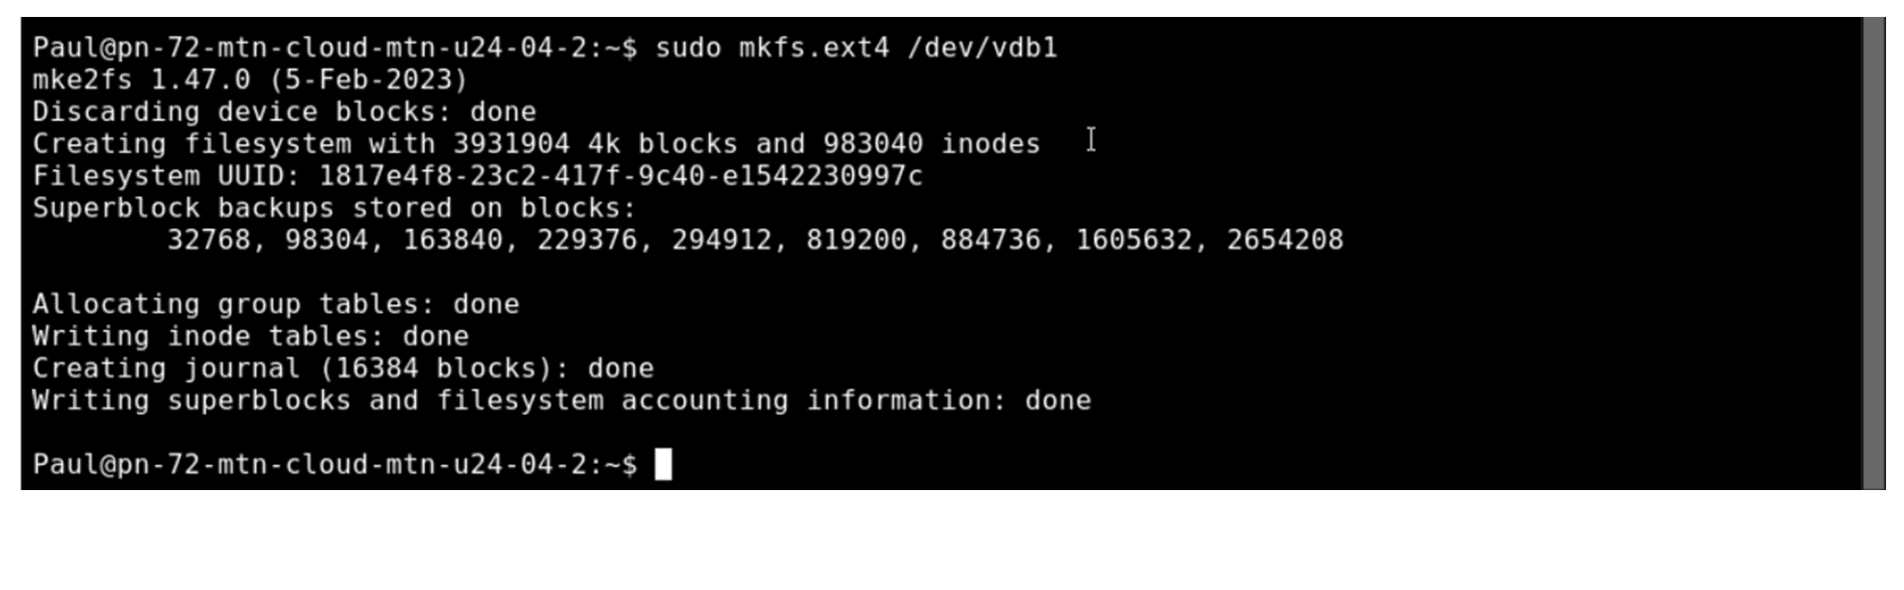
- Run Command: sudo mkfs.ext4 /dev/vdb1
- Result: Creates an ext4 filesystem on the partition, preparing it to store Linux files and displaying output with inode creation and filesystem features.
Step 3: Mount Temporarily and Copy /home
Create a Temporary Mount Point
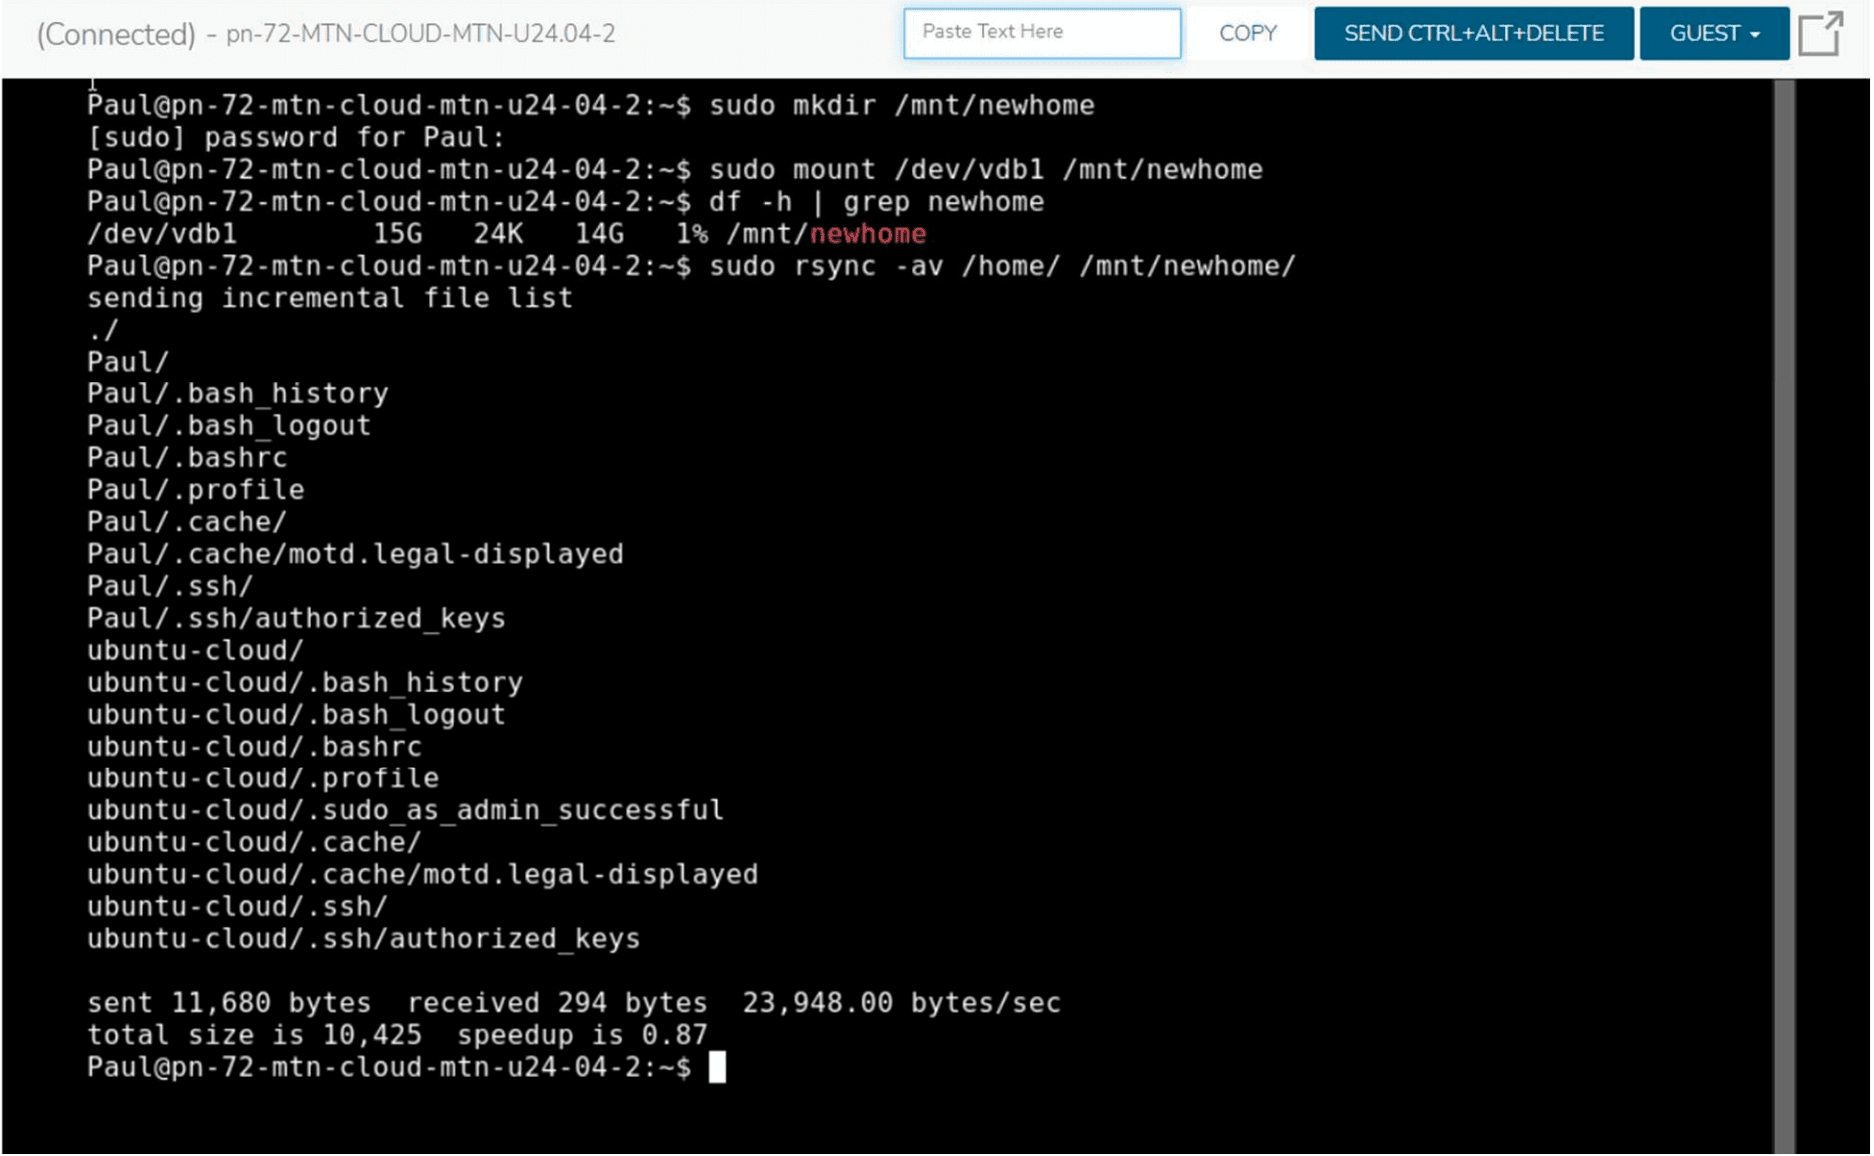
- Run Command: sudo mkdir /mnt/newhome
- Result: Creates a directory to access the new disk temporarily
Mount the New Partition
- Run Command: sudo mount /dev/vdb1 /mnt/newhome
- Verify mount: df -h | grep newhome
Copy all home data
- Run Command: sudo rsync -av /home/ /mnt/newhome/
- Result: All files, folders, and hidden items in /home are copied, preserving user permissions and ownership, which may take some time depending on the data size.
Step 4: Update /etc/fstab
Get the UUID (Recommended Method)
Instead of using /dev/vdb1 (which can change), use the UUID:
- Run Command: sudo blkid /dev/vdb1
- Result:
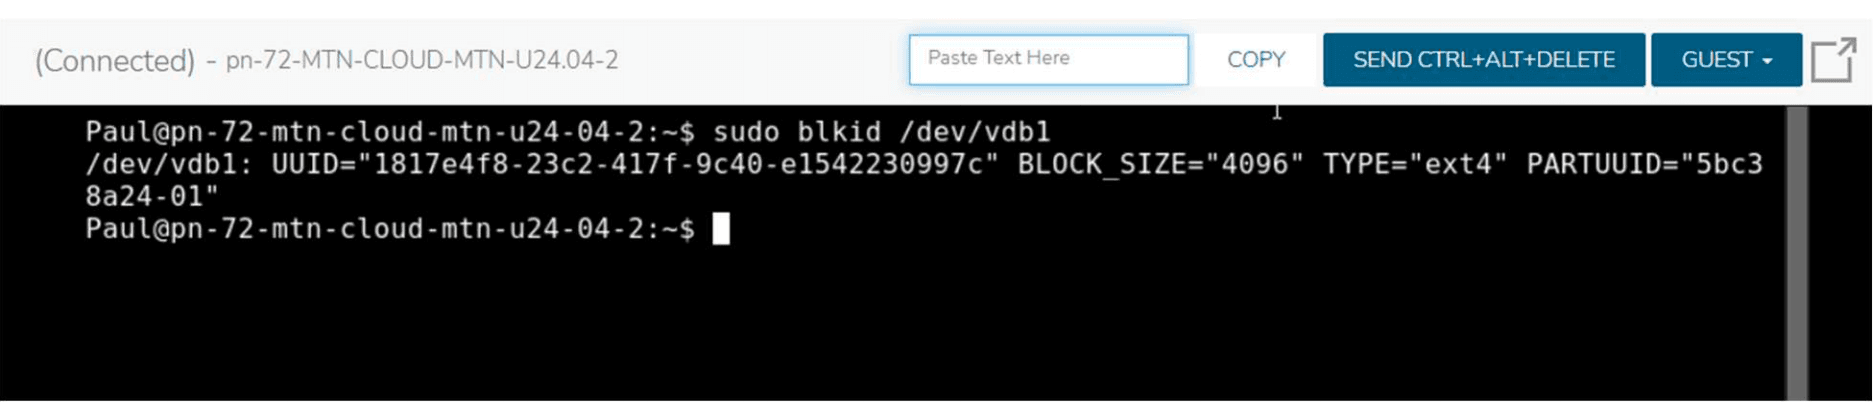
- Copy that value
Edit fstab
- Run Command: sudo nano /etc/fstab
- Add this line (using UUID):
UUID="Your UUID" /home ext4 defaults 0 2
- Result:
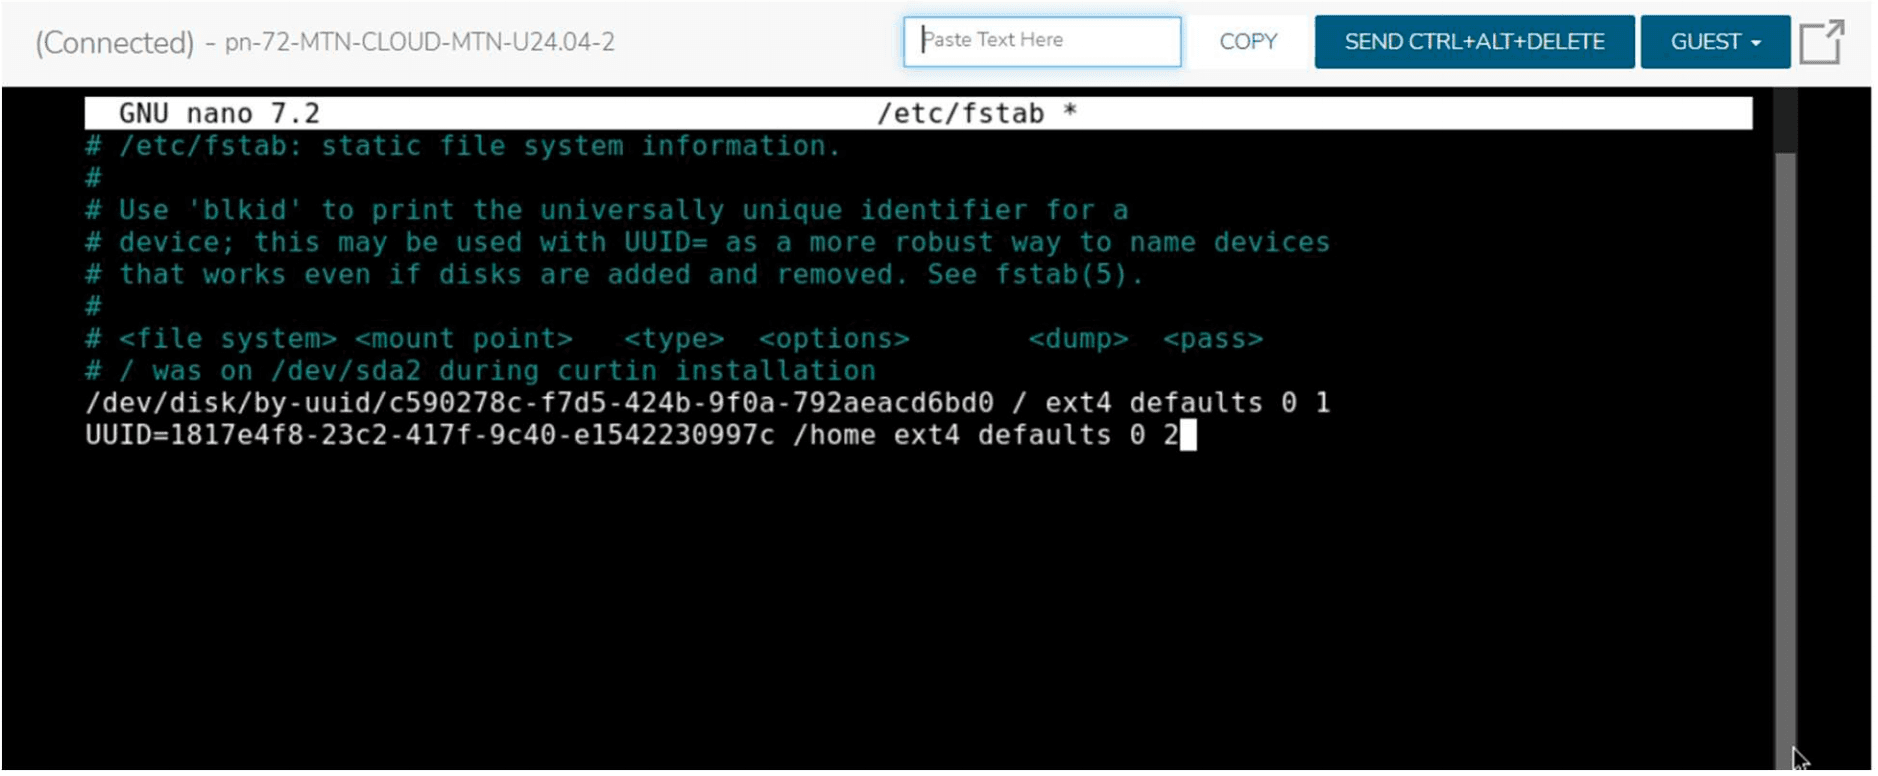
● What each column means:
- Device/UUID: What to mount
- Mount point: Where to mount it (/home)
- Filesystem type: ext4
- Options: defaults (standard options)
- Dump: 0 (don't backup with the dump command)
- Pass: 2 (check filesystem after root, which is 1)
● Save and exit:
- Press Ctrl+O (save)
- Press Enter (confirm)
- Press Ctrl+X (exit)
Step 5: Final Switch
Backup Current Home (Safety Step)
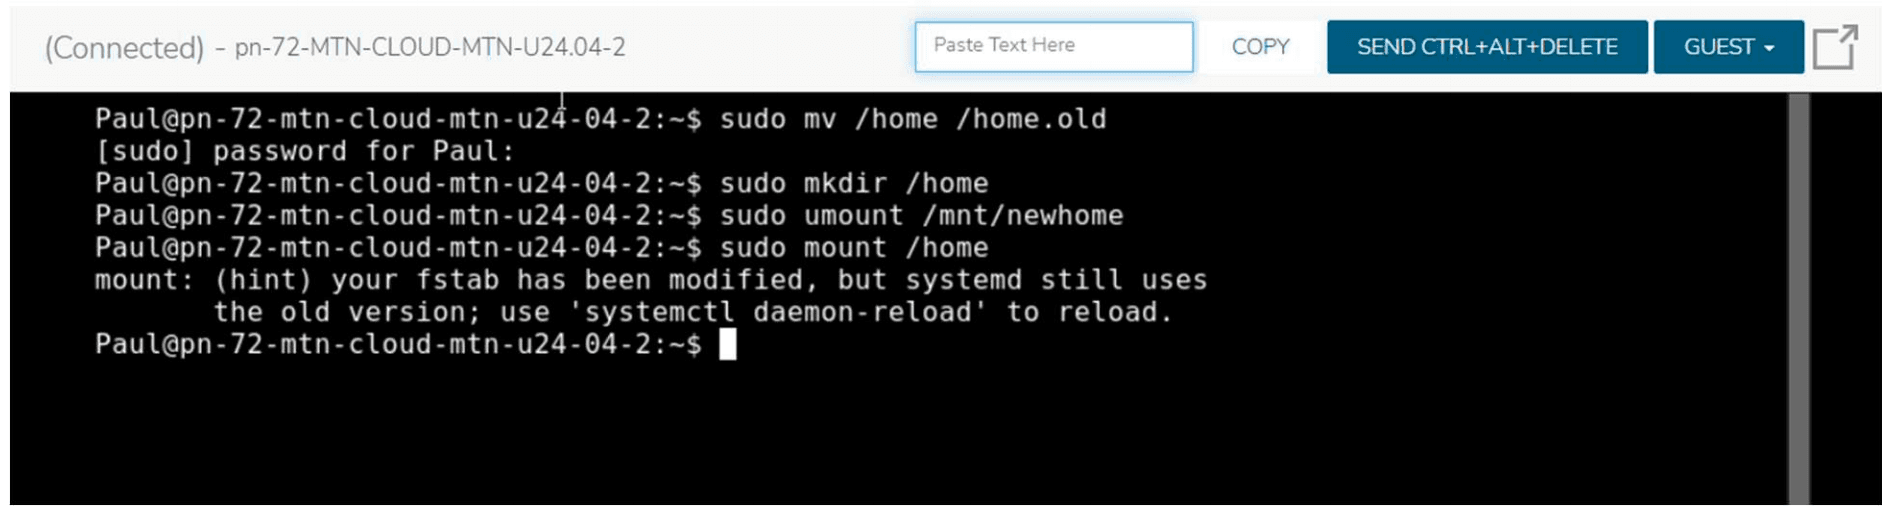
- Run Command: sudo mv /home /home.old
- Result: Renames your current `/home` directory to ` /home.old as a safety backup in case anything goes wrong.
Create New Home Directory
- Run Command: sudo mkdir /home
Unmount Temporary Mount
- Run Command: sudo umount /mnt/newhome
Mount the New Home
- Run Command: sudo mount /home
- Result: Reads /etc/fstab and mounts the new disk at /home
Step 6: Verification & Cleanup
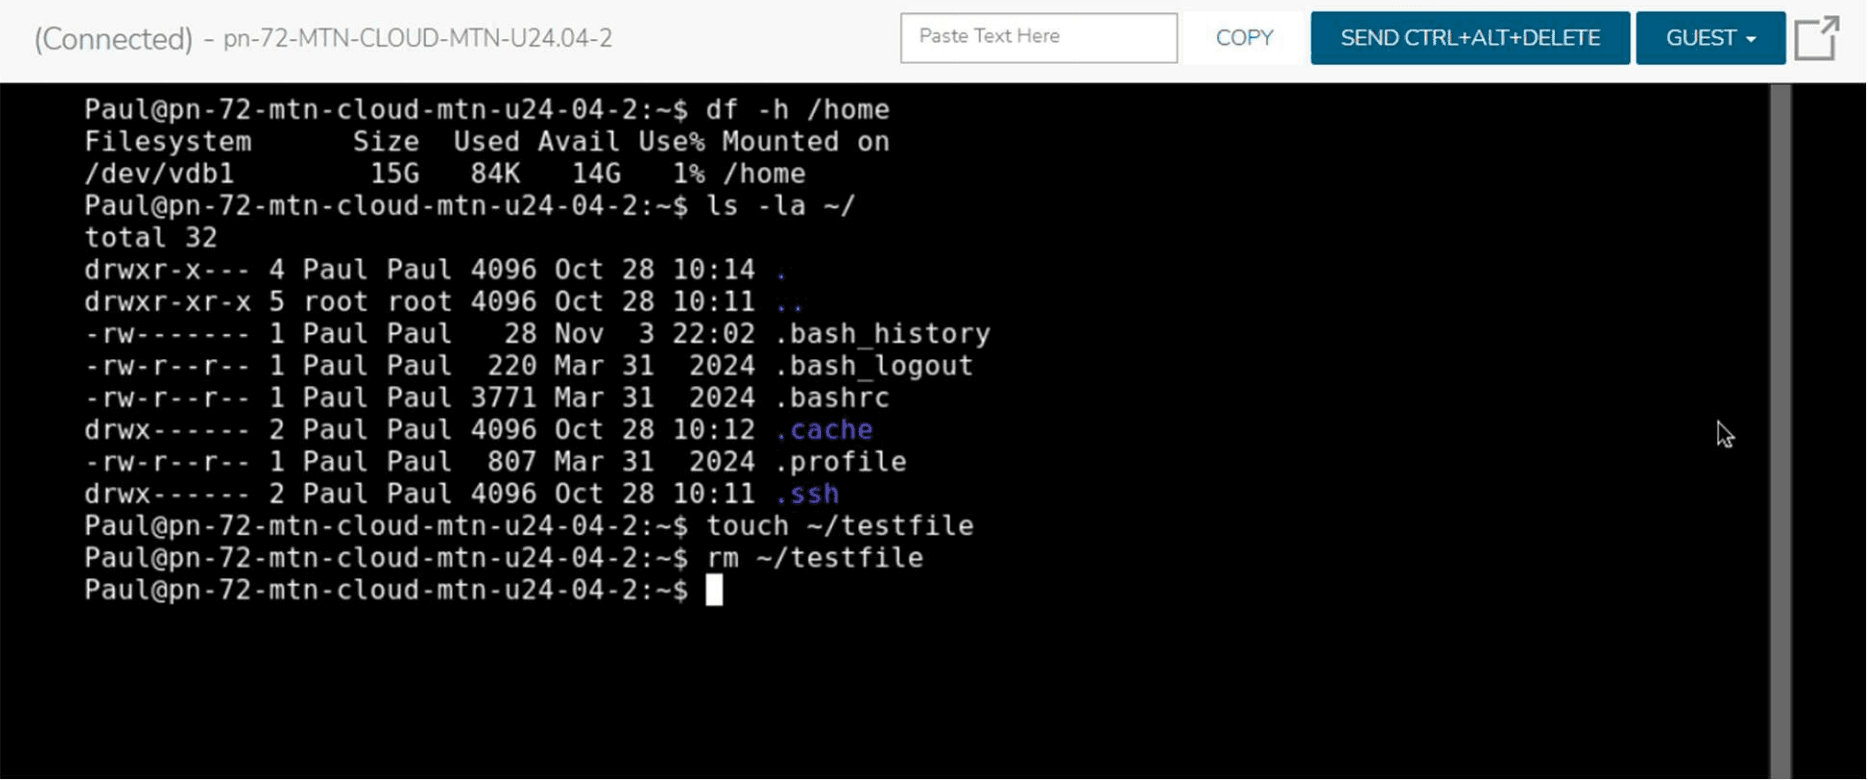
The verification commands below should work without error:
- Run Command: df -h /home
- Run Command: ls -la ~/
- Run Command: touch ~/testfile
- Run Command: rm ~/testfile
- Result:
Reboot and Verify
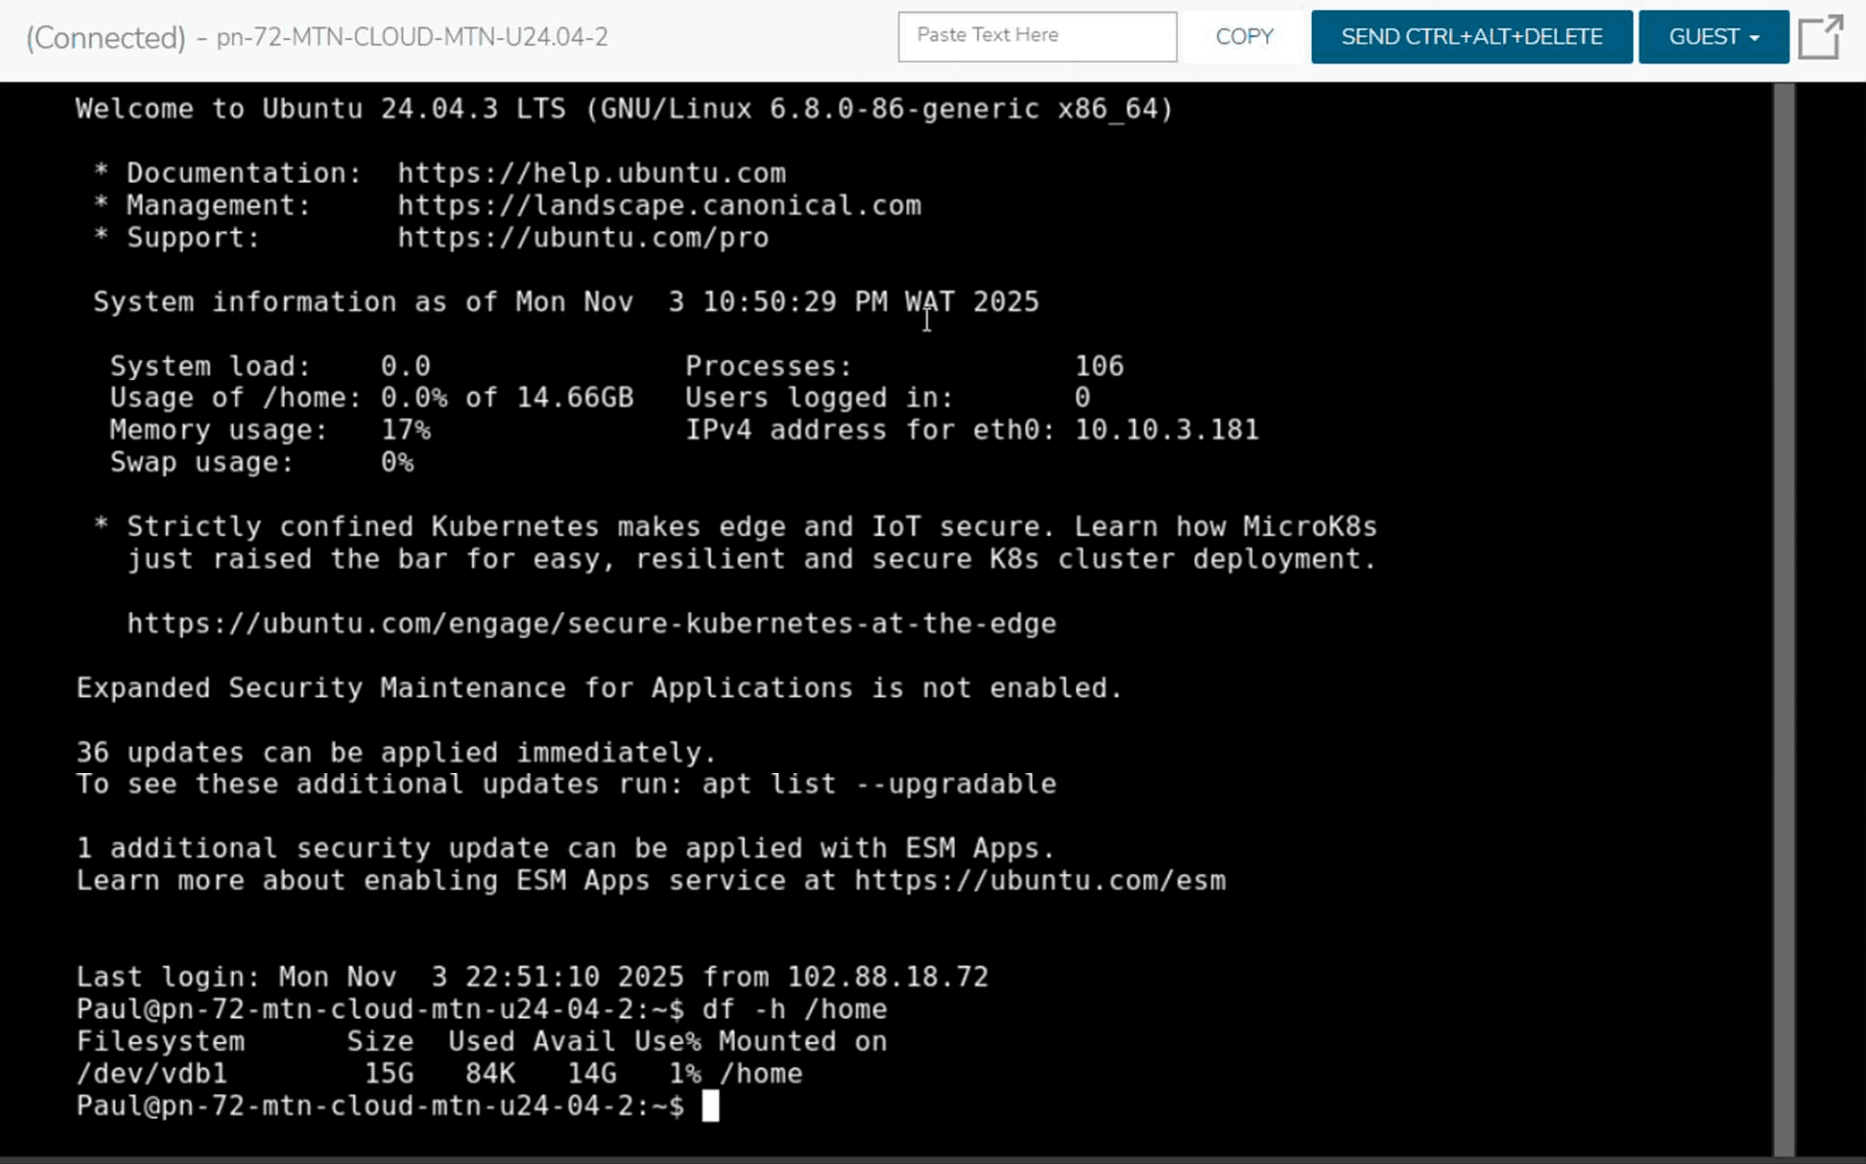
- Run Command: sudo reboot
- Run Command: df -h /home
Cleanup (After Confirming Everything Works)
- Run Command: sudo rm -rf /home.old
- Result: This removes the old backup copy.
⚠️ Important Safety Notes
- Backup first: If you have important data, back it up externally before starting
- Check active processes: Make sure no users are logged in during the switch:
- Run this Command: who
- Test fstab before rebooting:
- Run this Command: sudo mount -a