
Reconfiguring Instances (Vertical Scaling) on MTN Cloud
Service: MTN Cloud Instances (Virtual Machines) · Category: Compute
Overview
This guide shows how to vertically scale an existing instance on MTN Cloud with the Reconfigure action. You can change the instance's service plan (CPU and memory), add storage volumes and add network interfaces, without creating a new instance.
Why it matters:
- Right sized resources: move an instance to a larger or smaller service plan as your workload changes.
- More storage: attach additional data volumes to an instance that is already running.
- More connectivity: attach additional network interfaces to connect the instance to other networks.
Prerequisites
Before you begin, ensure you have:
- An MTN Cloud Console login with the appropriate role (full permissions) to Provisioning (Instances), for example the Customer Admin User role.
- A running instance (virtual machine).
Tip: If you do not see the Reconfigure feature despite having the appropriate role, contact support or refresh the portal.
Before You Reconfigure
Keep the following in mind before you reconfigure an instance:
| Item | What to know |
|---|---|
| Restart | The virtual machine restarts automatically when you reconfigure it, and hot resize is not supported. Plan for a brief period of downtime. |
| Root disk | The size of the root disk cannot be increased during a reconfiguration. To add storage, attach a new volume. |
| Disk size | Disk sizes can only be expanded, not reduced. If you select a smaller plan, memory and CPU are reduced but storage is not. |
| Network interfaces | The primary network interface cannot be edited. A secondary interface is attached only at the cloud layer, so you must configure it manually inside the guest operating system. |
The Right Sequence
To reconfigure an instance, follow this sequence:
- Open the Reconfigure window: navigate to Provisioning > Instances, select the instance, and choose Reconfigure from the Actions menu.
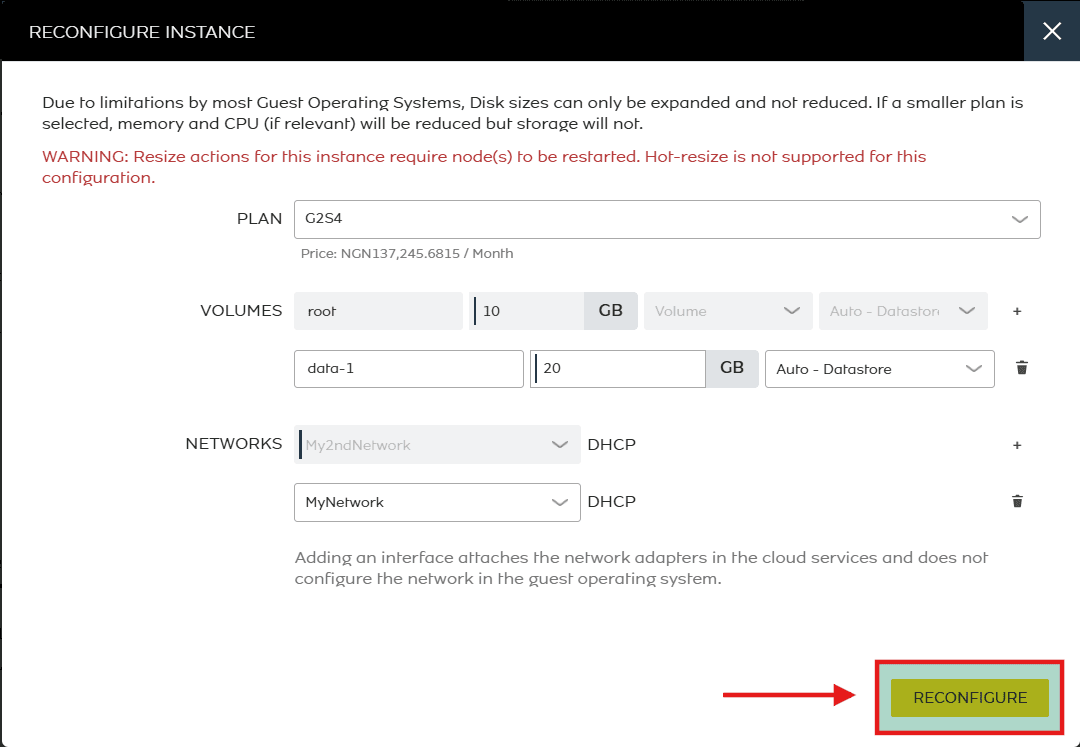
- Modify the resources: change the service plan (for example, from G1S1 to G2S4), attach additional data volumes, or add secondary network interfaces.
- Apply the changes: review your selections and click Reconfigure. The platform restarts the virtual machine to apply the new resources.
Phase 1 – Open the Reconfigure Window
Purpose: open the Reconfigure window for the instance you want to scale.
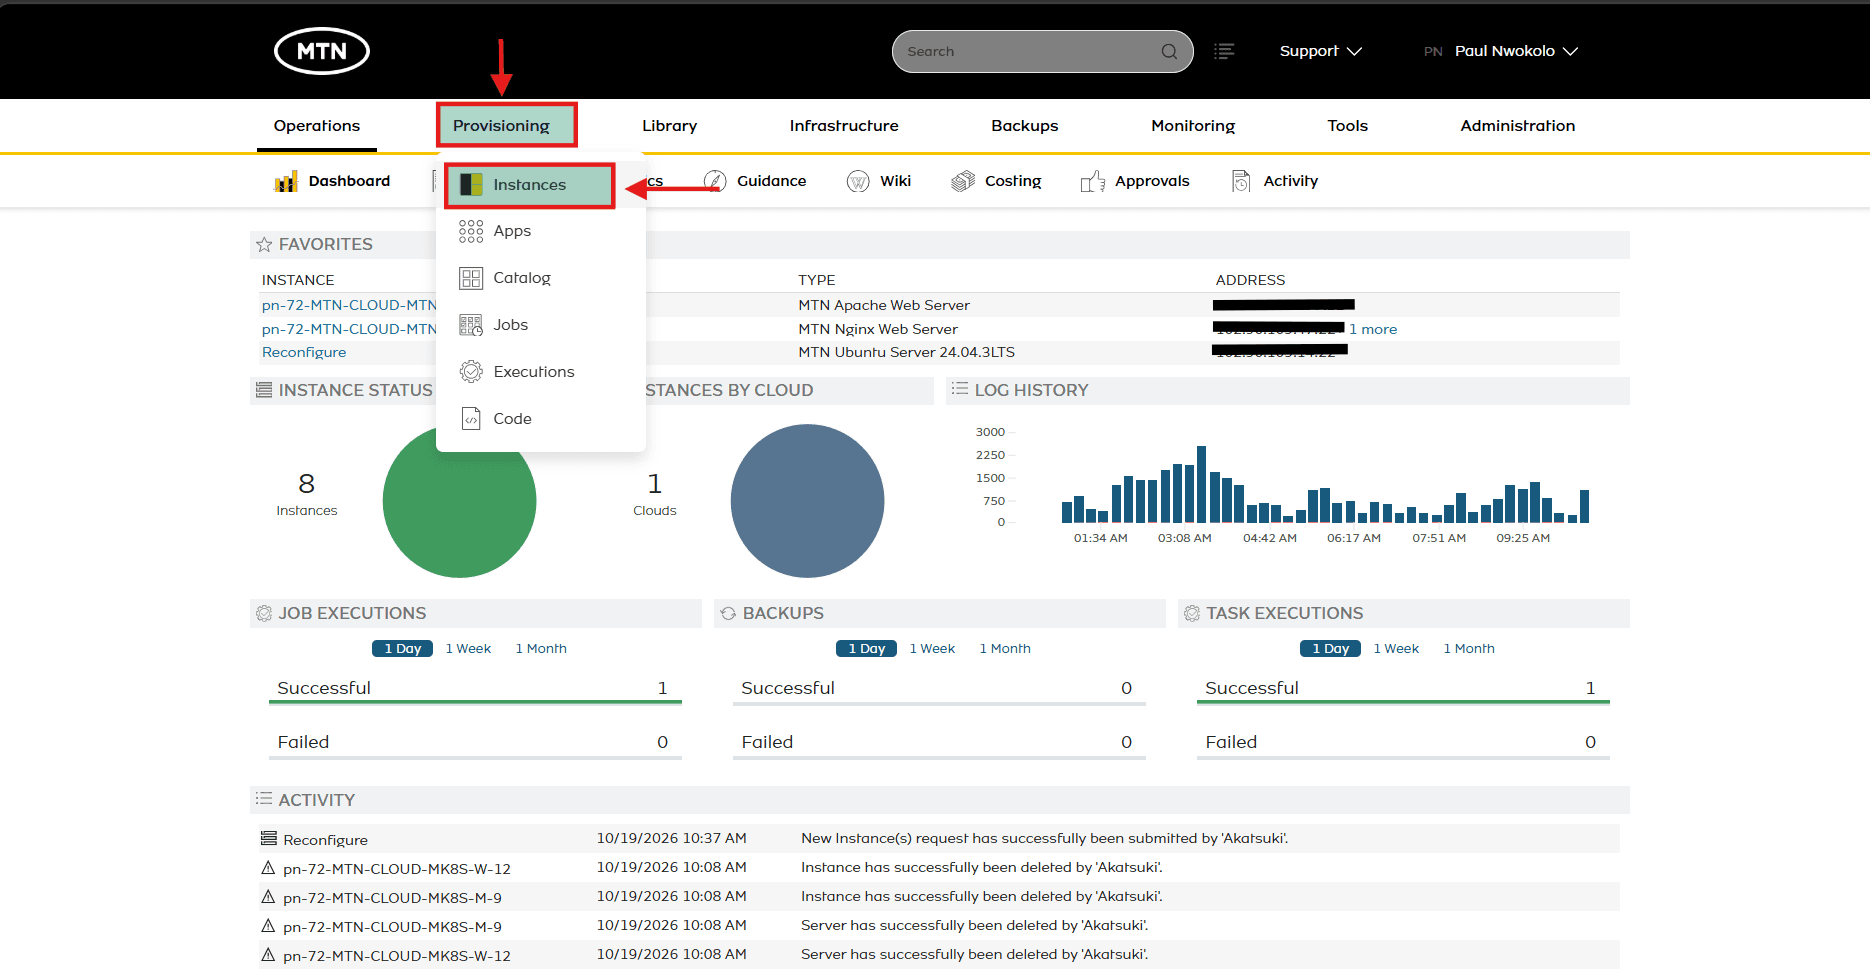
- Navigate to Provisioning > Instances.
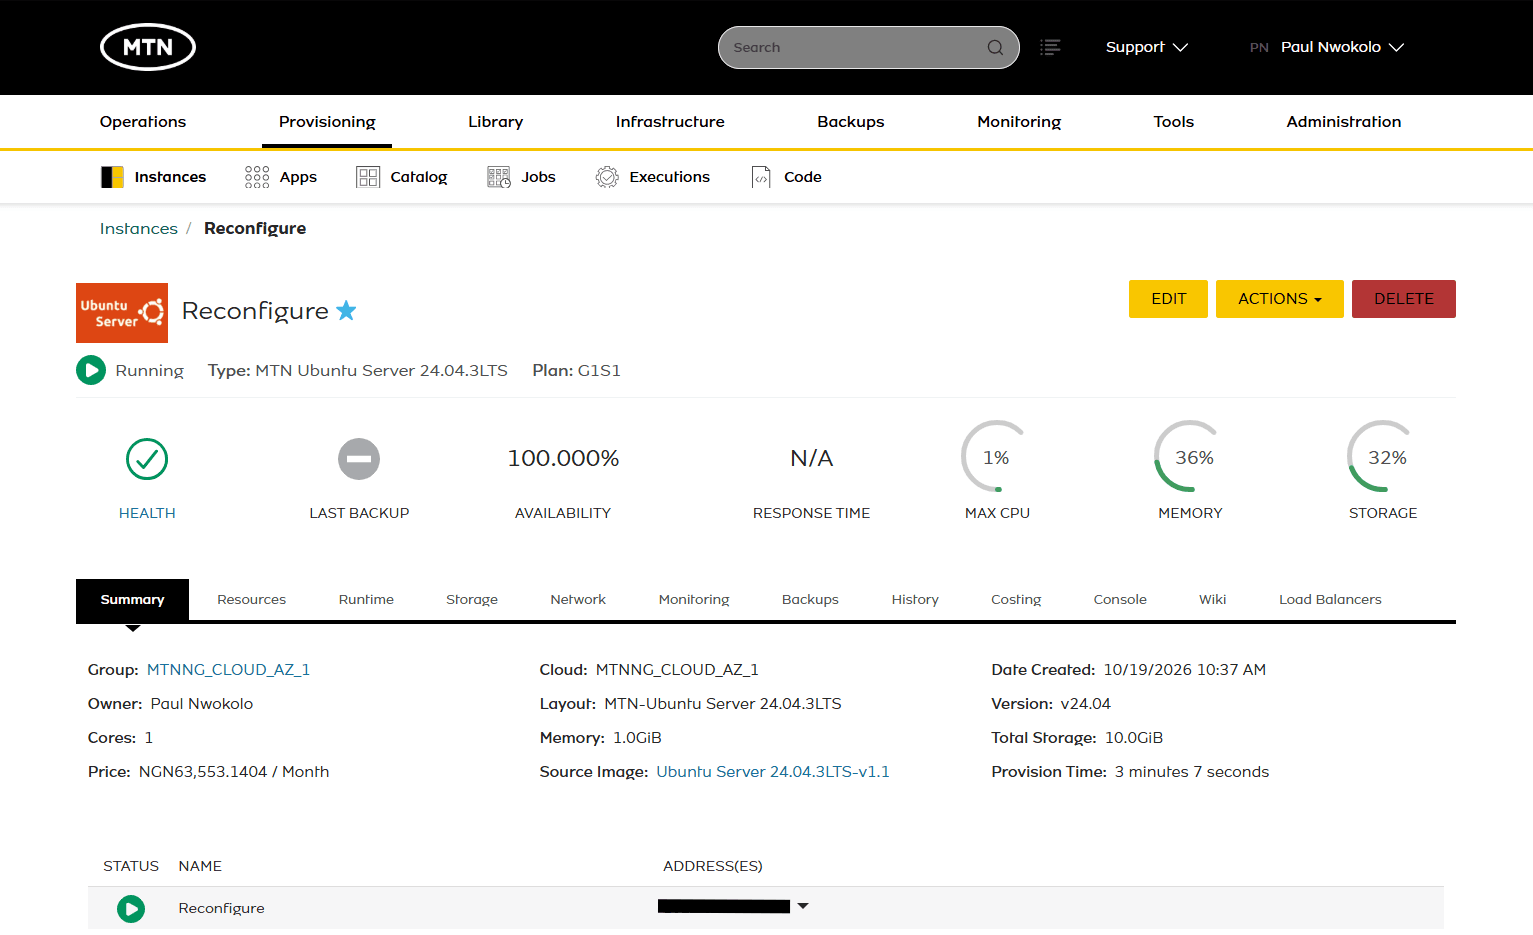
- Click the instance (virtual machine) you want to modify.
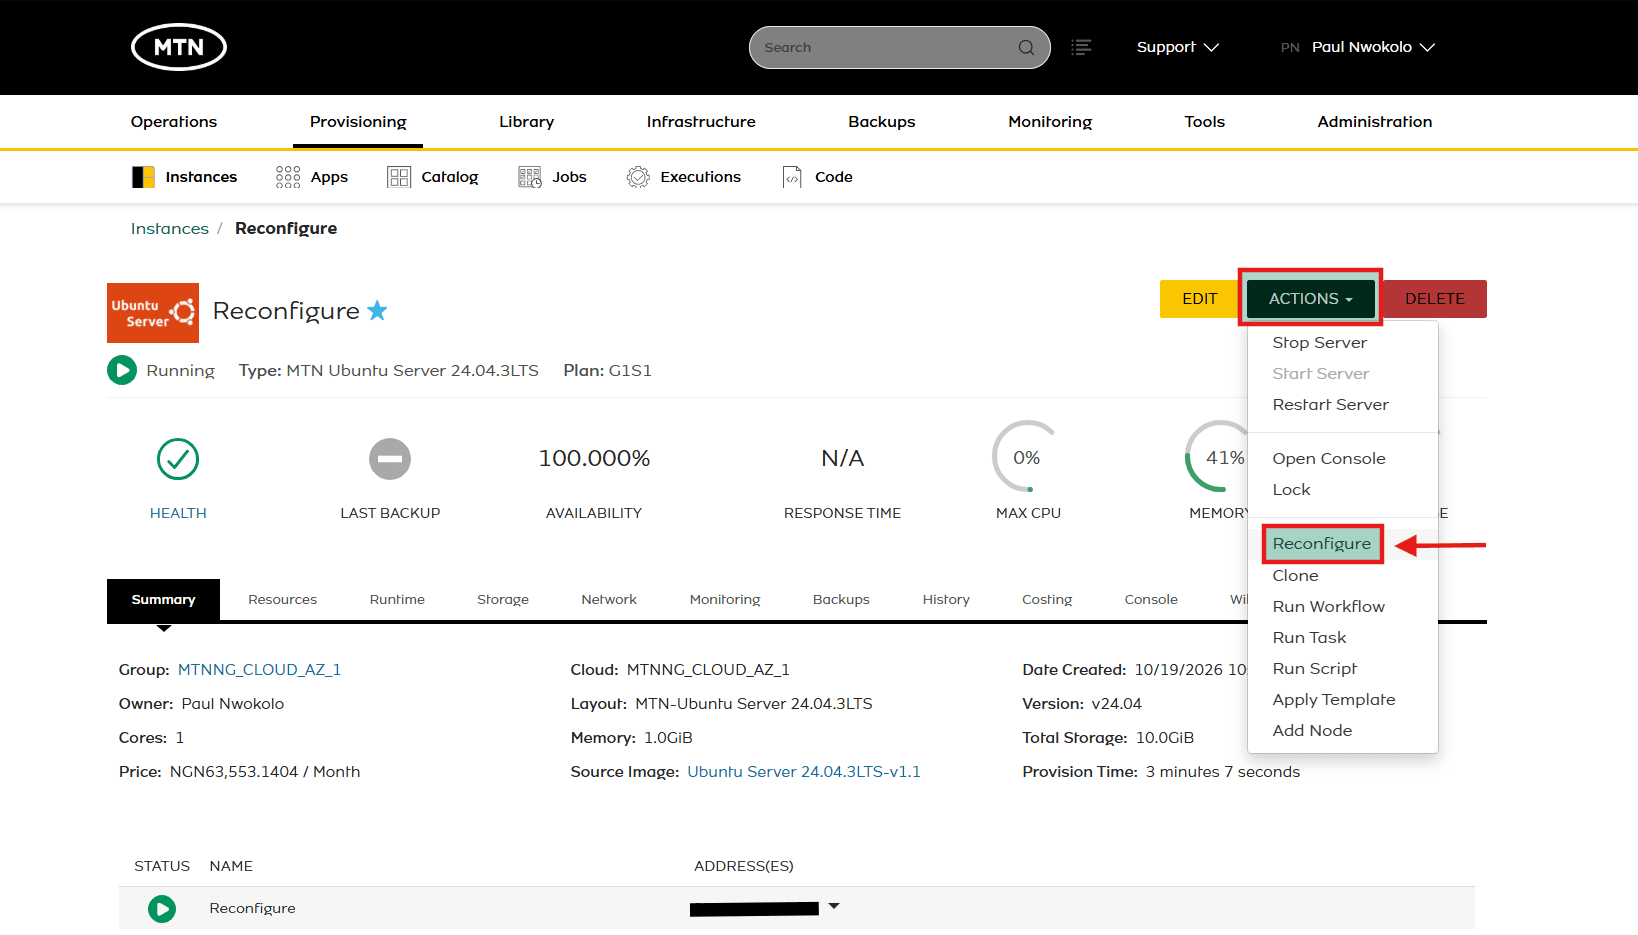
- Click the Actions dropdown menu, at the top right of the instance detail page.
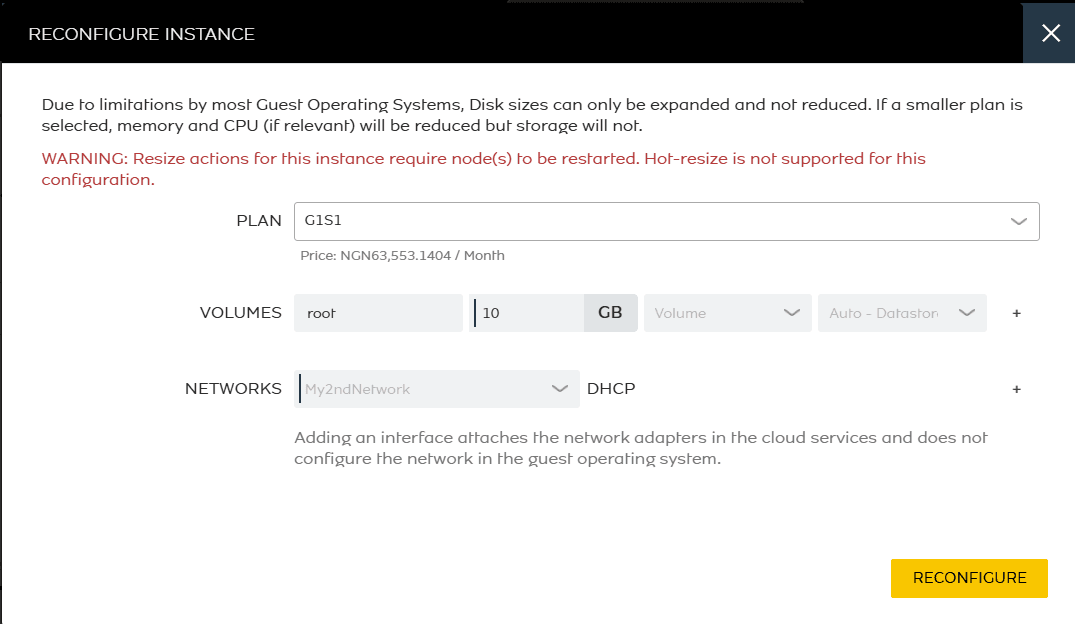
- Select Reconfigure from the list to open the Reconfigure Instance window.
Phase 2 – Modify Compute, Storage and Network
Purpose: change the resources of the instance. Make only the changes your workload needs. Each change below is optional.
Change the Service Plan
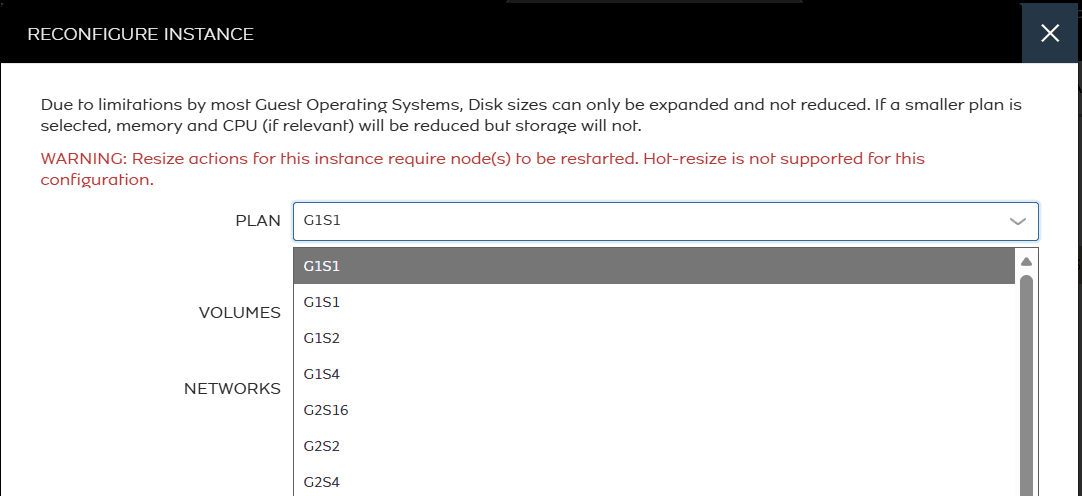
- In the Plan field, open the dropdown and select the compute tier you want (for example, G2S4 instead of G1S1). This adjusts the CPU and memory allocation of the instance.
Add a Data Volume
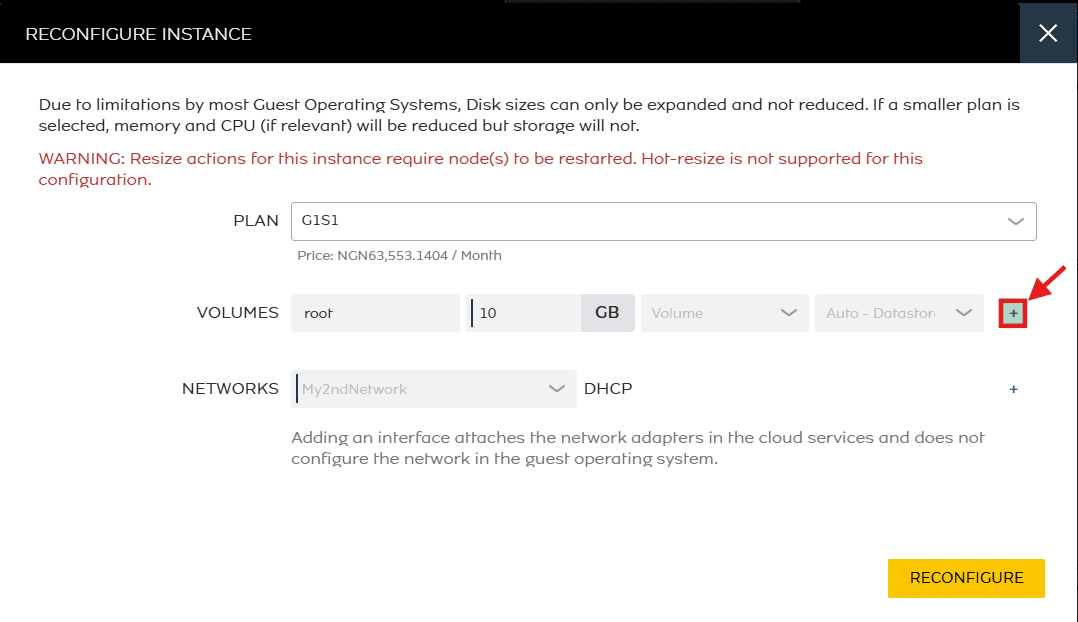
- Beside Volumes, click the + icon.
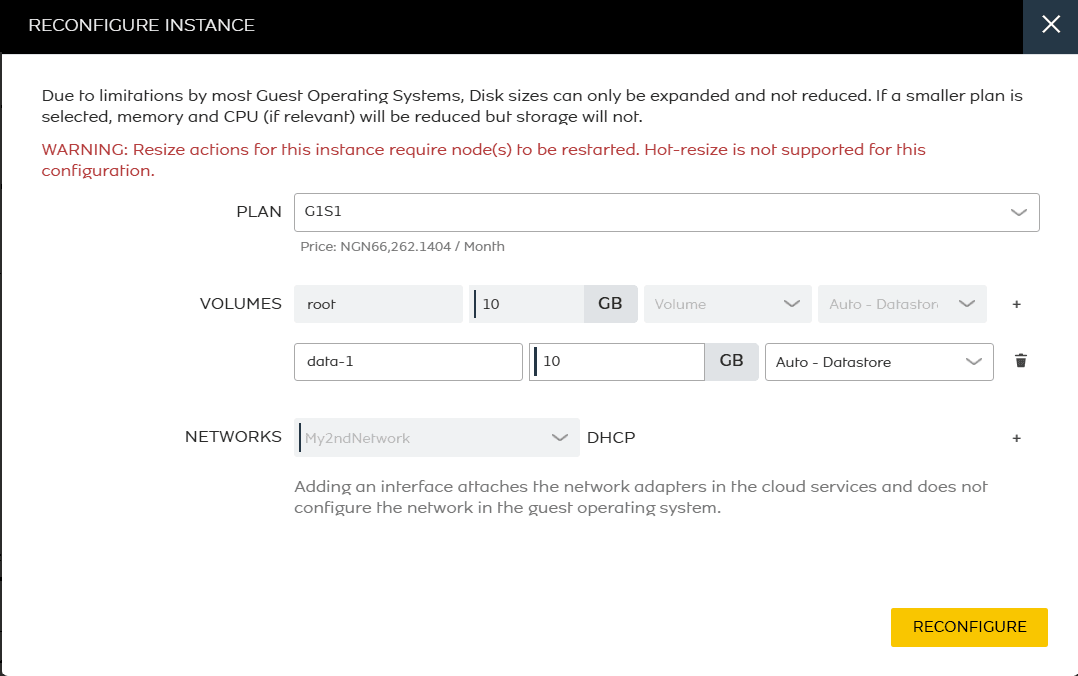
- Enter a label for the volume (for example, data-1) and its size in GB.
Add a Network Interface
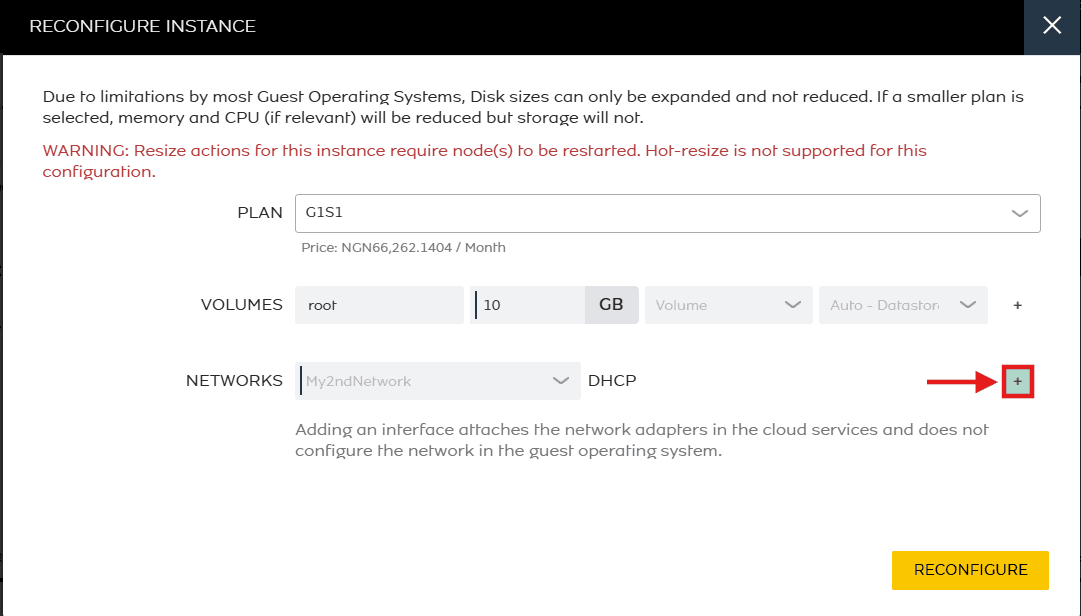
- Beside Networks, click the + icon.
- Select the target network from the dropdown list.
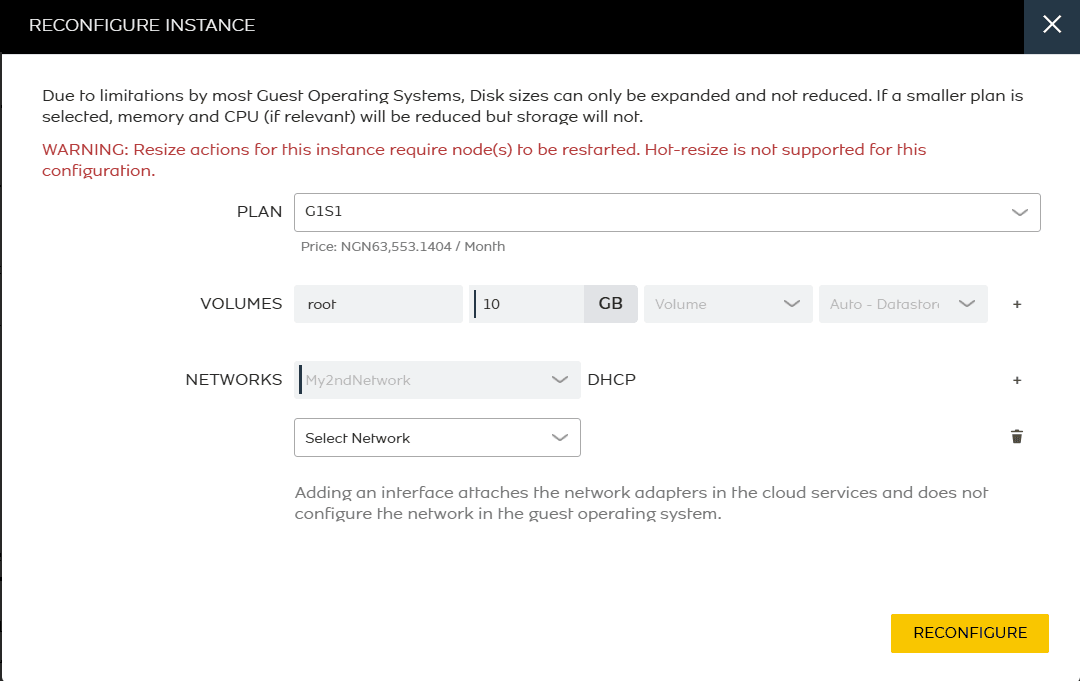
Note: adding an interface attaches the network adapter at the cloud layer only. It does not configure the network inside the guest operating system, so you must do that manually after the instance restarts.
Phase 3 – Apply the Changes
Purpose: apply the new configuration and confirm that the instance returns to a healthy state.
- Review your selections and confirm that the compute tier, storage volumes and network attachments match your workload requirements.
- Click Reconfigure to apply the changes.
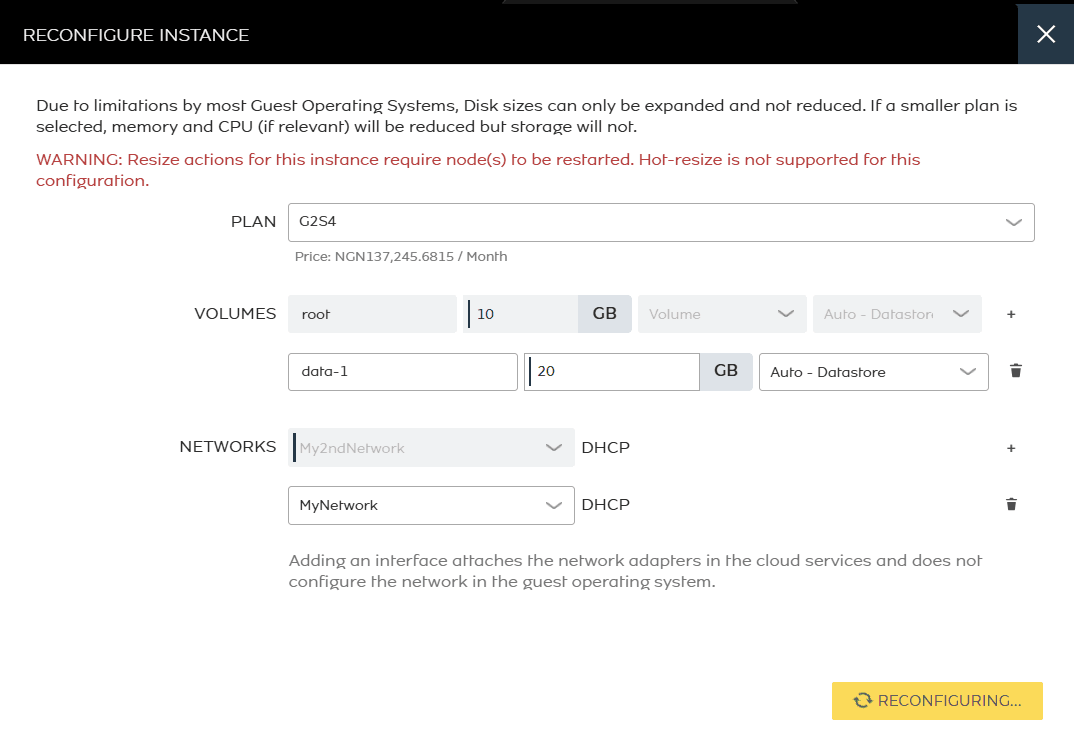
- Wait for the instance to restart. The instance detail page shows the resize progress.
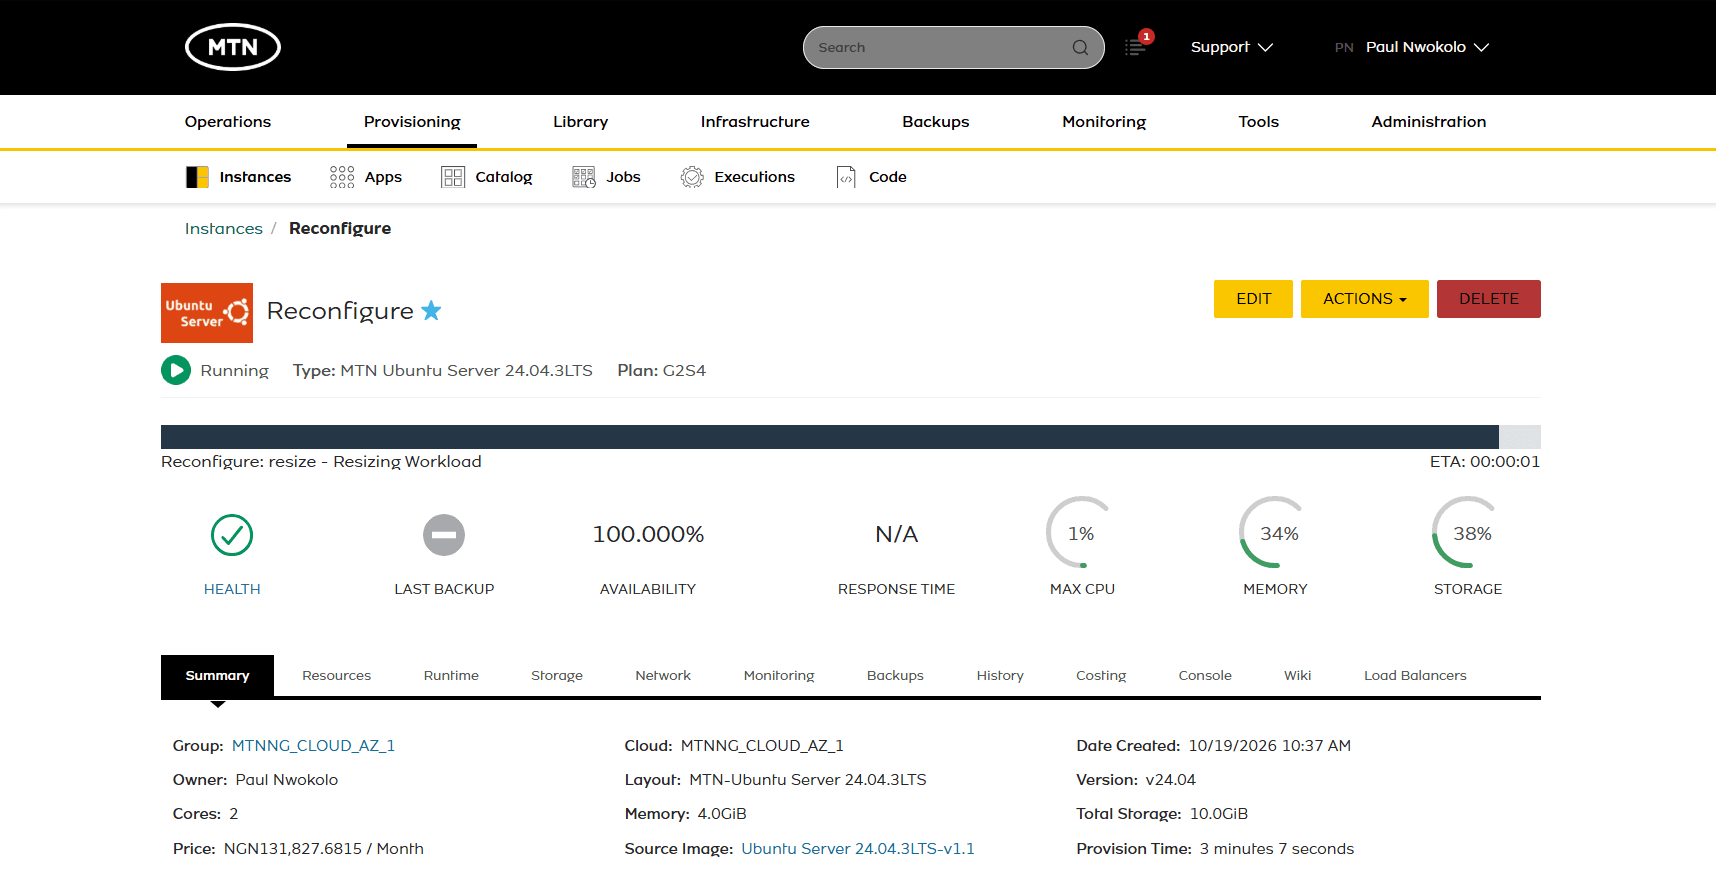
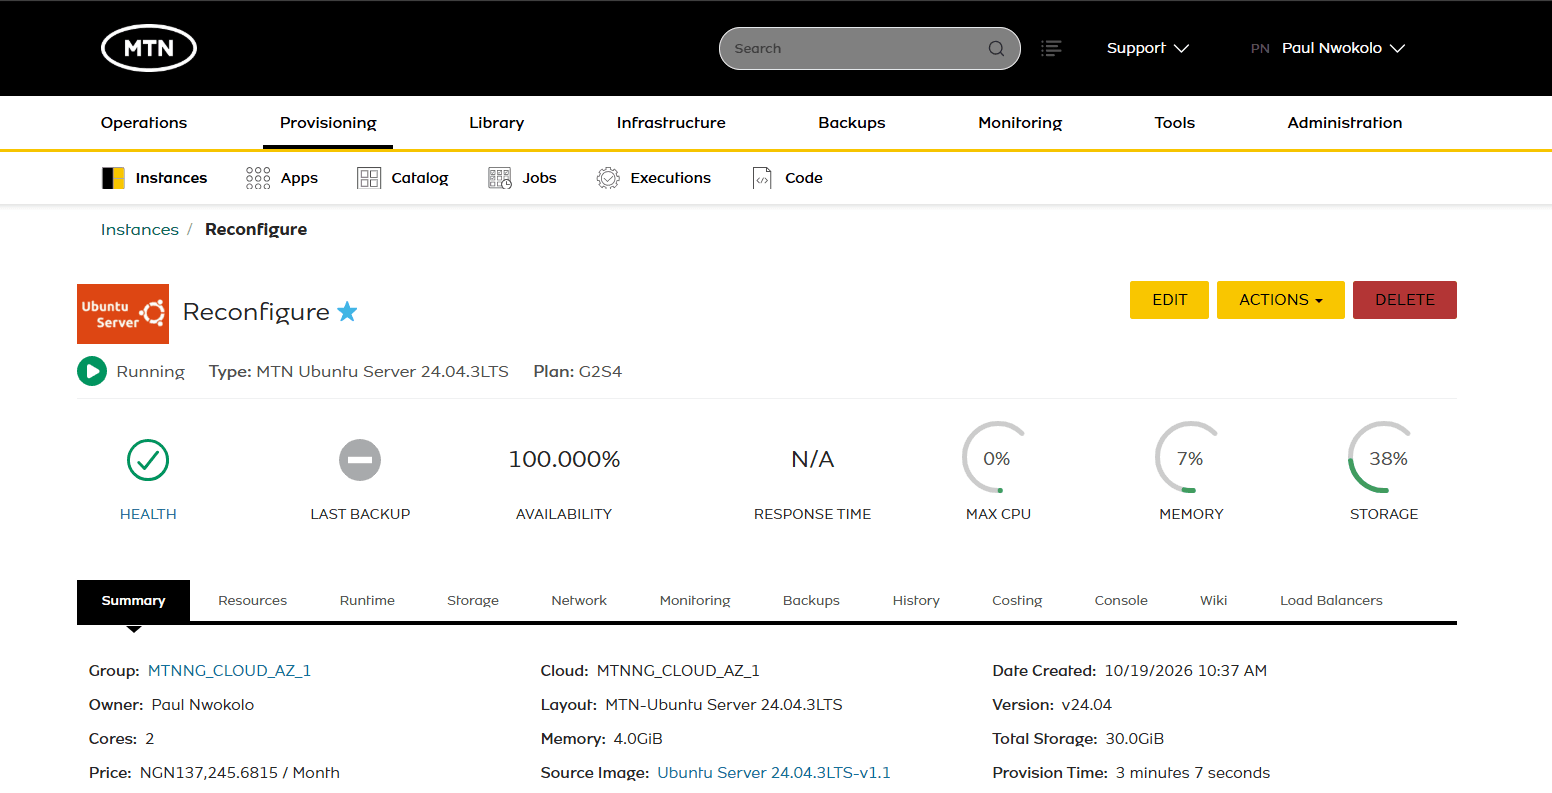
- When the instance returns to a healthy, running state, confirm the new resources on the detail page. In this example the instance now shows the G2S4 plan, with 2 cores, 4 GB of memory and 30 GB of total storage.
- If you added a volume or a network interface, complete the configuration inside the guest operating system, for example by mounting the new disk or configuring the new network interface.
Result: your instance is reconfigured and now runs with its updated compute tier, storage volumes and network interfaces.
Final Notes
- Plan the downtime: the instance restarts during a reconfiguration, so schedule it for a time when a brief interruption is acceptable.
- Add storage with volumes: the root disk cannot be increased. Attach a new data volume for additional storage.
- Configure the guest OS: a new volume must be mounted, and a new network interface configured, inside the guest operating system.