
Project Creation Workflow on MTN Cloud
Before You Start (prerequisites)
- Have an MTN Cloud Console login with role (permissions) to view Provisioning - eg, have the Customer Admin User role assigned.
Tip: If you don't see catalog items, contact support or refresh the portal.
Resource Pool (Project)
A Resource Pool is your isolated workspace on the MTN Cloud Platform—the dedicated environment where your compute, storage, and network resources are provisioned and managed.
💡 Why It Matters
- 🔒 Secure & Isolated
- Your workloads run in a protected space, separate from other tenants and resource pools.
- ⚙️ Customizable for Your Project
- Tailor your resource pool to match your team's needs—whether it's dev, test, or production.
- ⚡ Fast Deployment with Templates
- Launch instances quickly using predefined templates and automation
The Right Sequence
Provisioning ➡️ Catalog ➡️ Select Catalog Item (Create Project) ➡️ Fill in Data ➡️ Order Now
Step 1: Select Catalog Item
Under the Provisioning tab:
- Click on Catalog
- Select the catalog item with the following details:
- Catalog Name: Create Project
- Description: "Resource pool, where your workload will be provisioned"
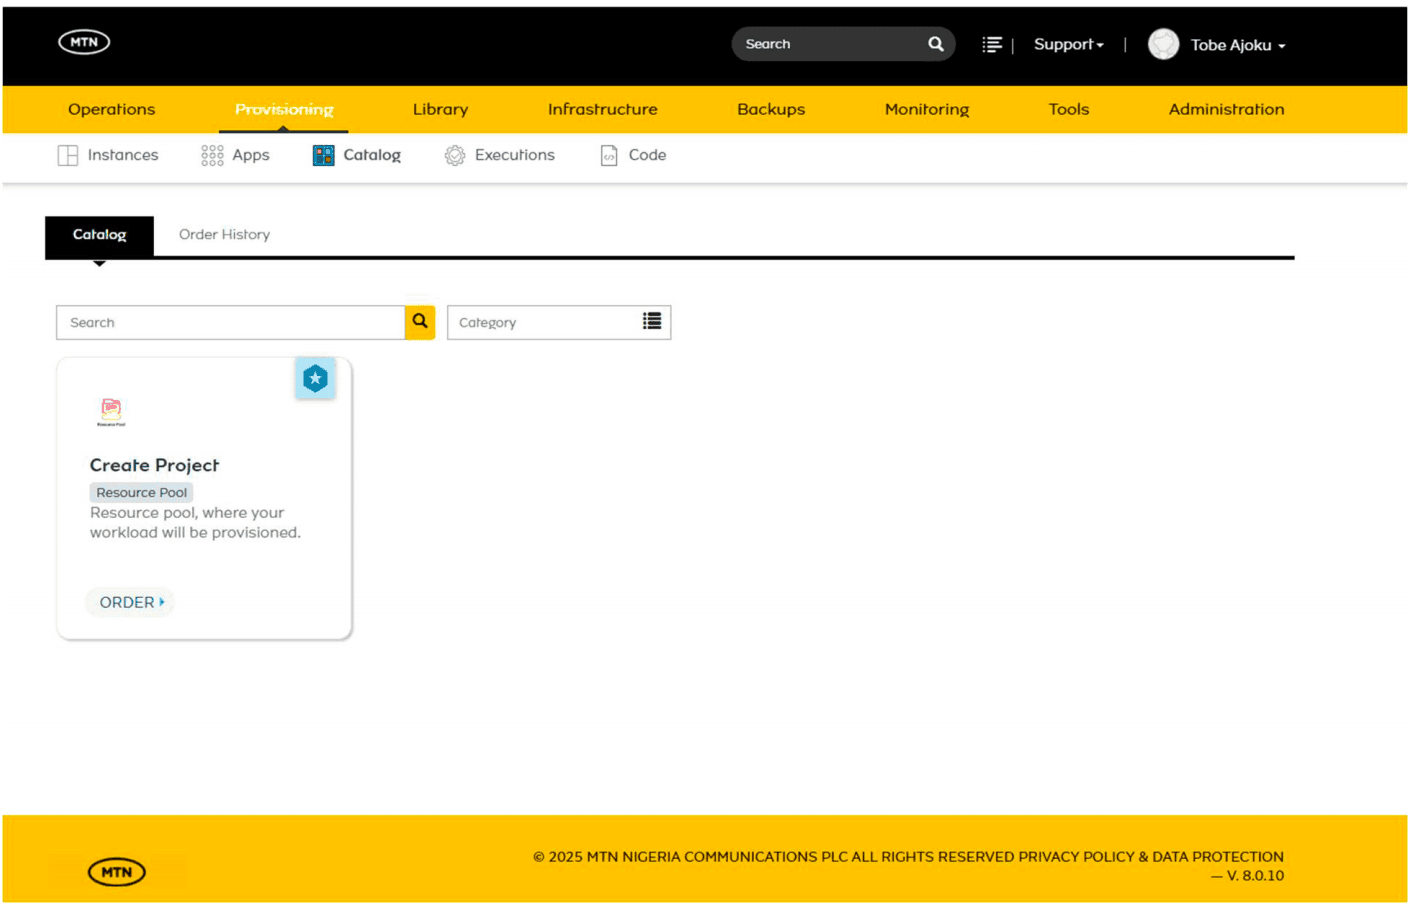
Step 2: Select Fill in Required Fields
- Group: Choose your group (e.g. MTNNG_CLOUD_AZ_1, e.t.c.)
- Cloud: Select the cloud you want to provision into ( e.g MTNNG_CLOUD_AZ_1, e.t.c.)
- Project Name: Enter a unique name for your new project (e.g., company-abc-vas-2025)
- Project Description: Optional description for your project (e.g., "VAS Service Components")
Once done, select Order Now.
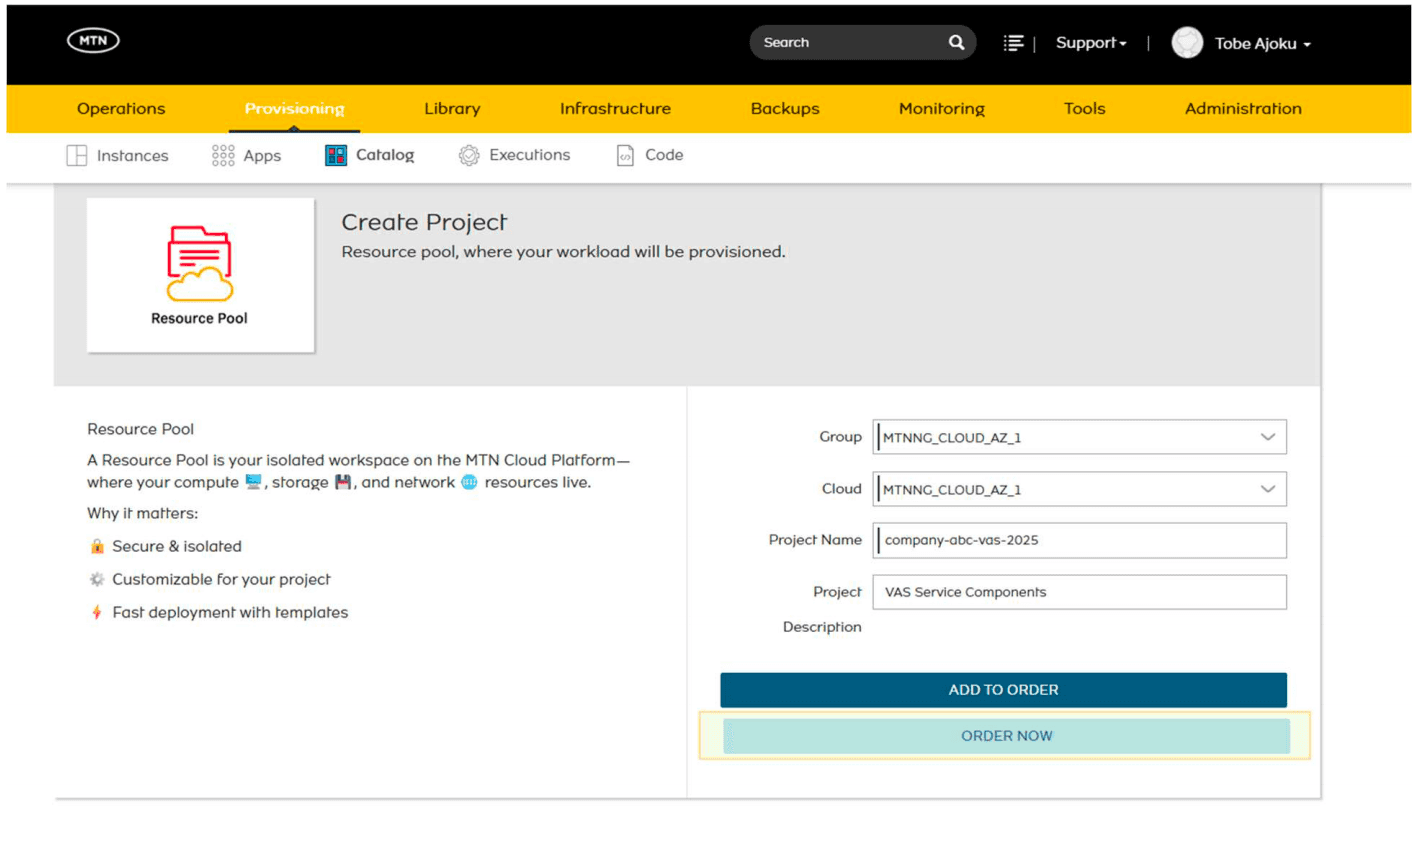
Step 3: Confirmation
- You'll receive a notification similar to the one below once the project is created.
- The project name would be in this format - [provided-project-name]-tenancy.
E.g. company-abc-vas-2025-ABC- where ABC represents the name of the customer tenancy
- Wait for about ten (10) minutes before proceeding. This period is needed for all required resources to be made available within your tenancy.
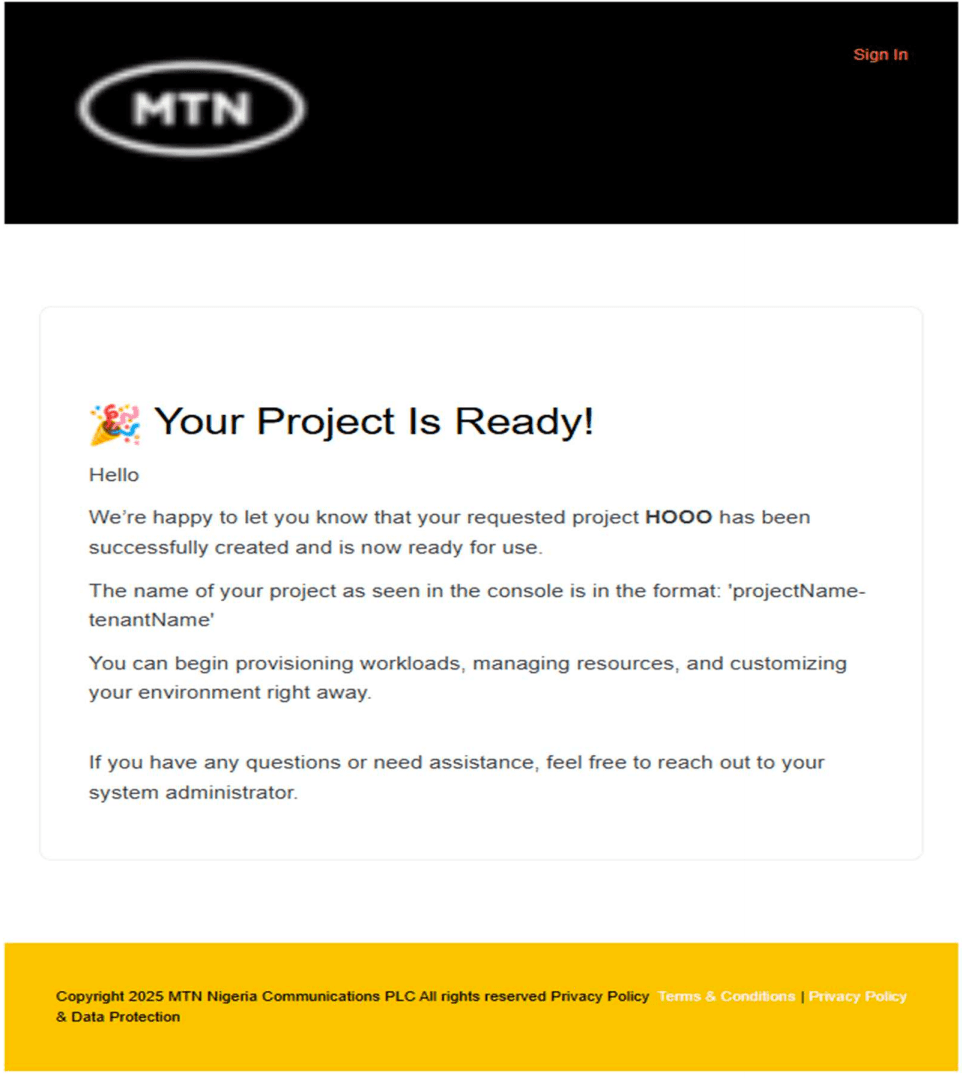
Step 4: Usage
When provisioning a VM instance, creating a Network, creating a Router, and Security Group(s) that are meant to be part of this project (e.g., the company-abc-vas-2025-ABC as in the example above). Look out for the Resource Pool field and ensure that the project name is selected.
Note: A customer may have multiple Resource Pools (projects) in a tenancy (if there is a need to completely isolate services at that level)
- The new resource pool (project) will appear in the instance provision wizard or any other wizard where resource pool selection is required.
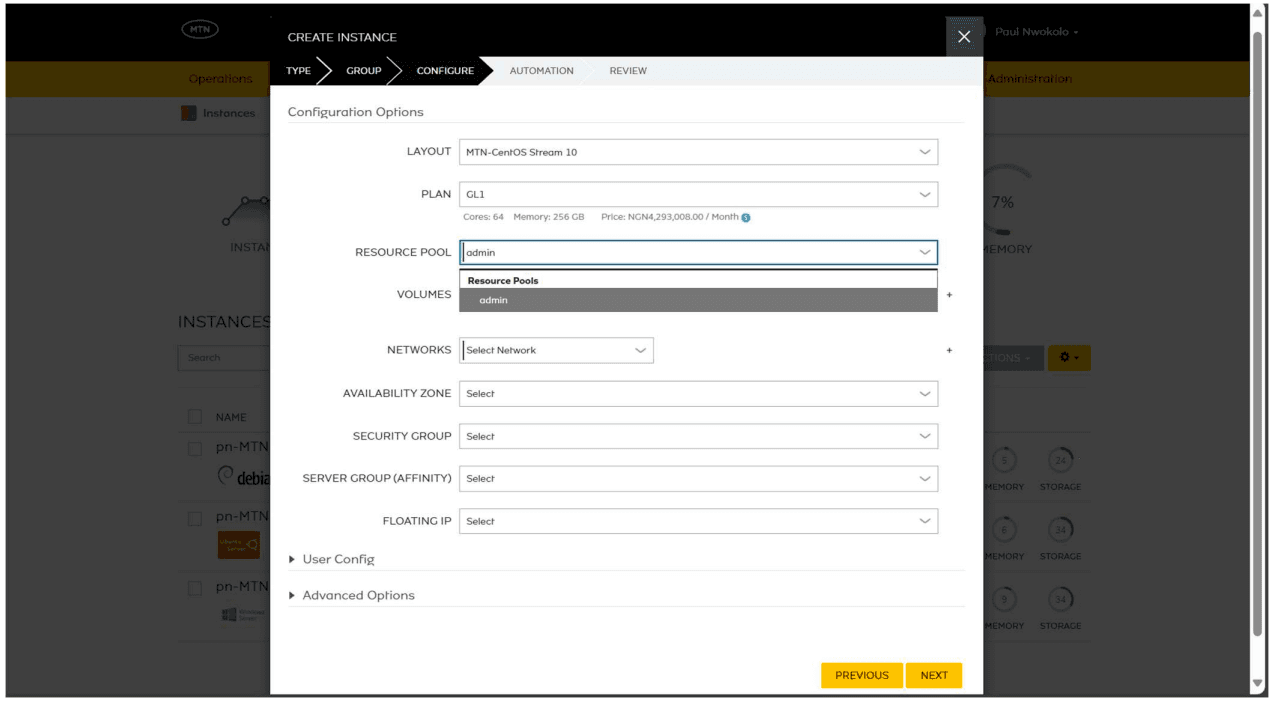
Congratulations! Your Project (resource pool) has been successfully created. You can now start provisioning compute, storage, and network resources in your isolated workspace on the MTN Cloud Platform.