
LEMP Stack Server Provisioning Workflow on MTN Cloud
Overview
This guide covers the automated deployment of a fully integrated LEMP (Linux, Nginx, MySQL, PHP) stack server on the MTN Cloud Platform. This service allows you to host dynamic, database-driven web applications using either the Service Catalog or the standard Instance provisioning wizard.
Why it matters:
- High-Performance Web Stack: Uses Nginx as the web server, known for its high performance, low resource consumption, and ability to handle high-concurrency workloads.
- Database Integration: Includes a pre-configured MySQL database with user credentials, enabling immediate connection for your web applications.
- PHP Customization: Supports multiple PHP versions with configurable memory limits and upload sizes to match your application requirements.
- Modern Architecture: Leverages PHP-FPM for efficient PHP processing, delivering better performance for dynamic content than traditional Apache mod_php.
Prerequisites
Before you begin, ensure you have:
- An active MTN Cloud Console login with the appropriate permissions (e.g., Customer Admin User role) to view the “Provisioning” and “Infrastructure” tabs.Tip: If you do not see required features and resources, please refresh the portal or contact support.
- A created Resource Pool (Project). Refer to the Project Creation Workflow documentation.
- A created Network. Refer to the Network and Router Creation Workflow documentation for detailed steps.
- A created Router with the network attached. Refer to the Network and Router Creation Workflow documentation for detailed steps.
- A pre-configured Security Group to manage inbound/outbound traffic. Refer to the Security Group Creation documentation for detailed steps.
- A planned deployment strategy (e.g., specific IP needs, naming conventions, and database configuration details).
Important Note: You must include inbound rules in your security group for the ports required by the LEMP stack (e.g., Port 80 for HTTP, Port 443 for HTTPS, Port 3306 for MySQL) to ensure the services are accessible.
Phase 1 – Deploy MTN LEMP Stack Server
Step 1 - Select Catalog Item
Navigate to the Provisioning tab and click on Catalog. Search for and select MTN LEMP(PHP) item.

Figure 1: Accessing the Catalog from the Provisioning dashboard.

Figure 2: The Catalog view displaying the “MTN LEMP (PHP)” option for ordering.
Step 2 - Configure Deployment
Fill in the following details in the order form:
General Configuration:
- Group & Cloud: Select your assigned group and cloud.
- Name: Provide a unique name for your LEMP server.
- Environment: Select the appropriate environment (e.g., Development, Staging, Production).
- Labels: Optionally, add labels for organizational purposes.
Instance Configurations:
- Resource Pool: Choose the appropriate Resource Pool (Project).
- Plan:Select a service plan that defines the VM’s CPU and memory resources.
- Volumes: Select the required volume capacity.
- Network(s): Assign your Network.
- Web Server Port: Define the web server port (default is 80).
- Security Groups: Select both the Default security group and the custom Security Group created earlier.
- Floating IP: Assign a floating IP if required.
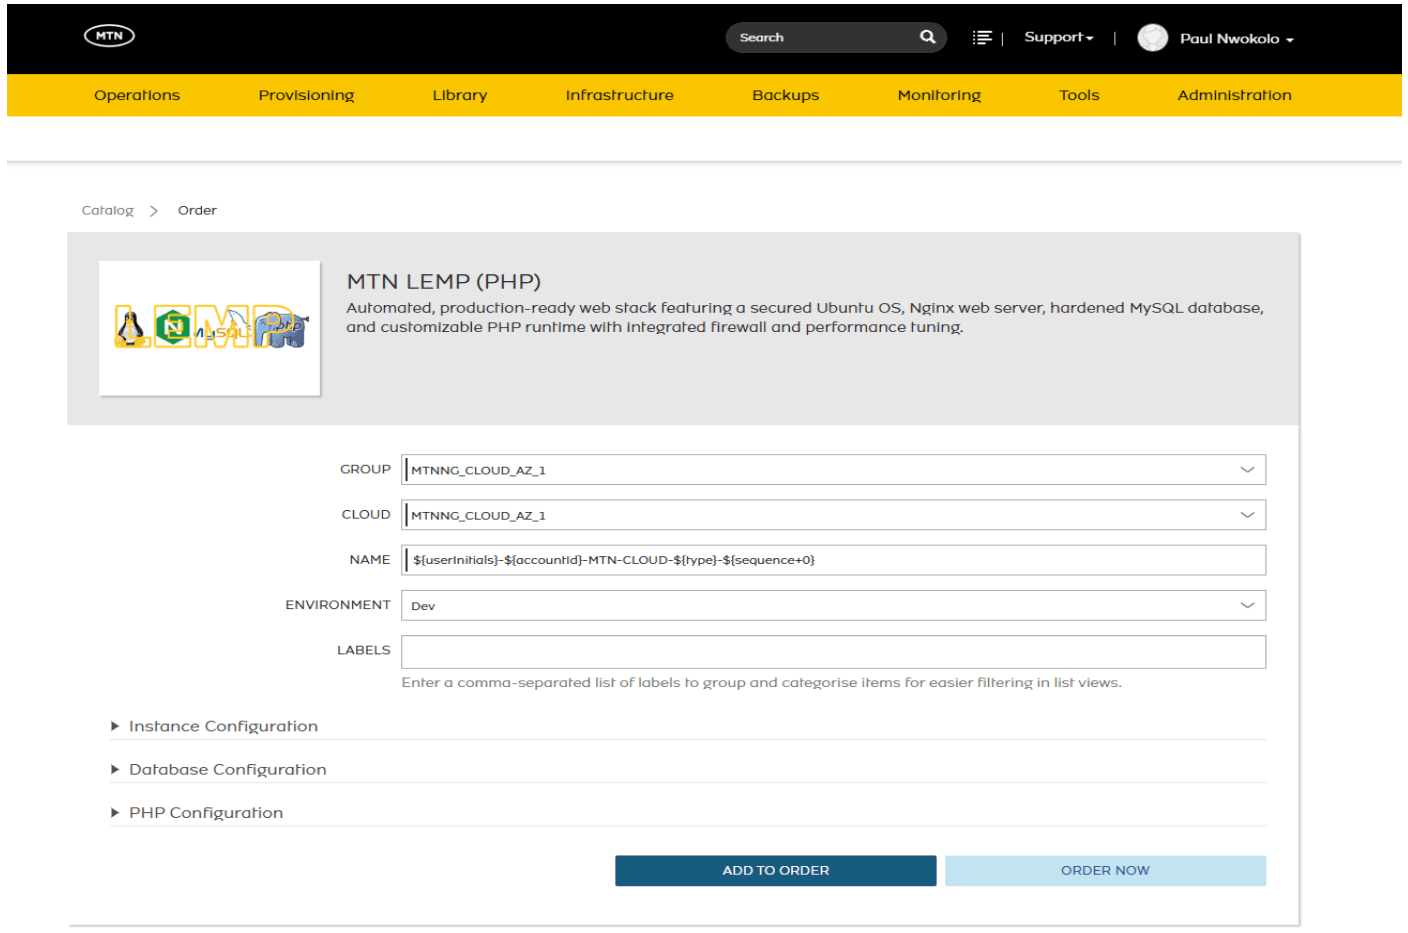
Figure 3: The deployment order form.
Database Configuration:
- MySQL Version: Select either 8.0 or 8.4 LTS.
- Database Name: Enter a name for your database.
- DB Username: Enter a username for database access.
- DB Password: Enter a strong password for the database user.
- Make DB Owner?: If checked, the user created will be the database owner.
- Require SSL for Connections?: Enable SSL encryption for database connections.
- Allowed CIDRs: Specify CIDR ranges allowed to connect to the database.
- Use HostSSL?: If checked, Host CIDRs will be configured as HostSSL.
- Password Expiry Days: Set the number of days after which the database password expires.
PHP Configuration:
- PHP Version: Select from available versions (e.g., 8.3, 8.4, or 8.5).
- PHP Memory Limit: Define the memory limit for PHP scripts (e.g., 256M).
- Max Upload Size: Set the maximum file upload size (e.g., 64M).
Click Order Now to initiate the deployment.
Step 3 – Verify and Manage
Navigate to Provisioning > Instances to view your running server.
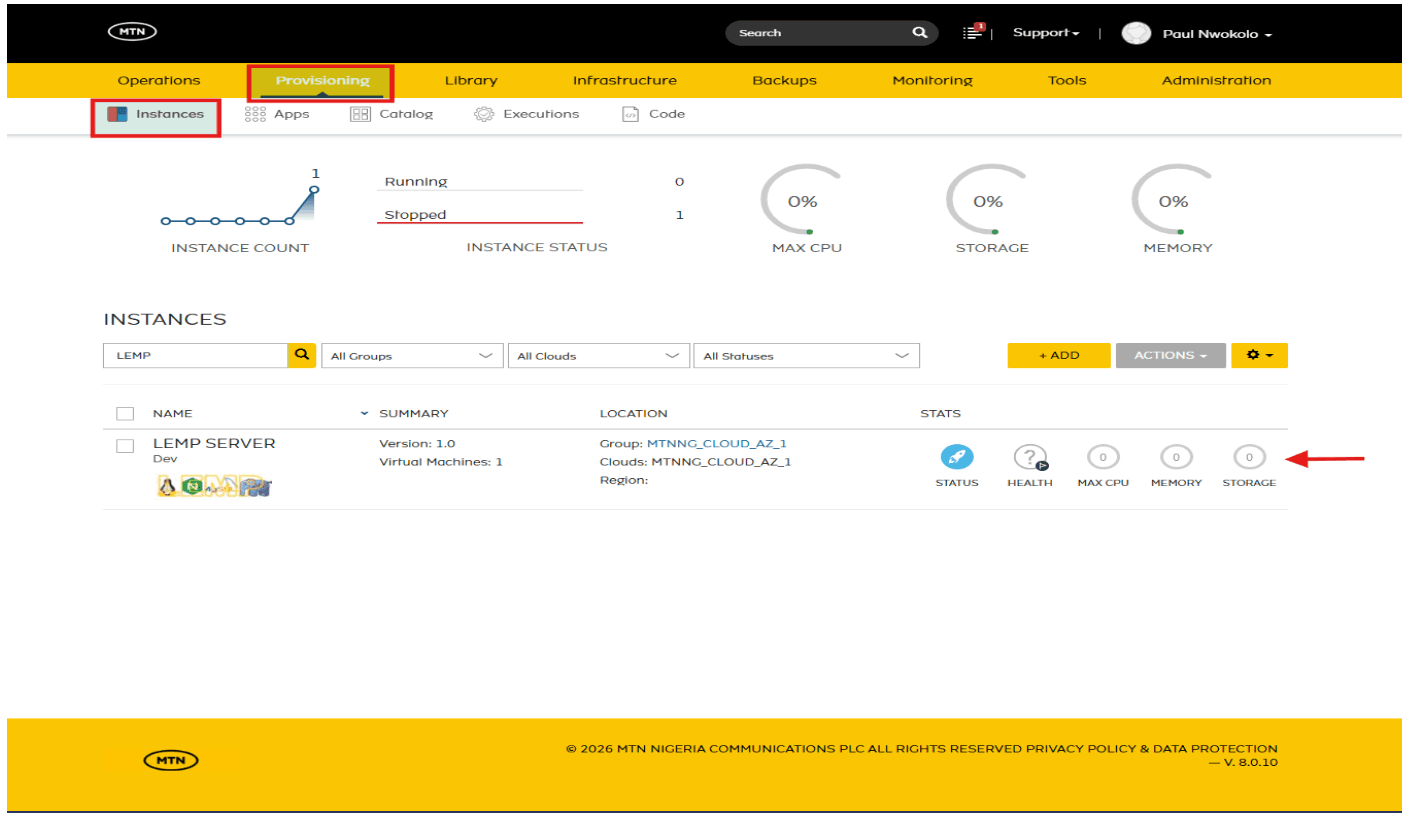
Figure 4: Instance view showing the status and health of the provisioned LEMP stack server
Once the status shows as Running, expand the Addresses section and select the provided HTTP link to confirm the web server is live.
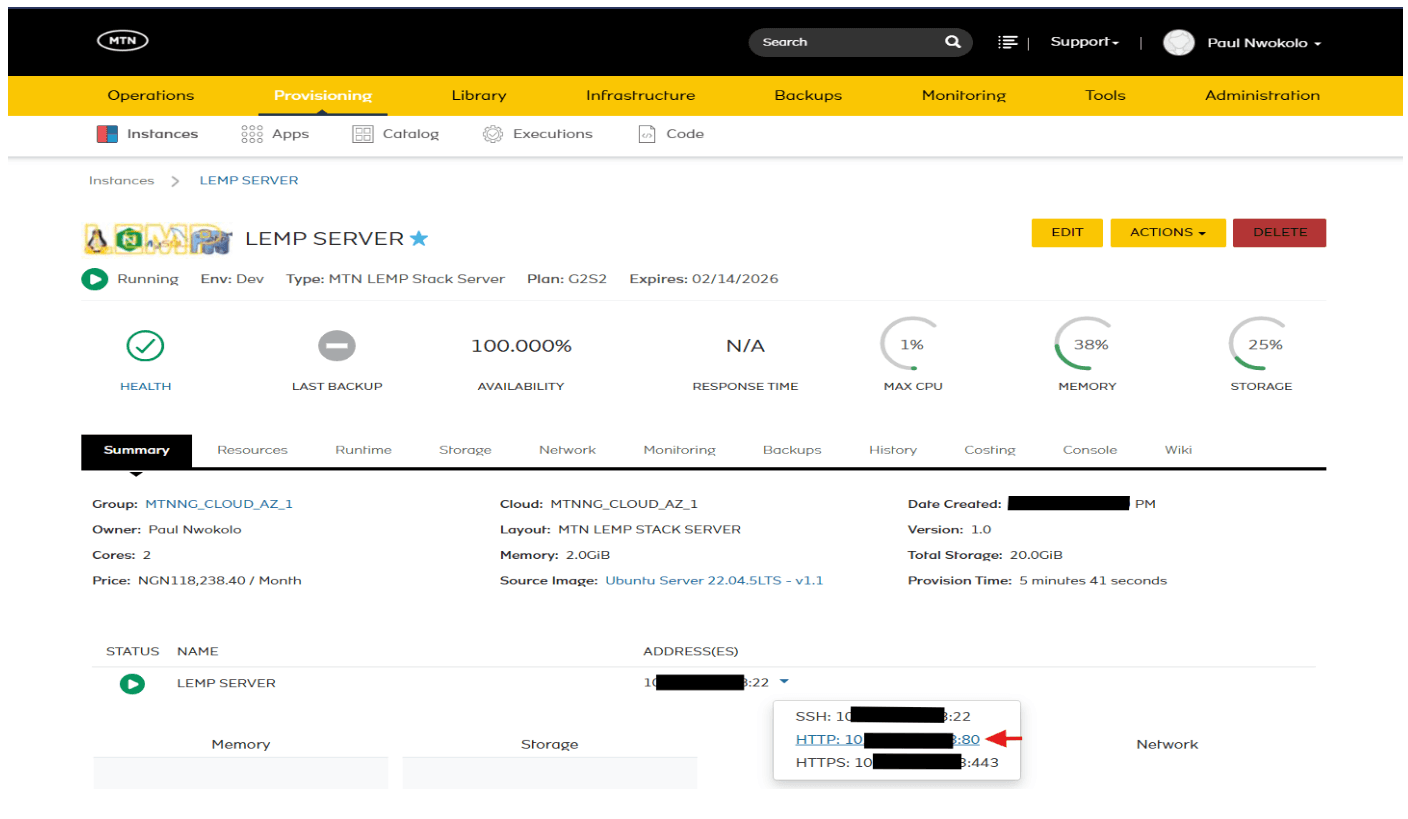
Figure 5: Instance details view showing the HTTP address link for verification
If the Nginx web service uses a custom port, verify it by entering the instance’s public IP, followed by that port in your browser.
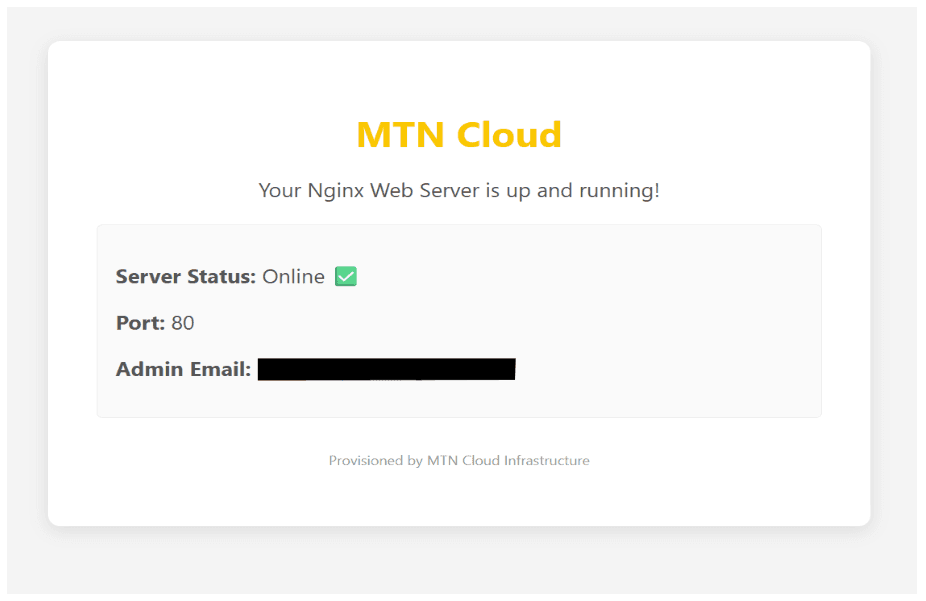
Figure 6: The verification page confirming the Nginx Web Server is up and running
Verify PHP Service:
Once provisioning is complete, you can also verify the PHP service by navigating to http://<floating_IP>/info.php in your browser.
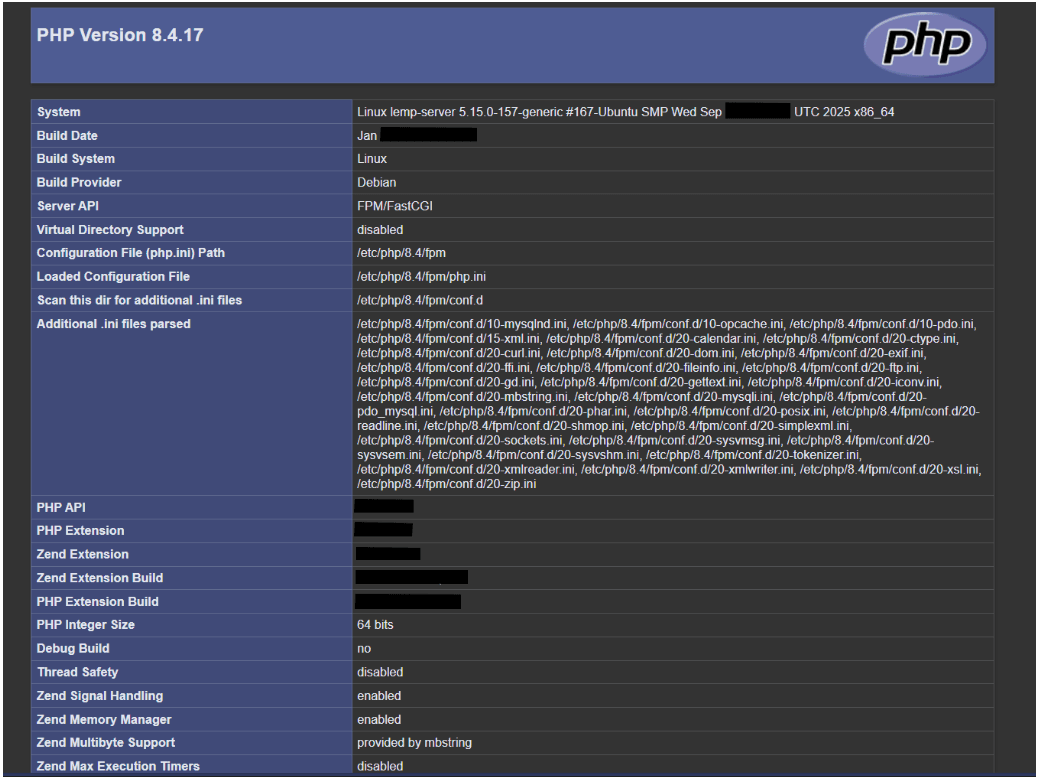
Figure 7: PHP information page confirming PHP is properly configured
Console View:
When you open the Consoletab or connect to the instance remotely, you’ll see key details about the newly provisioned LAMP stack server:
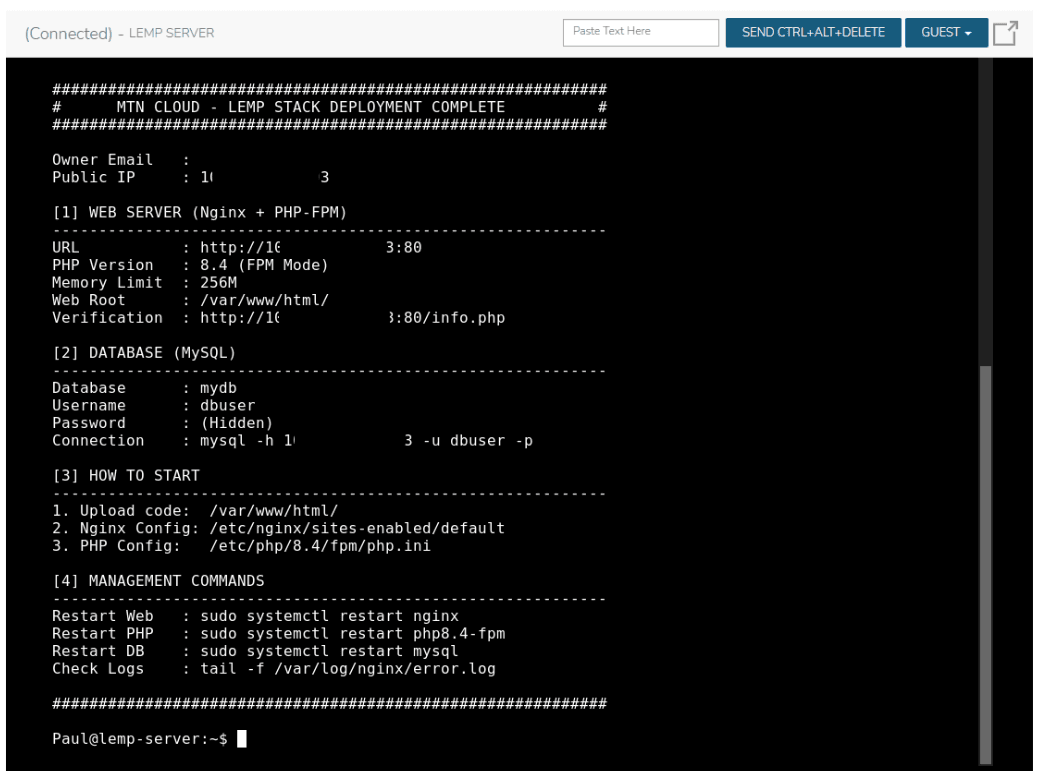
Figure 8: Console view showing server details and management commands.
Additional Deployment Method
The instance can also be provisioned via the Instances tab—the same way you would normally create an instance or virtual machine—by selecting the MTN LEMP Stack Server instance type.
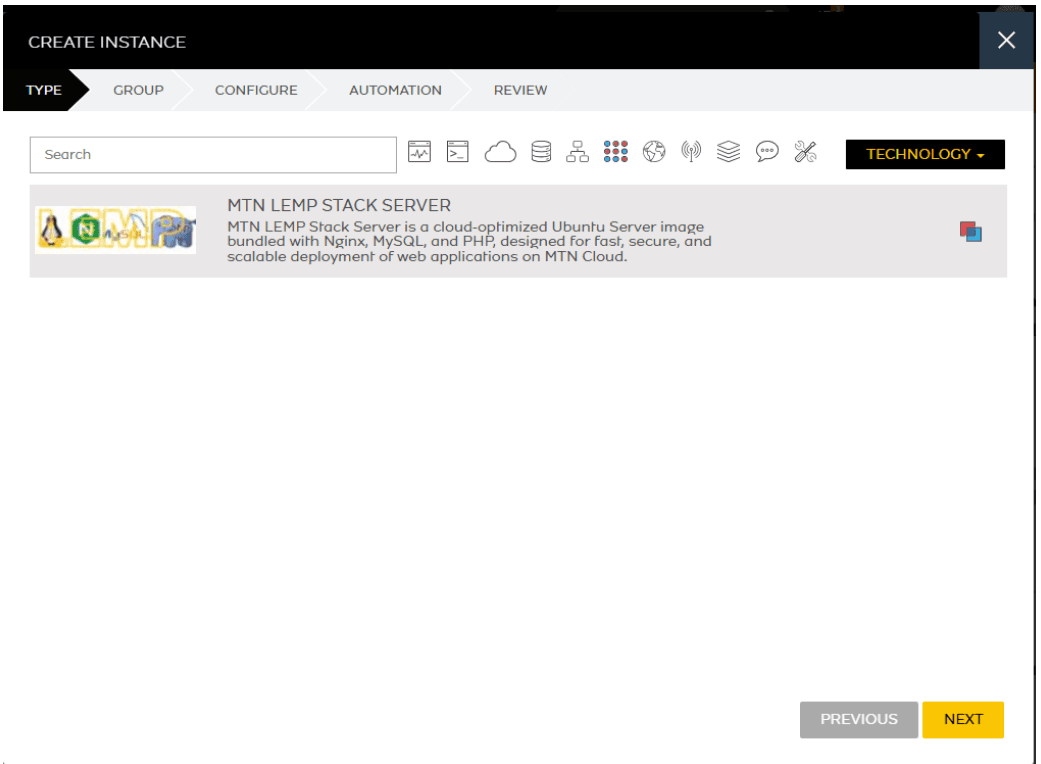
Figure 9: Deploying via the Instance tab.
Important Tips and Notes
- Security: Default authentication is active. For production environments, immediately strengthen passwords and run mysql_secure_installation to harden the database.
- Remote Access: External connections to MySQL are blocked by default. To enable them, update the MySQL bind-address and open the firewall for the database port in your security group.
- Connectivity:Applications connect to the database via the instance’s public IP using standard credentials. For local connections from the same server, use localhost (127.0.0.1). No special client-side configuration or drivers are required.
- SSL Configuration: If HTTPS is required, you can install certificates and enable SSL modules through standard Nginx configuration files.
- Management: Use the provided management commands in the console to restart services or check logs:
- Restart Nginx: sudo systemctl restart nginx
- Restart PHP-FPM: sudo systemctl restart php8.4-fpm
- Restart DB: sudo systemctl restart mysql
- Check Logs: tail -f /var/log/nginx/error.log
- Configuration Files: Key configuration files for customization:
- Nginx: /etc/nginx/sites-enabled/default
- PHP: /etc/php/<version>/fpm/php.ini
- Code Deployment: Upload your application code to /var/www/html/ and configure Nginx virtual hosts in /etc/nginx/sites-enabled/ as needed.