Domain Controller Integration Guide on MTN Cloud
Introduction
This comprehensive guide walks you through integrating the Domain controller with MTN Cloud for centralised identity management.
Prerequisites
Port Requirements: Core ports (53, 88, 389) are mandatory for Active Directory authentication and directory services. Supporting ports (135, 464) are recommended for full functionality. NetBIOS ports (137-139) are only required for legacy or NetBIOS-based environments.
| PORTS | PROTOCOL | SERVICE | PURPOSE |
|---|---|---|---|
| 53 | TCP/UDP | DNS | Name Resolution |
| 88 | TCP/UDP | Kerberos | Authentication |
| 135 | TCP | RPC Endpoint Mapper | Remote procedure calls |
| 137-138 | UDP | NetBIOS | Name service |
| 139 | TCP | NetBIOS | Session service |
| 389 | TCP/UDP | LDAP | Directory Queries |
| 464 | TCP/UDP | Kerberos Password | Password Changes |
Phase 1: Domain Controller Integration
Step 1: Security Group Configuration
- Before proceeding with the integration of the Domain Controller Server to MTN Cloud, update the relevant security group with the following rules:
- Allow TCP traffic on port 389 from:
- 102.88.18.238/32
- 102.88.18.72/32
- Allow UDP traffic on port 389 from:
- 102.88.18.238/32
- 102.88.18.72/32
- Allow TCP traffic on port 389 from:
- Confirm that the rules are active and correctly applied.
Step 2: Readiness Confirmation
- Validate that all the above steps have been completed successfully before moving to the next phase.
Phase 2: Identity Source
3.1: Add the Domain Controller to Identity Source
As the Customer Admin User of your tenancy
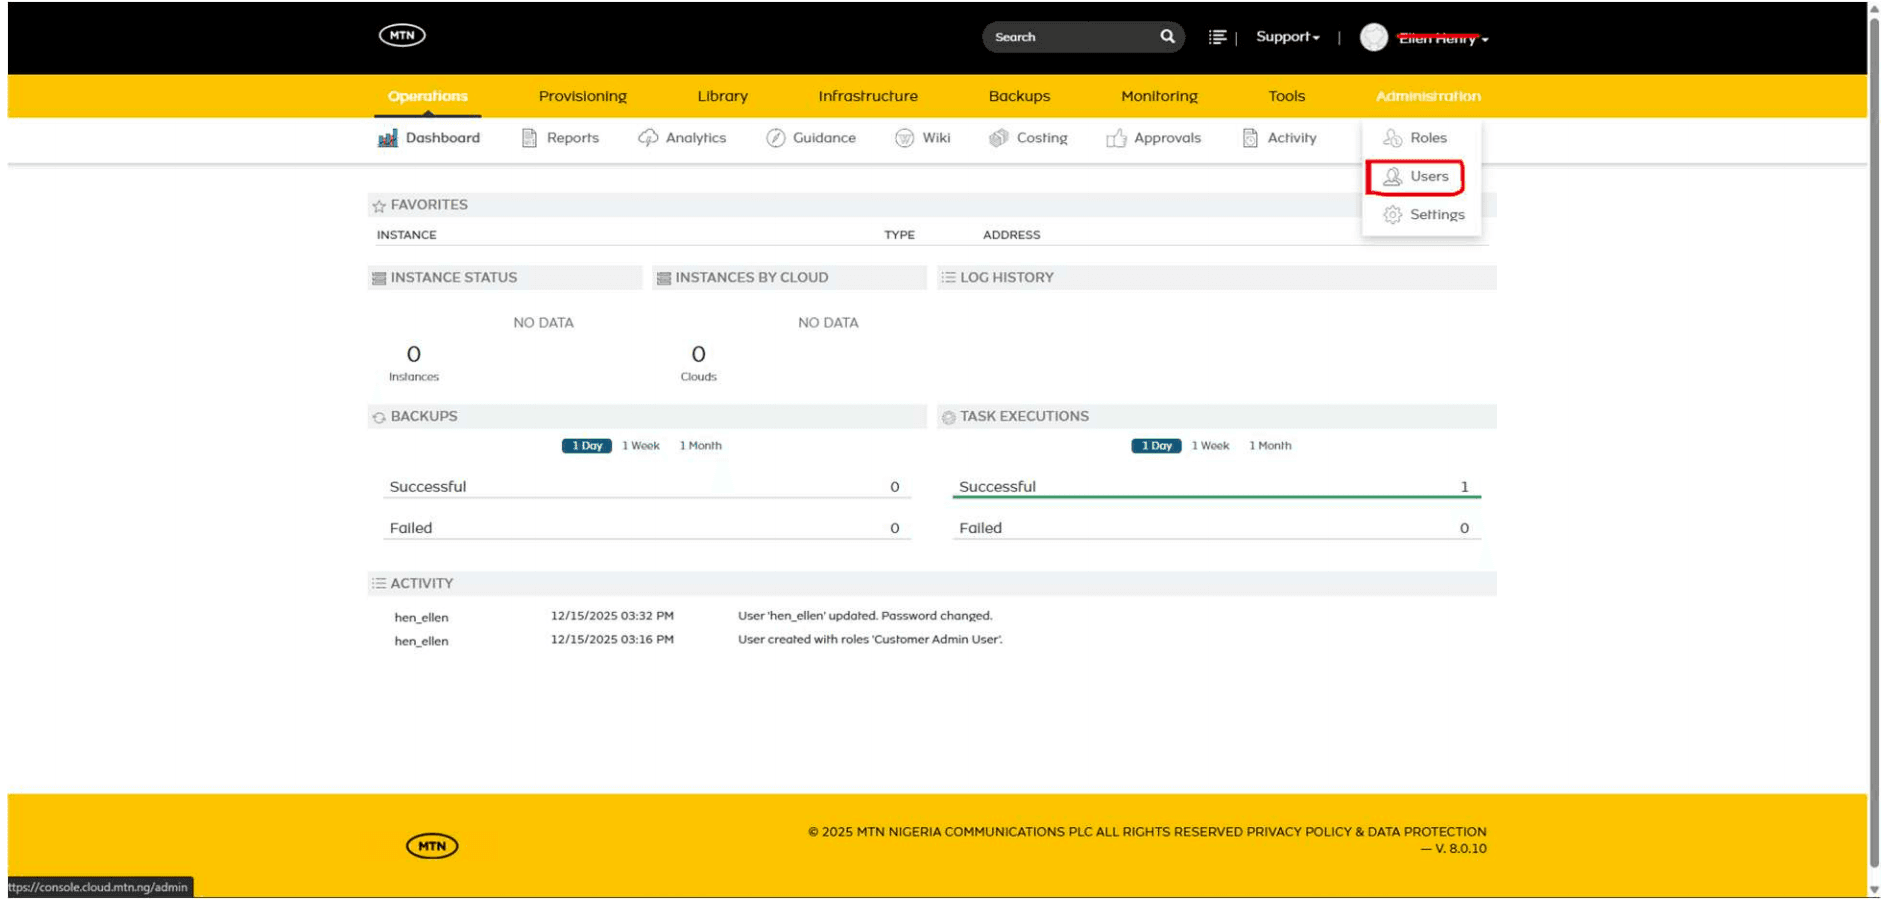
- Navigate to Administration > Users
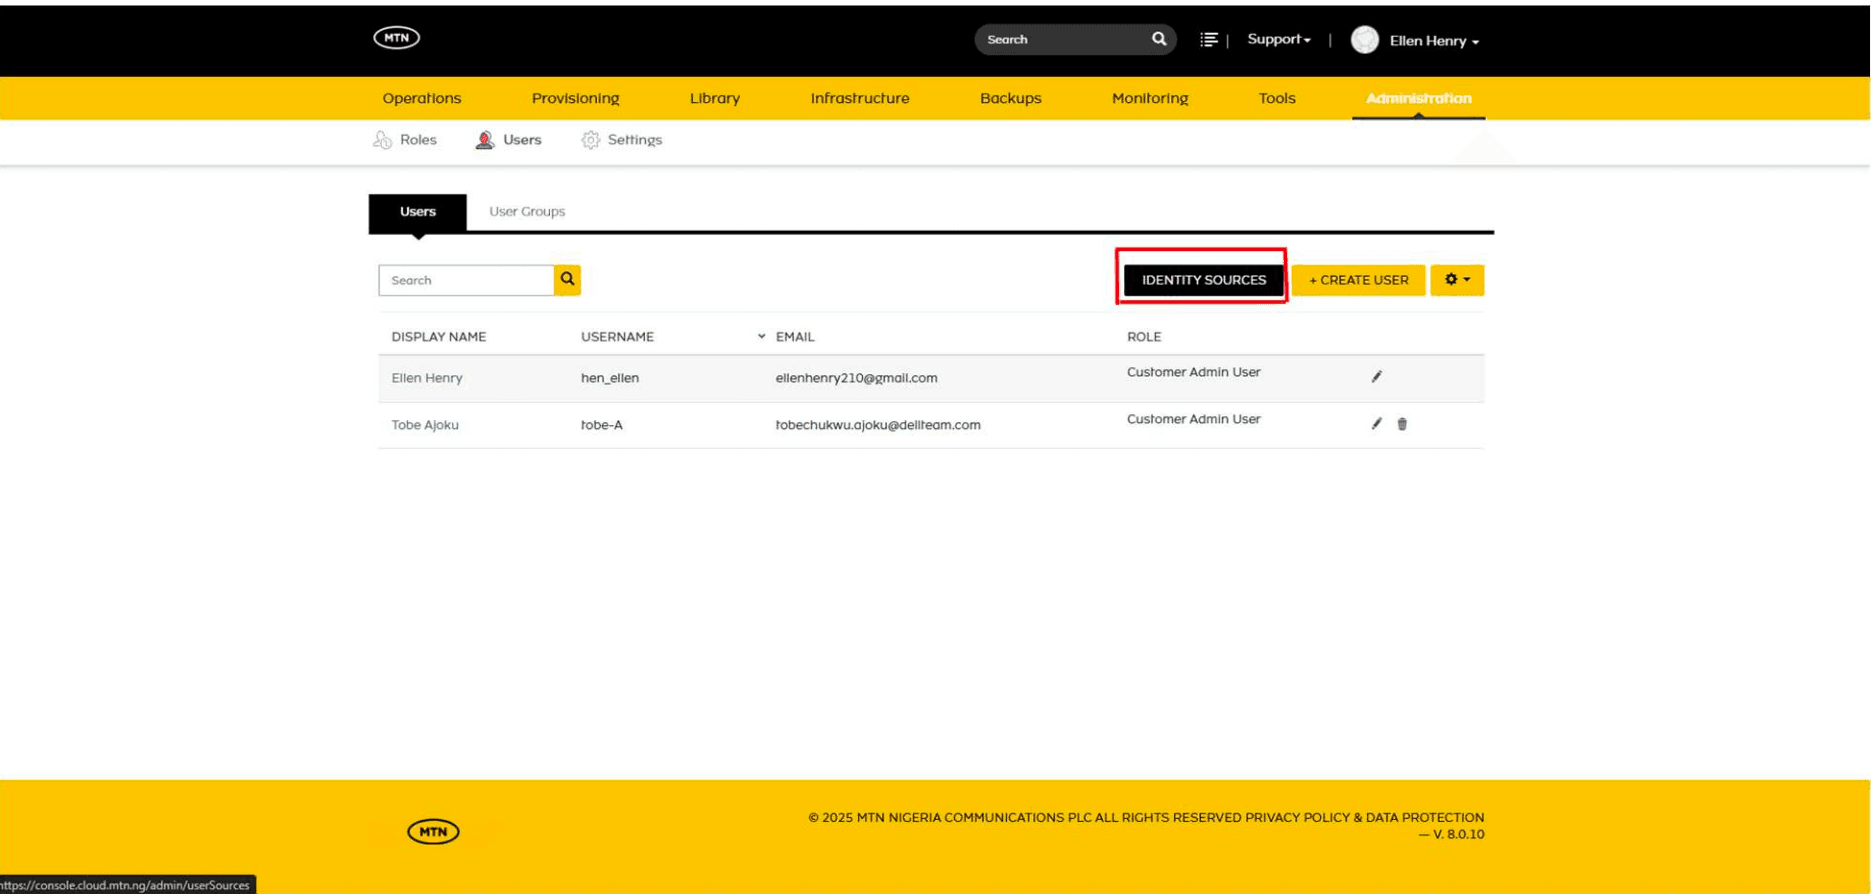
- Select Identity Sources
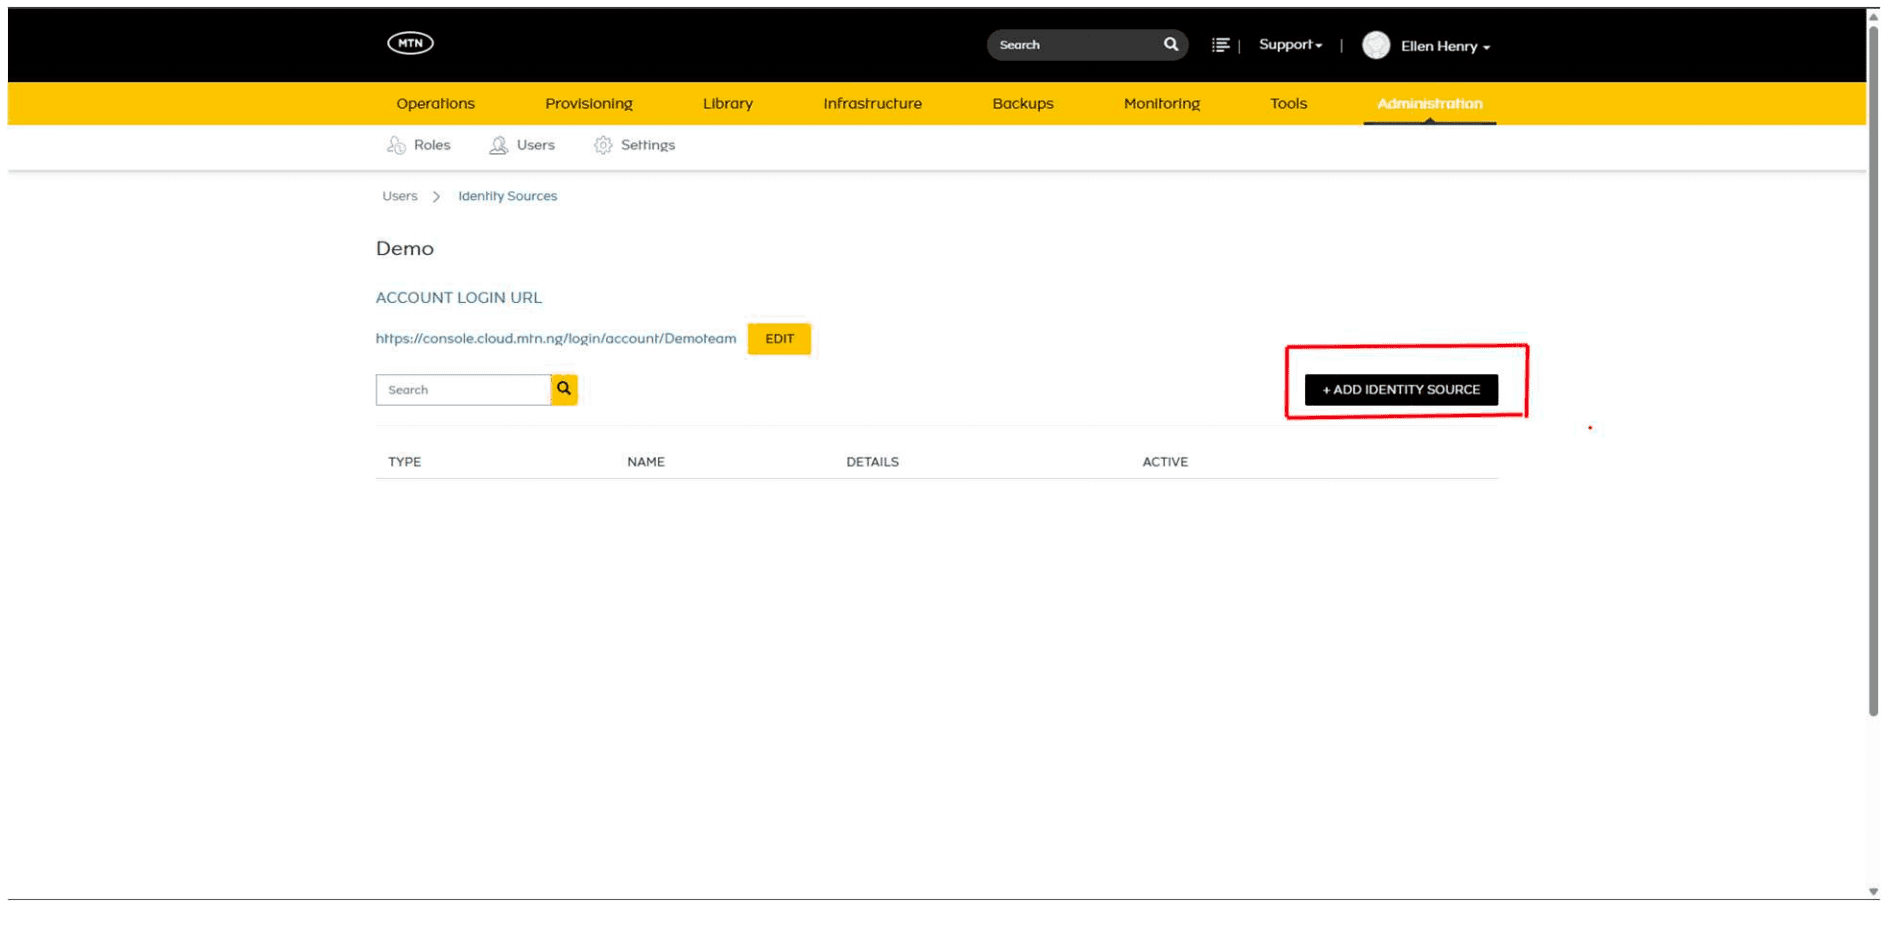
- Click on Add Identity Source
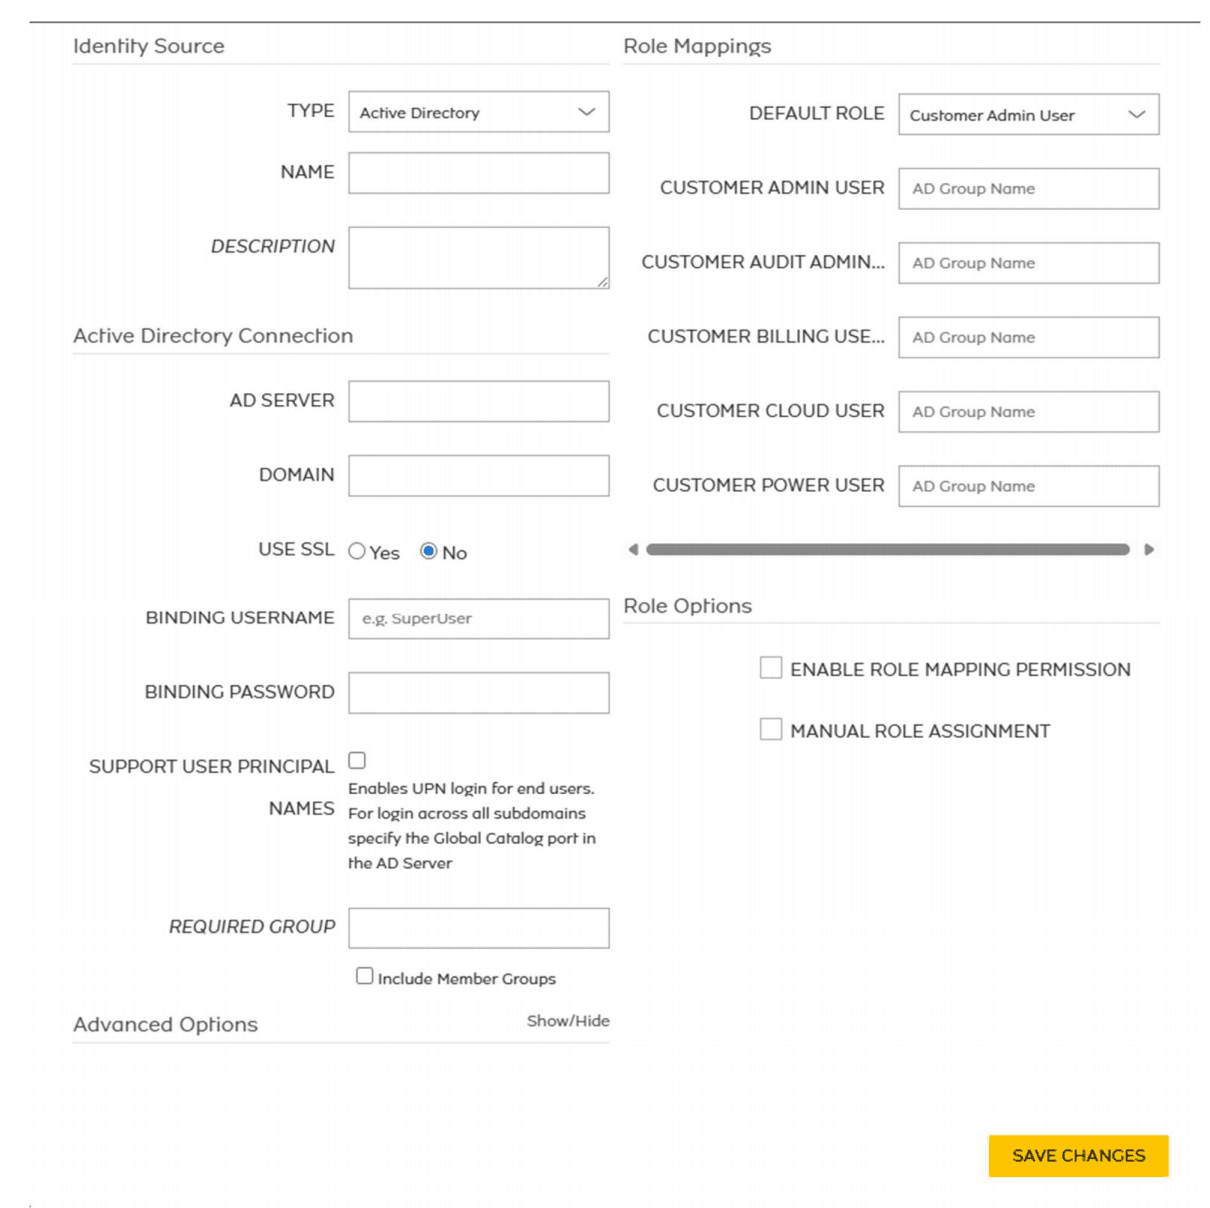
Apply the required information:
- Select the type as Active Directory.
- Name.
- Description.
- AD server (IP-Address:389), e.g 102.80.29.3:389
- Leave SSL as the default (No).
- Domain Name.
- Binding Username & Password (Administrator).
- Check the box "Support User Principal".
- Check the box "Include Member Groups".
- Check the box "Enable Role Mapping Permission".
- Check the box "Manual Role Assignment".
- Click on Save Changes