
Security Group Creation on MTN Cloud
Overview
A Security Group acts as a virtual firewall for your virtual machine instances, controlling both inbound (ingress) and outbound (egress) network traffic.
Why it matters:
- Network Defence: It provides a critical layer of security by ensuring only authorized traffic reaches your instances, blocking unauthorized access attempts.
- Granular Control: You can define specific protocols (TCP, UDP, ICMP) and port ranges, allowing you to tailor access strictly to what your application requires.
- Reusable Policies: Once created, a Security Group can be attached to multiple instances, ensuring a consistent security posture across your infrastructure.
Prerequisites
Before you begin, ensure you have:
- An active MTN Cloud Console login with the appropriate permissions (e.g., Customer Admin User role) to view the “Infrastructure” and “Network” tabs.
Phase 1 – Create Security Group
Step 1 – Navigate to Security Groups
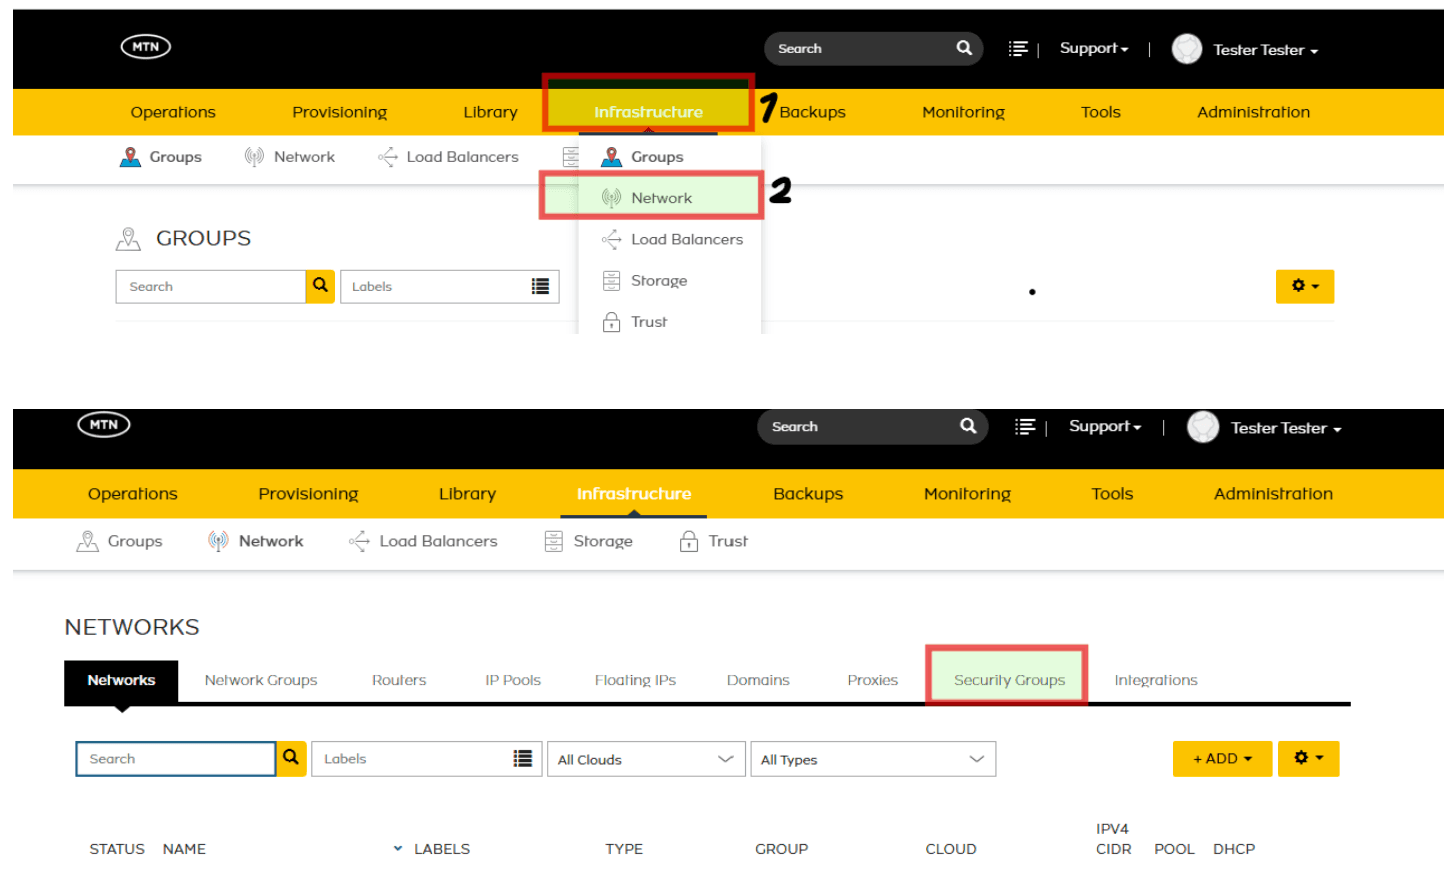
Navigate to Infrastructure → Network → Security Groups. Click the +ADD button to begin.
Step 2 – Define Security Group Identity
Once the form appears, provide the following details:
- Name: Provide a clear, unique name for the group (e.g., web-server-sg).
- Description:Add a brief explanation of the group’s purpose.
- Scoped Cloud: Select the relevant cloud environment (e.g., MTNNG_CLOUD_AZ_1)
Step 3 – Add Security Rules
- Once created, click on the name of the newly created Security Group in the list.
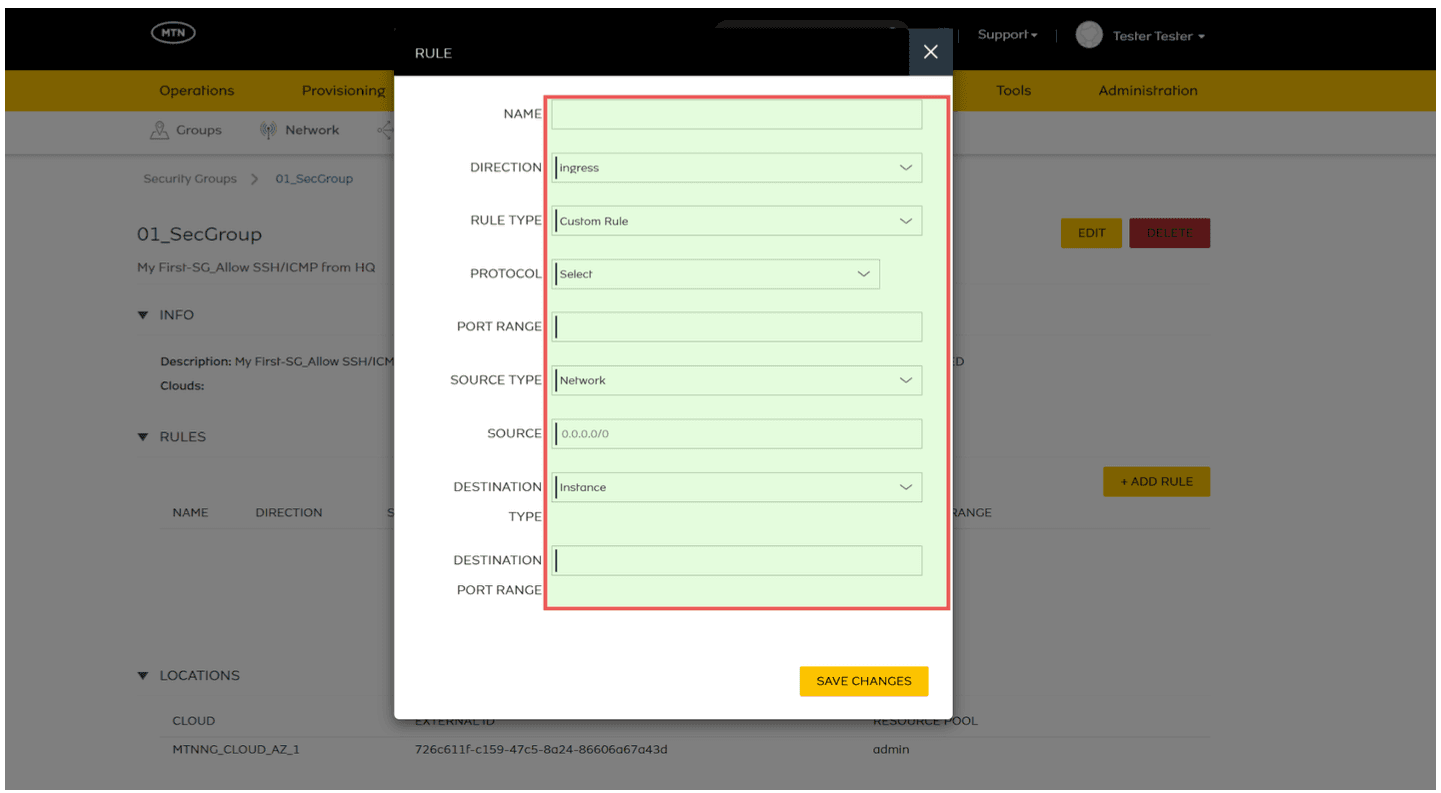
- Navigate to the Rules tab and click +Add Rules.
- Configure the rule:
- Direction: Choose Ingress or Egress.
- Protocol: Select TCP, UDP, or ICMP.
- Port Range: Enter the specific port (e.g., 80 for HTTP).
Step 4 – Assign to Location
- Navigate to the Locations tab within the Security Group.
- Click +Add Location.
- Select the required Cloud where your workloads are provisioned and click Save Changes.