
Network and Router Creation Workflow on MTN Cloud
Before You Start (prerequisites)
- Have an MTN Cloud login with permissions to view Infrastructure (Network).
- Have a Project (Resource Pool) Created
- Plan your Network:
- Have a diagram
- Decide on the IP schemes
- Define the inter-communication across planned networks and attached instances (useful in defining Security Group Rules and attaching Routers)
Tip: If you don’t see networks, routers, IP pools, etc., contact support or refresh the portal.
The Right Sequence
- ●
Create Network: Define the network by specifying its name, description, CIDR block, DNS settings, and any other required parameters, such as Group and Network Service.
- ●
Create Router: Set up the router by providing its name, selecting the resource pool, and associating it with an external network. Then, attach the previously created network subnet as an interface to enable connectivity to the internet and other networks.
Part 1 — Create Network
Purpose: Establish a tenant-specific network within MTN Cloud to enable subnet allocation, IP pool management, and router connectivity for virtual infrastructure.
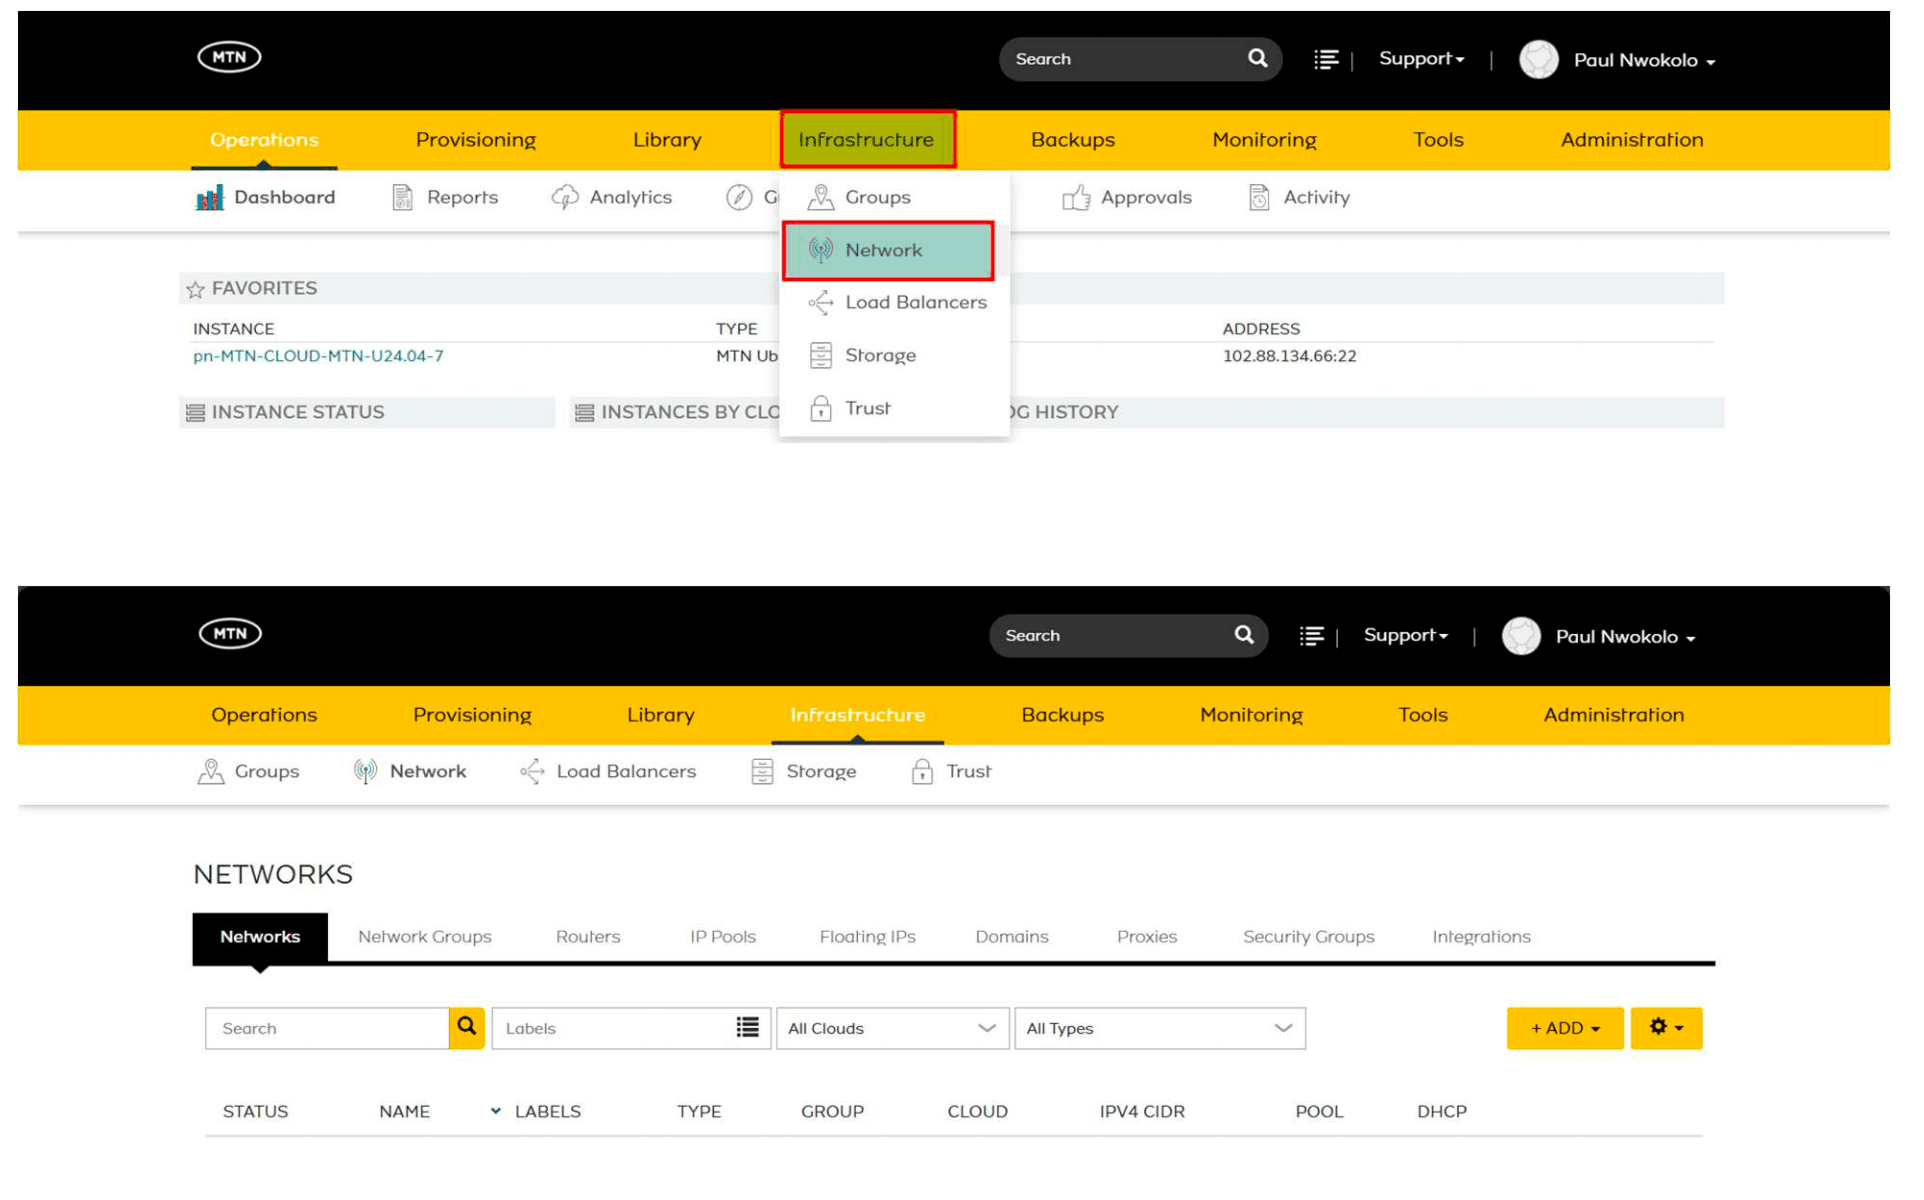
- Navigate to: Infrastructure > Network > Networks.
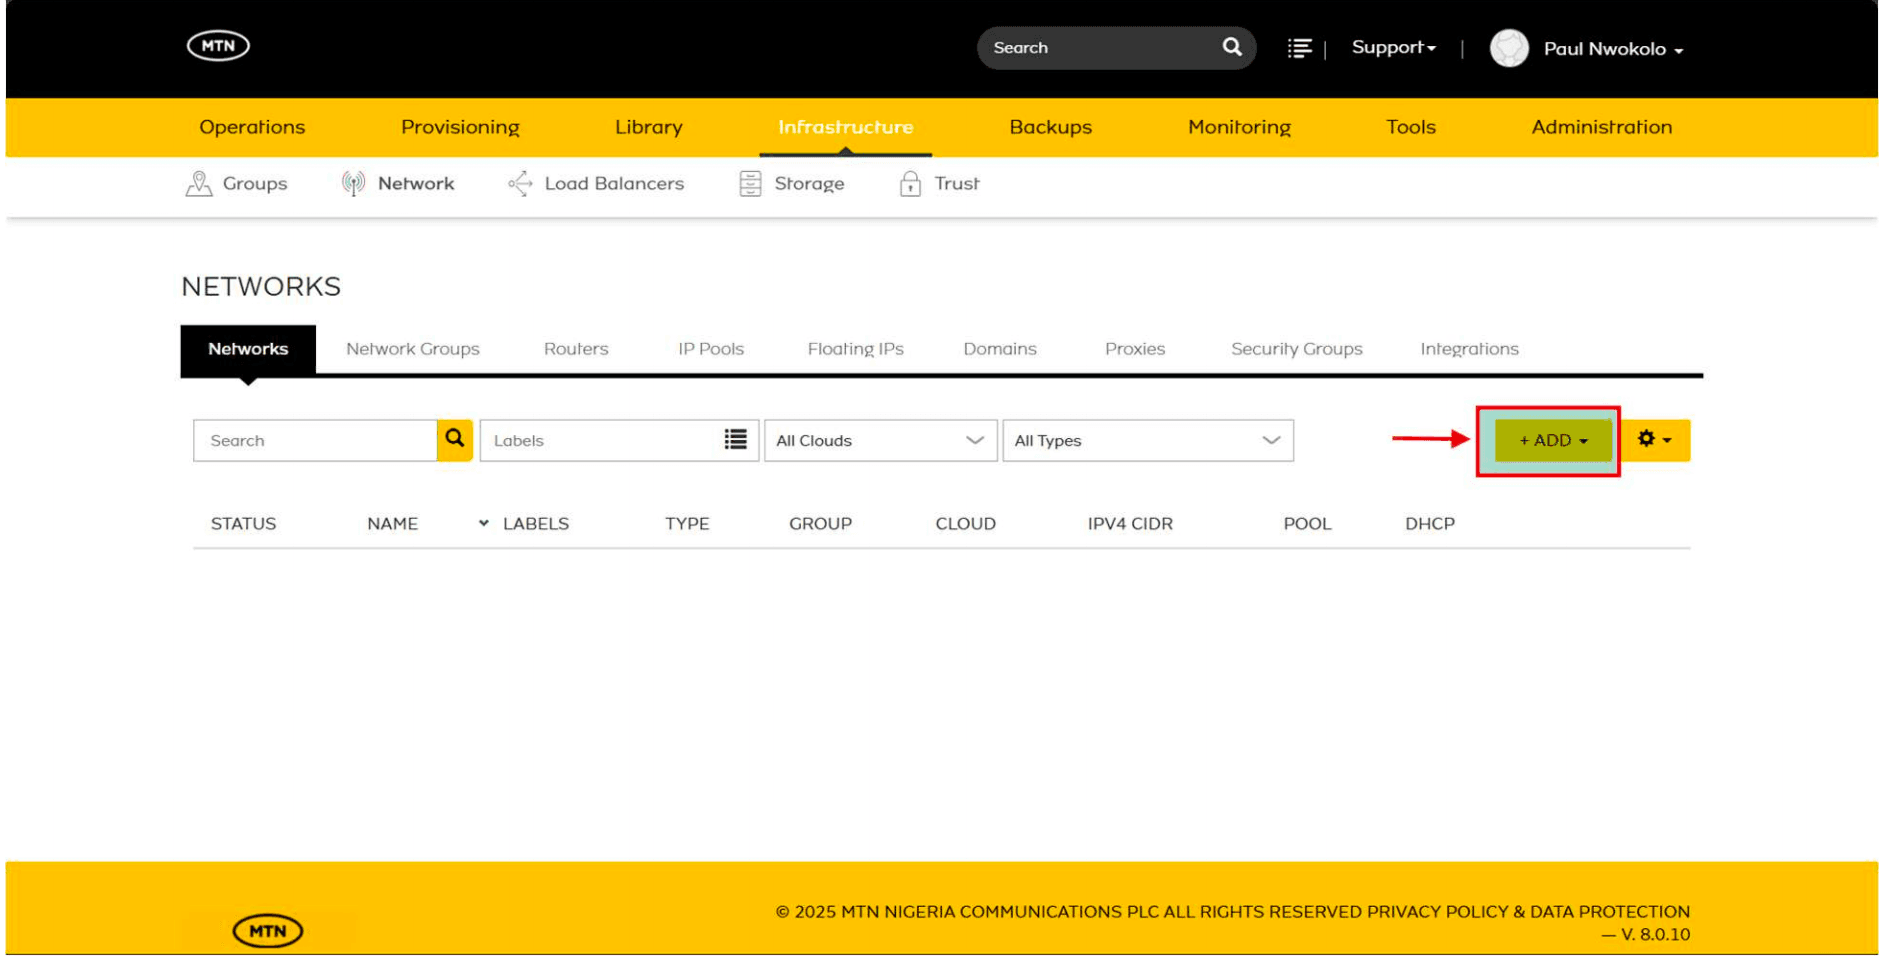
- Click +Add
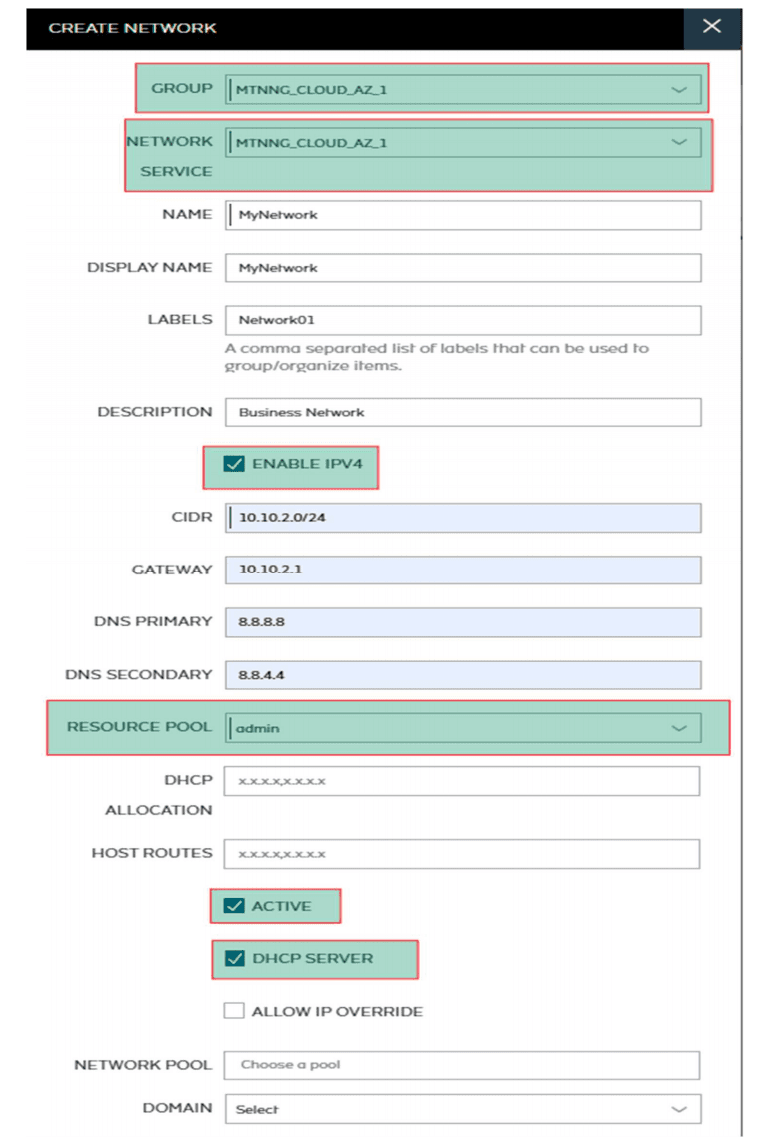
Assign:
- Group = Select a group. E.g. MTNNG_CLOUD_AZ_1
- Network Service = Select a group. E.g. MTNNG_CLOUD_AZ_1
- Name:
- Display Name
- Labels
- Description
- Check the box Enable IPV4
- CIDR
- Gateway
- DNS Primary
- DNS Secondary
- Resource Pool = Select the correct resource pool (important if you have more than one)
- (Optional) DHCP Allocation
- (Optional) Host Routes
- Check the box Active
- Check the box DHCP Server (for automatic IPv4 assignment)
- (Optional) Network pool (leave blank)
- (Optional) Domain (leave blank)
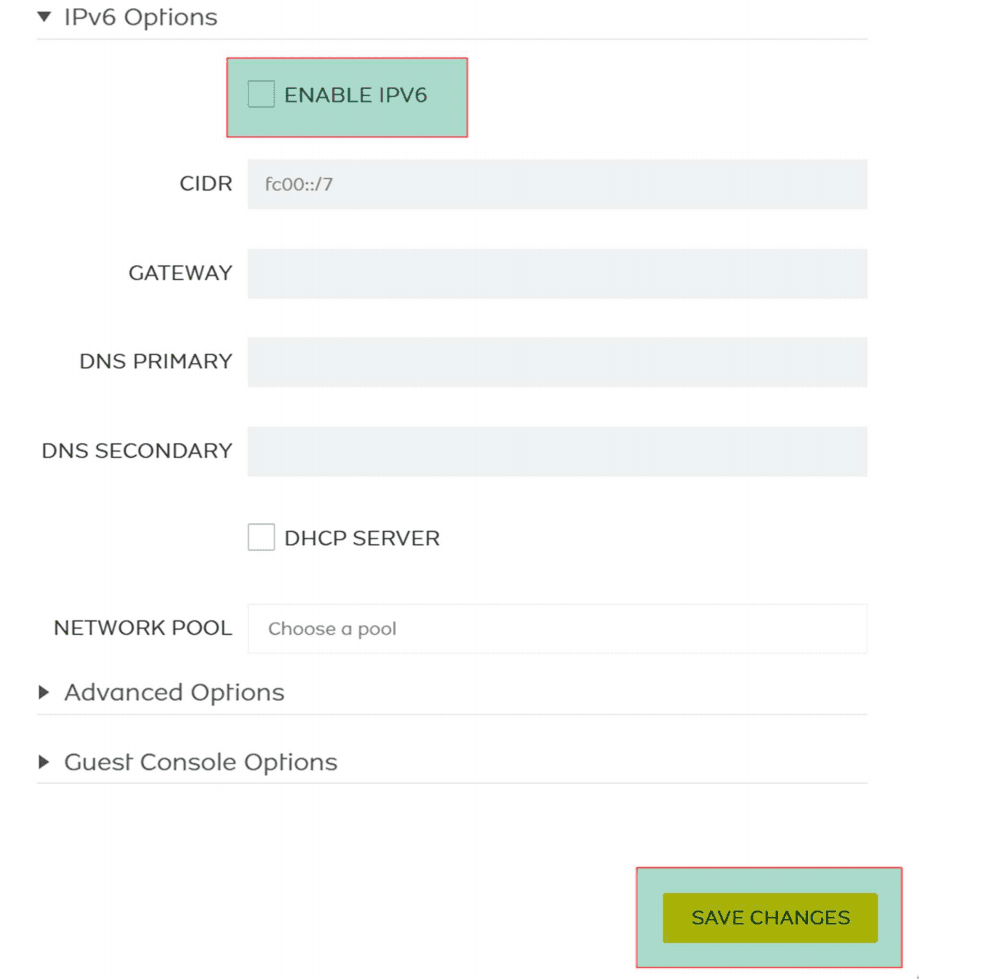
- Under IPv6 Options, Uncheck the box Enable IPV6
- (Optional) Advanced Options
- (Optional) Guest Console Options
- Click Save Changes
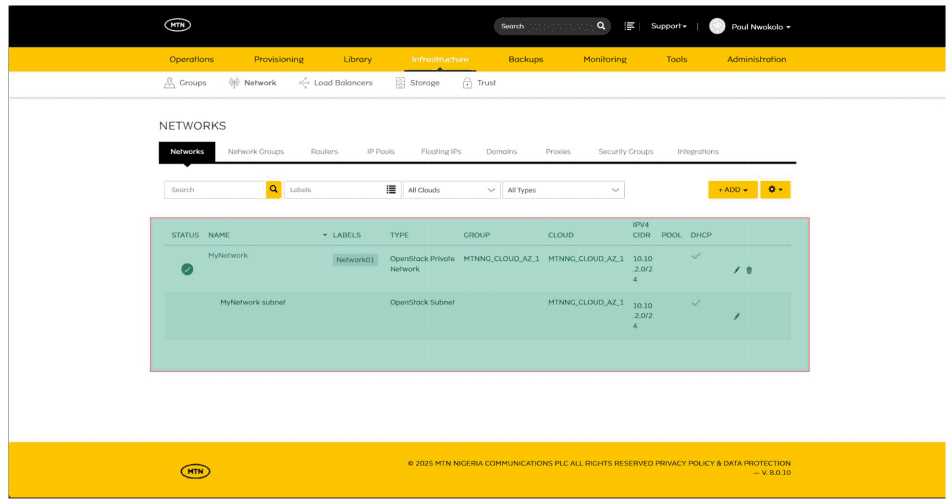
● The network will become visible after you save the changes.
● When properly created, the subnet should also be visible.
Part 2 — Create Router
Purpose: Provision a router within MTN Cloud to enable network connectivity by linking internal subnets to external networks or gateways, facilitating traffic routing across tenant infrastructure.
- Navigate to: Infrastructure > Network > Routers.
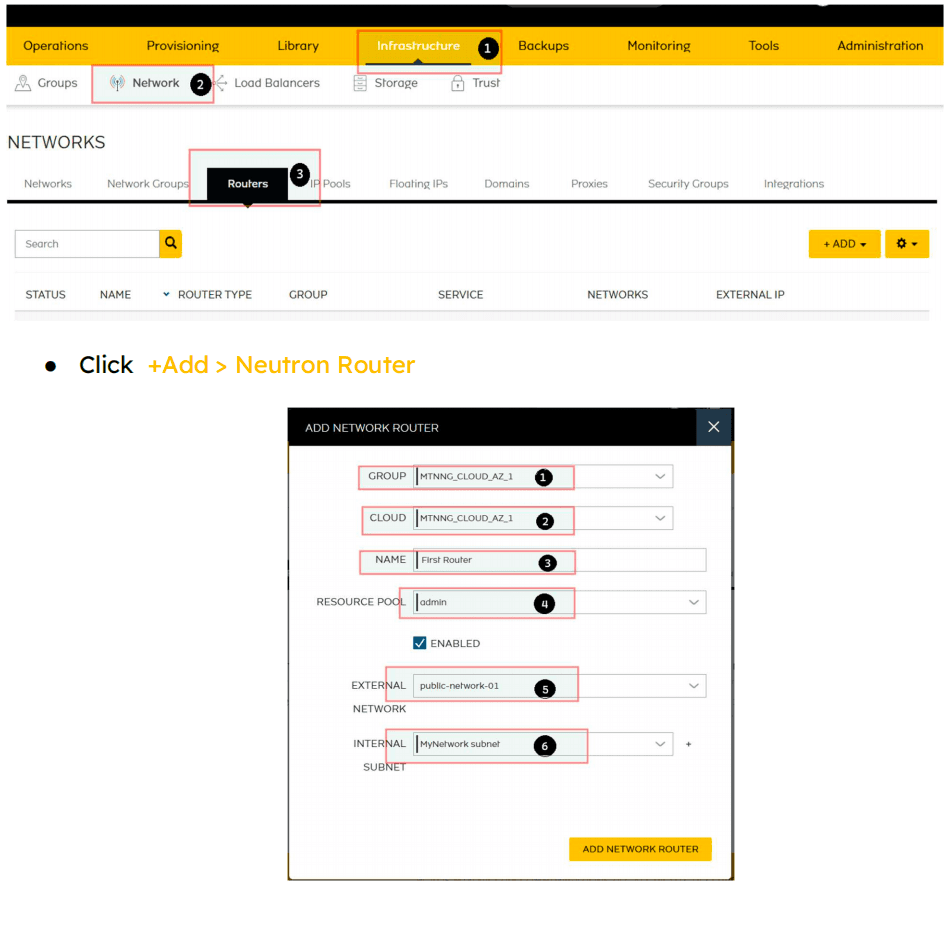
- Click +Add > Neutron Router
Assign:
- Group = Select a group. E.g. MTNNG_CLOUD_AZ_1
- Network Service = Select a group. E.g. MTNNG_CLOUD_AZ_1
- Name:
- Resource Pool:
- Check the ENABLE box
- External Network: If required to route to the internet, select an external network from the list
- Internal Network: Select from the list the network you created and any other one that needs to connect to this router
- Click ADD NETWORK ROUTER
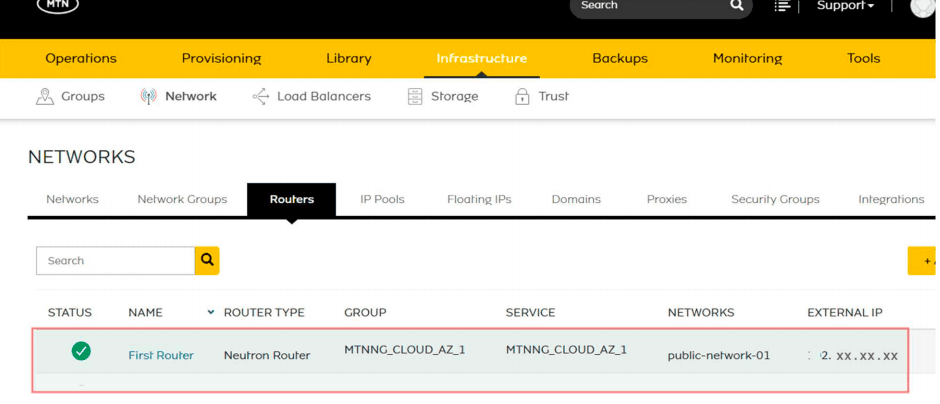
Congratulations! Your Network Router has been created. If you choose to add a Public network, then VMs attached to the internal networks should be able to reach the internet with the right security group settings. Traffic can also be routed across the connected internal networks.