
MTN MySQL Database Server Provisioning Workflow on MTN Cloud
Before You Start (prerequisites)
- Have an MTN Cloud login with permissions to view Provisioning (Instances and Catalog) and Infrastructure (Network).
Tip:If you don’t see required features and resources, contact support or refresh the portal.
- Define a Security Group
- Plan your deployments
The Right Sequence
- Create Security Group: Establish a controlled network boundary by defining allowed inbound and outbound traffic to secure deployed resources.
- Deploy MTN MySQL Database Server:Launch a fully configured MySQL‑based database server on the MTN Cloud to provide secure, reliable database services using either Catalog Items or the Instance Tab.
Important Note:Port 3306 configured for the MySQL service—must be added as an inbound rule in the personal security group and applied to the MySQL database server, alongside the default security group.
Part 1 — Create Security Group
Purpose: Controls network access to(ingress) and from(egress) your VM.
- Navigate to: Infrastructure > Network > Security Groups
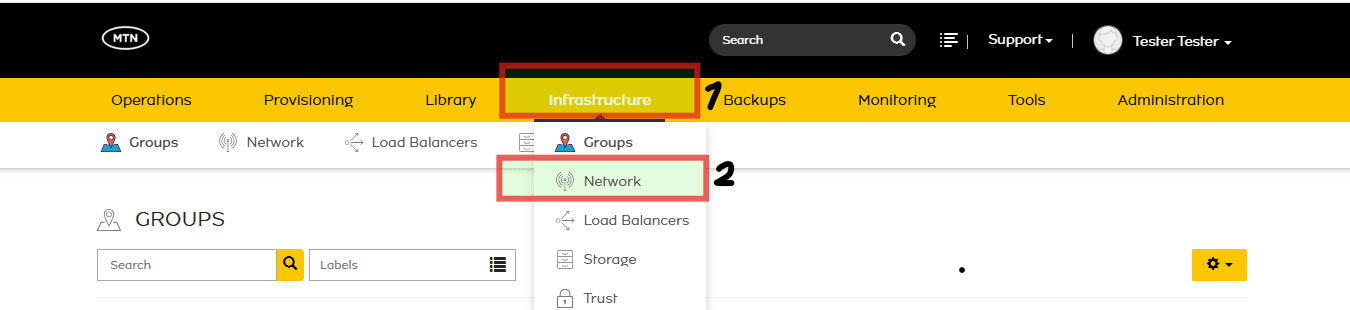
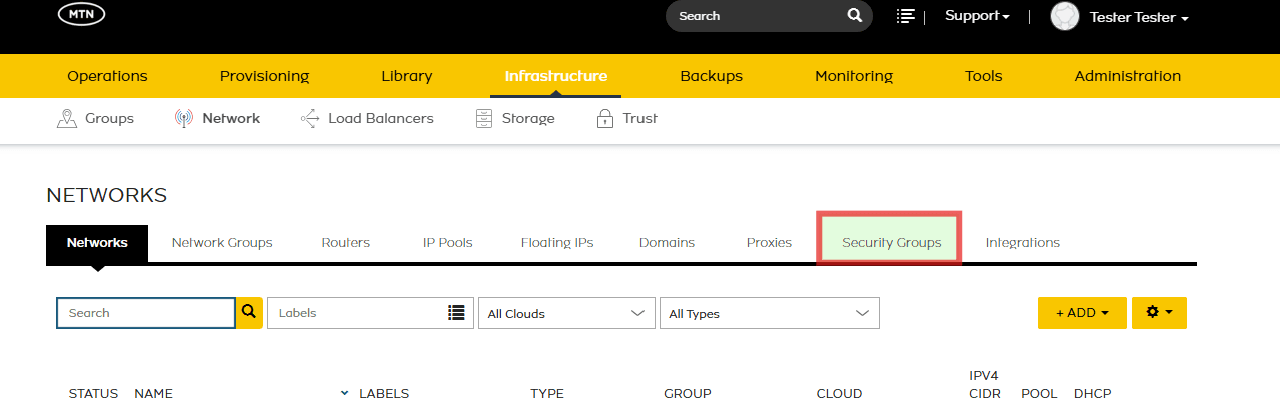
- Click +Add
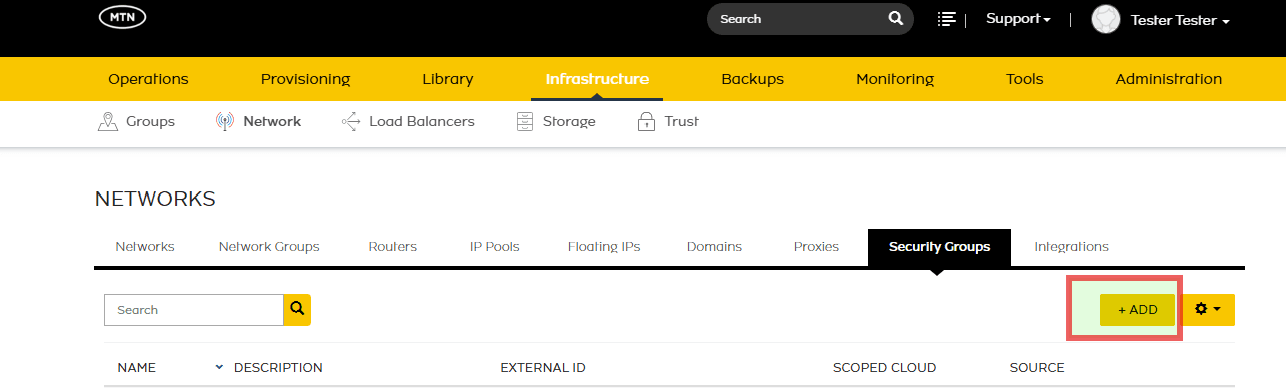
- Assign:
- Name
- Description
- Scoped Cloud = MTNNG_CLOUD_AZ_1
- Click the Security Group that was recently created
- Navigate to Rules
- Click on +Add Rules
- Assign:
- Name
- Direction = (Ingress or Egress)
- Rule Type = Custom Rule
- Protocol = (TCP, UDP OR ICMP)
- Port Range (available depending on protocol selected)
- Source Type
- Source
- Destination Type
- Destination Port Range
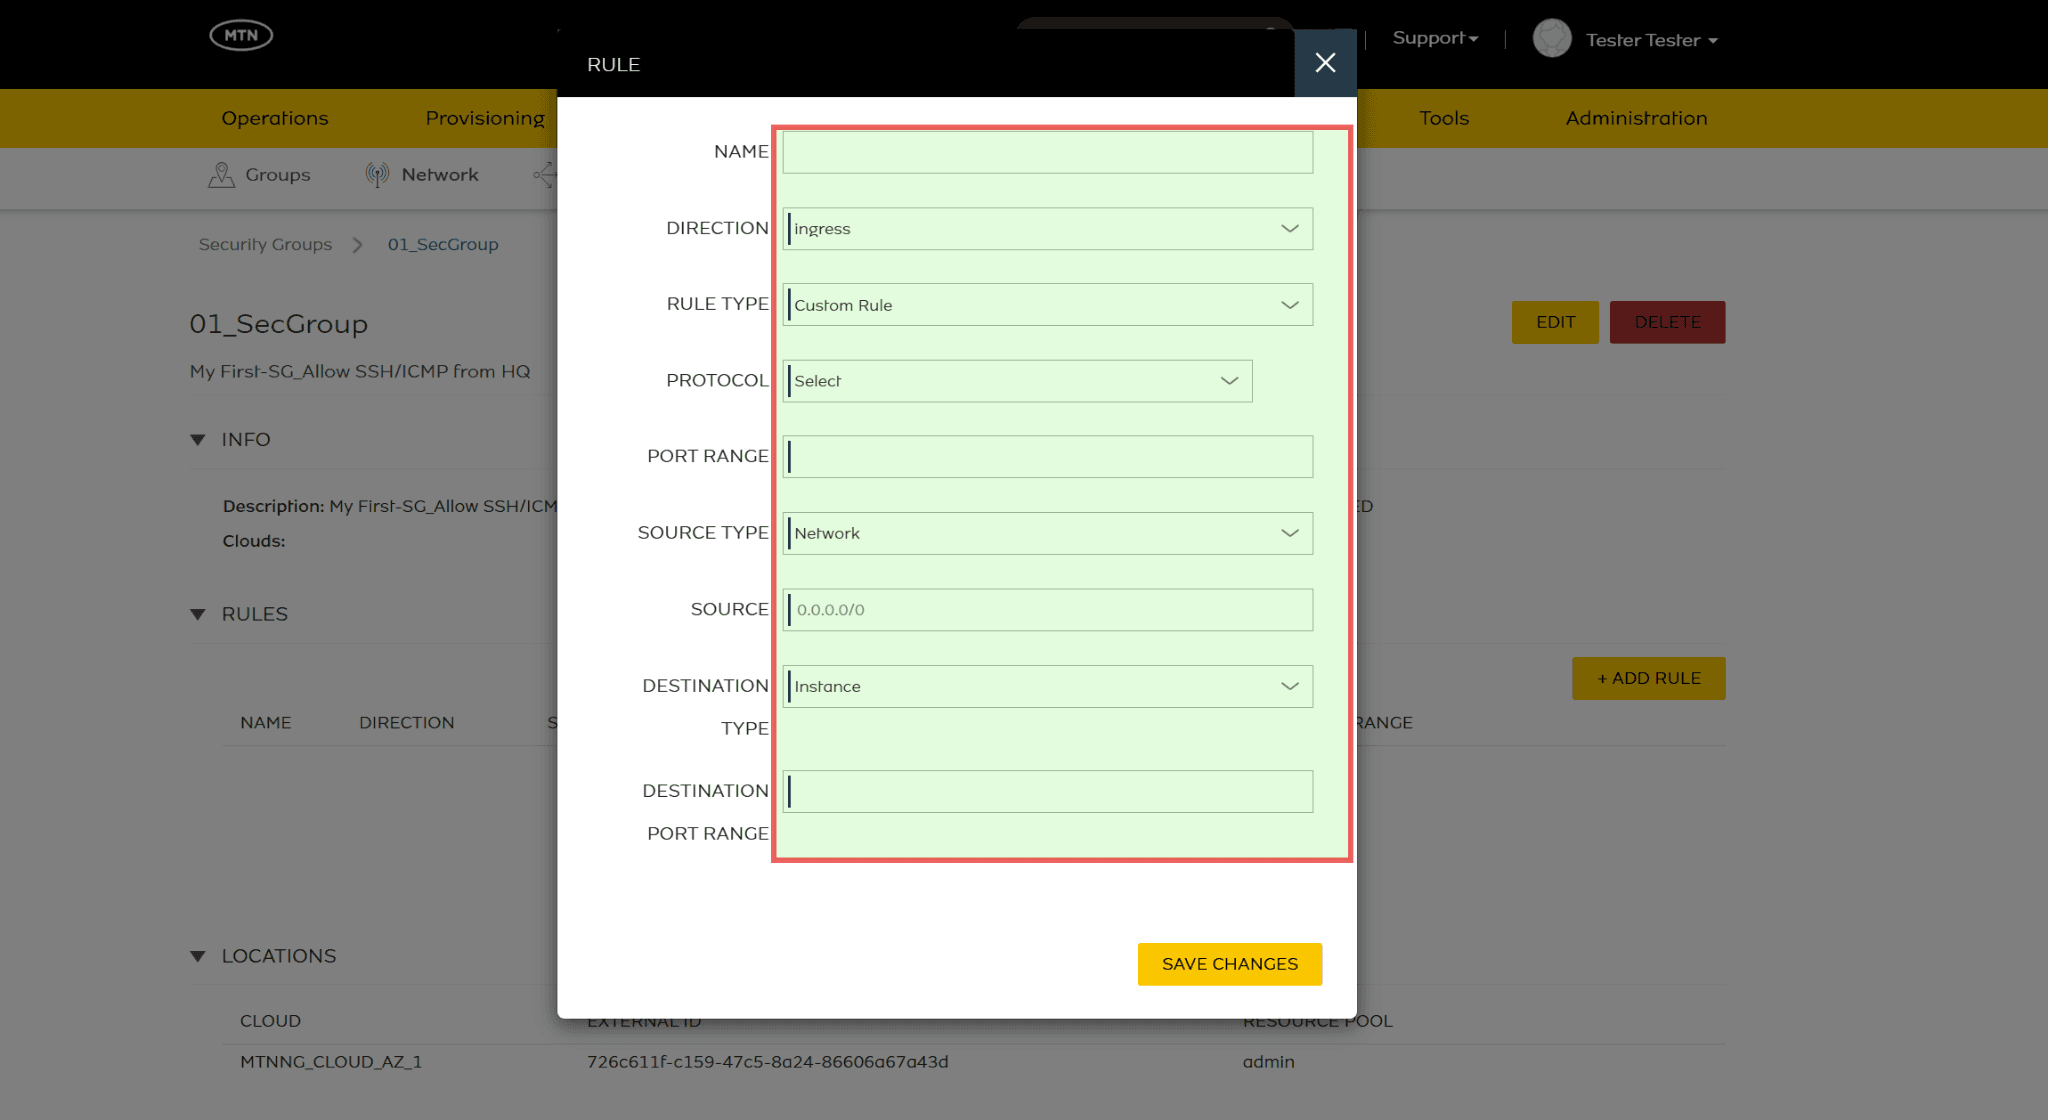
- Scroll Down to Save Changes
- Navigate to Location
- Click on +Add Location
- Select the required Cloud where the workload to be protected is provisioned.
- Click on Save Changes
Part 2 — Deploy MTN MySQL Database Server
Purpose:Enable the automated deployment of a MySQL‑based database server within the MTN Cloud environment. This process leverages Catalog Items to streamline provisioning and ensure a consistent, ready‑to‑use database platform.
- Navigate to: Provisioning > Catalog.


- Select catalog item (MTN MySQL)
- Assign:
- Group
- Cloud
- Name
- Environment
- Labels
- Instance Configuration
- Resource Pool
- Plan
- Volumes
- Network(s)
- Security Groups (default and the security group created earlier)
- Floating IP
- Database Configuration
- MySQL Version (8.0 or 8.4 LTS)
- Database Name
- DB Username
- DB Password
- (Optional) Make DB Owner? If checked, User created will be DB Owner
- (Optional) Require SSL for Connections?
- Allowed CIDRs
- (Optional) Use HostSSL? If checked, Host CIDRs will be imputed as HostSSL
- Password Expiry Days
- (Optional) Auto Security Updates
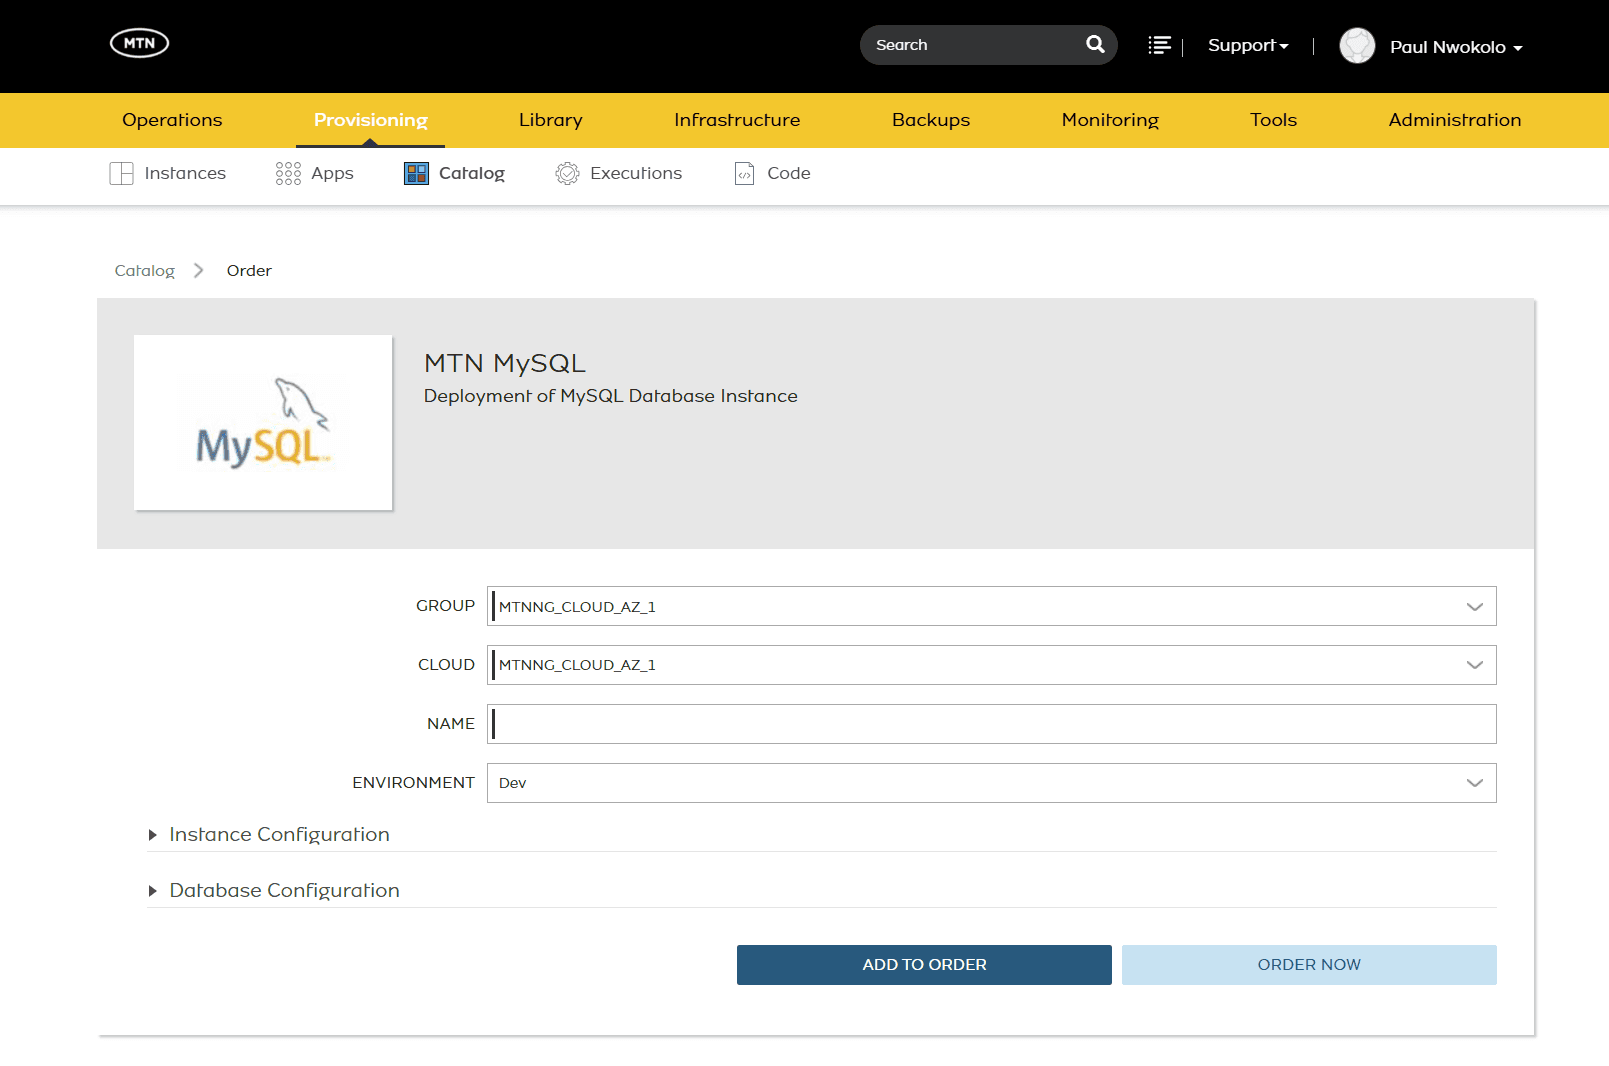
- Click Order Now
- Navigate to: Provisioning > Instances
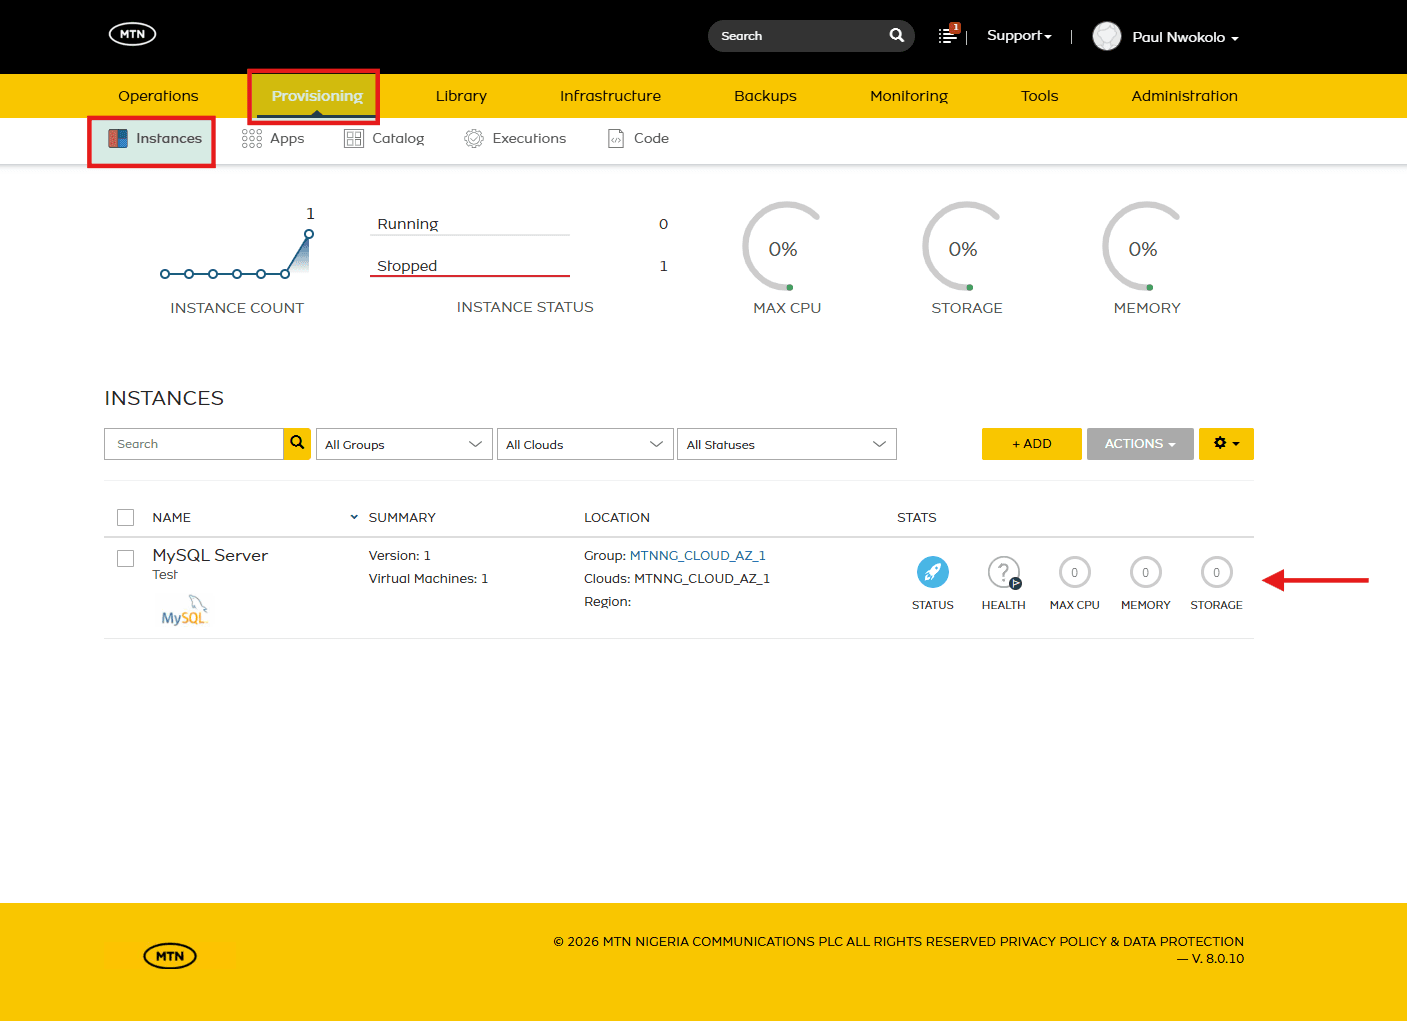
- Once provisioning is complete, open the Console tab to verify that the MySQL server has been installed and configured successfully.
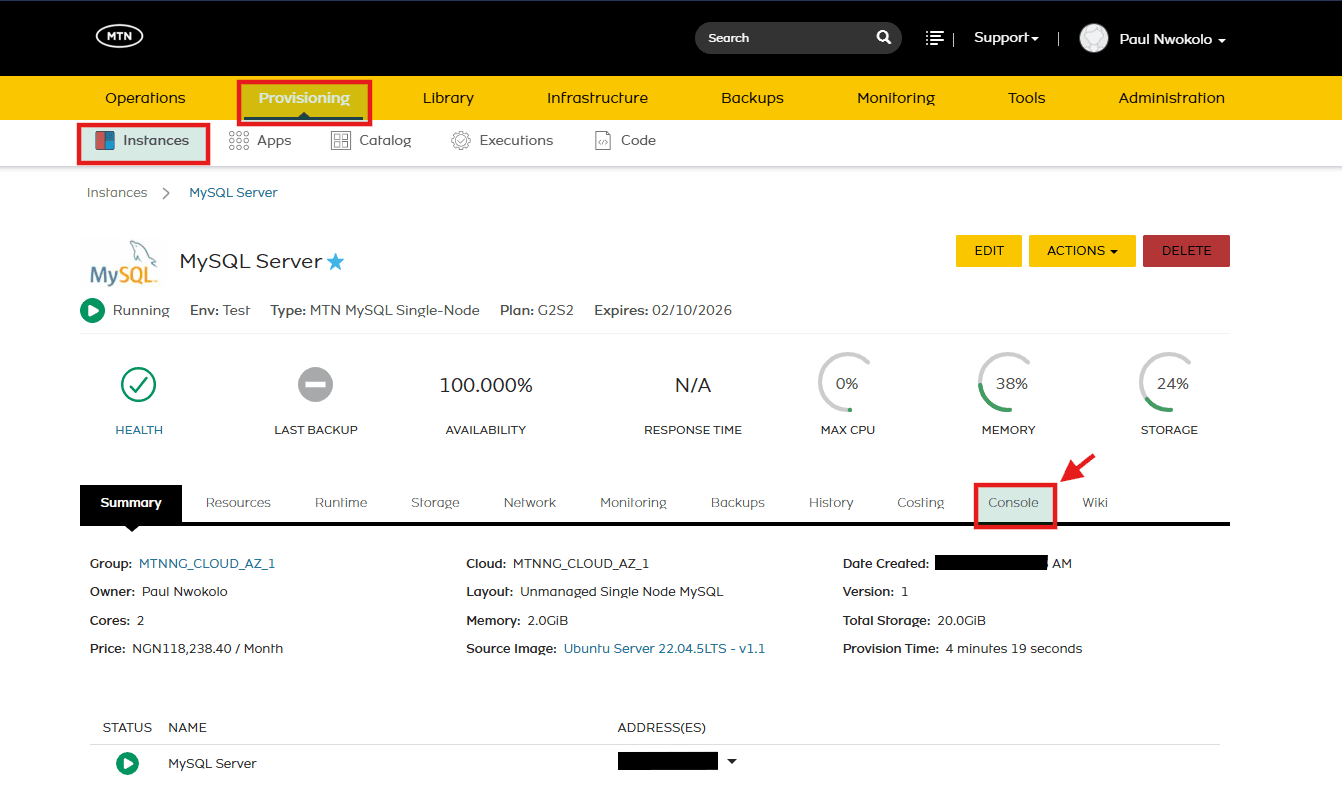
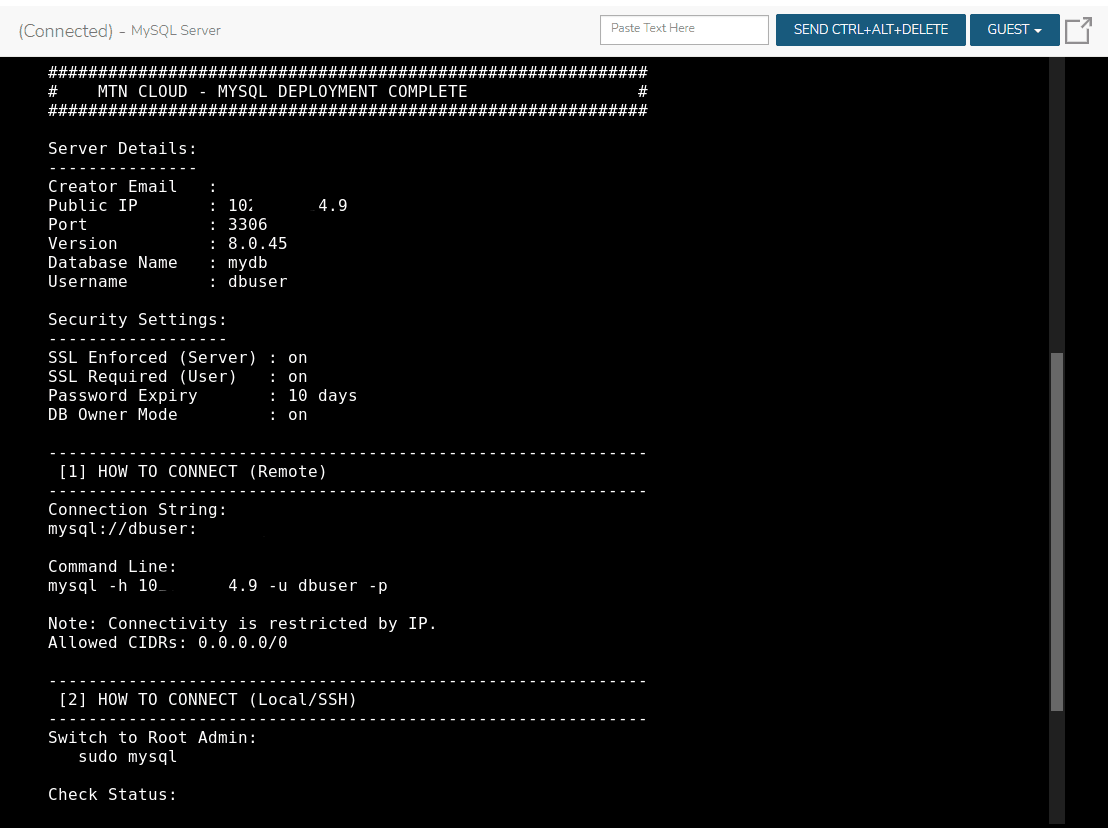
- Once the Console is open, you’ll see key details about the newly provisioned MySQL server, confirming that installation and configuration completed successfully.
Additional Deployment Method
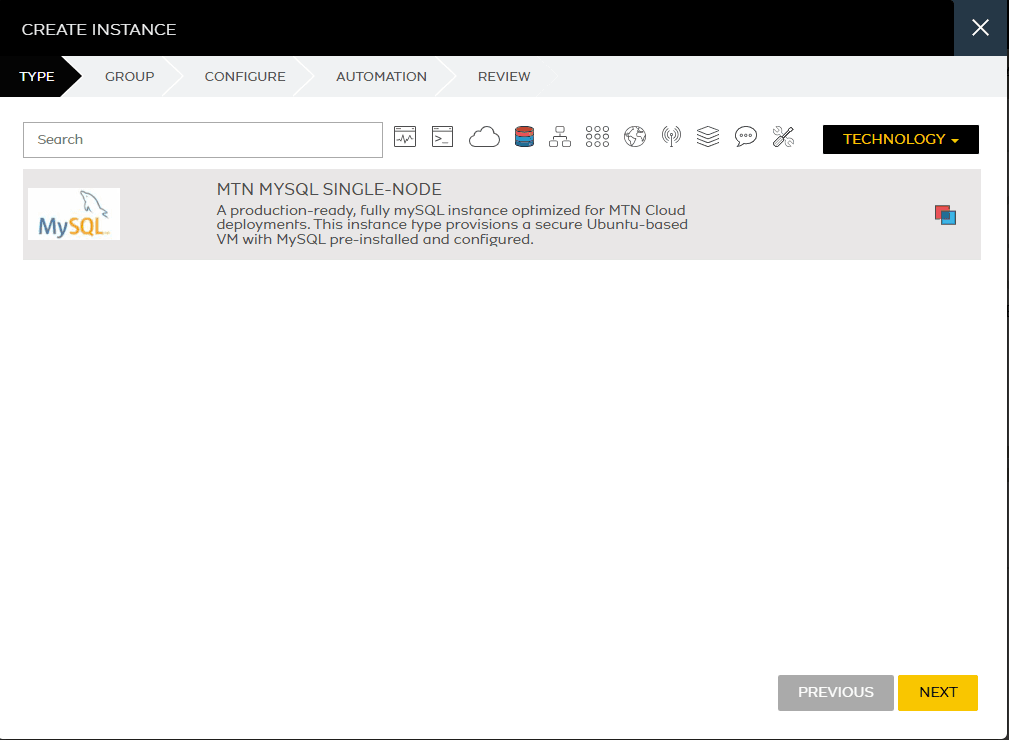
The instance can also be provisioned via the Instances tab—the same way you would normally create an instance or virtual machine—by selecting the MTN MySQL Single-Node instance type.
Important Tips & Notes
- The MySQL server is deployed with default authentication and security settings. For production use, consider strengthening passwords and adjusting access controls in the MySQL configuration.
- Remote connections are restricted by default. If external access is required, update the bind‑address and user permissions, and ensure that firewall rules allow traffic on the MySQL port.
- Applications connect using the instance’s public IP and standard MySQL credentials, with no additional client‑side configuration required.