
MTN Managed Database Provisioning Workflow on MTN Cloud
v1.0
Before You Start (prerequisites)
- Have an MTN Cloud login with permissions to view Provisioning (Instances, Apps and Catalog) and Infrastructure (Network).
Tip:If you don’t see required features and resources, contact your tenancy administrator (Customer Admin User) or support. A refresh of the portal page may also resolve this.
- Define a Security Group
- Plan your deployments
The Right Sequence
- Create Security Group: Establish a controlled network boundary by defining allowed inbound and outbound traffic to secure deployed resources.
- Deploy Managed Database Server: Deploy a fully configured MySQL or PostgreSQL Managed Database server on MTN Cloud to ensure secure, reliable services, utilizing Catalog Items for streamlined provisioning.
Important Note: Ensure that the required ports for the MySQL or PostgreSQL service are added as an inbound rule within your personal security group and applied to the Managed Database server, in addition to the default security group.
Part 1 – Create Security Group
Purpose: Controls network access to (ingress) and from (egress) your VM.
- Navigate to: Infrastructure > Network > Security Groups
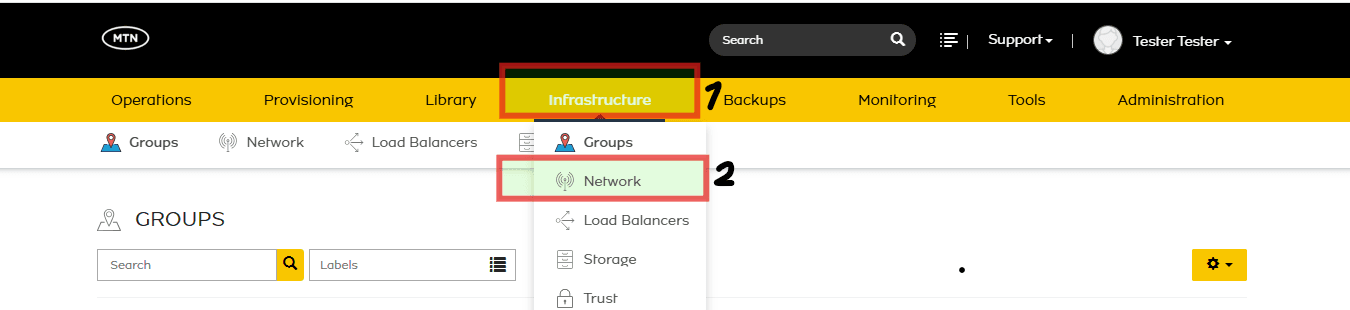

- Click +Add

- Assign:
- Name
- Description
- Scoped Cloud = MTNNG_CLOUD_AZ_1
- Click the Security Group that was recently created
- Navigate to Rules
- Click on +Add Rules
- Assign:
- Name
- Direction = (Ingress or Egress)
- Rule Type = Custom Rule
- Protocol = (TCP, UDP OR ICMP)
- Port Range (available depending on protocol selected)
- Source Type
- Source
- Destination Type
- Destination Port Range
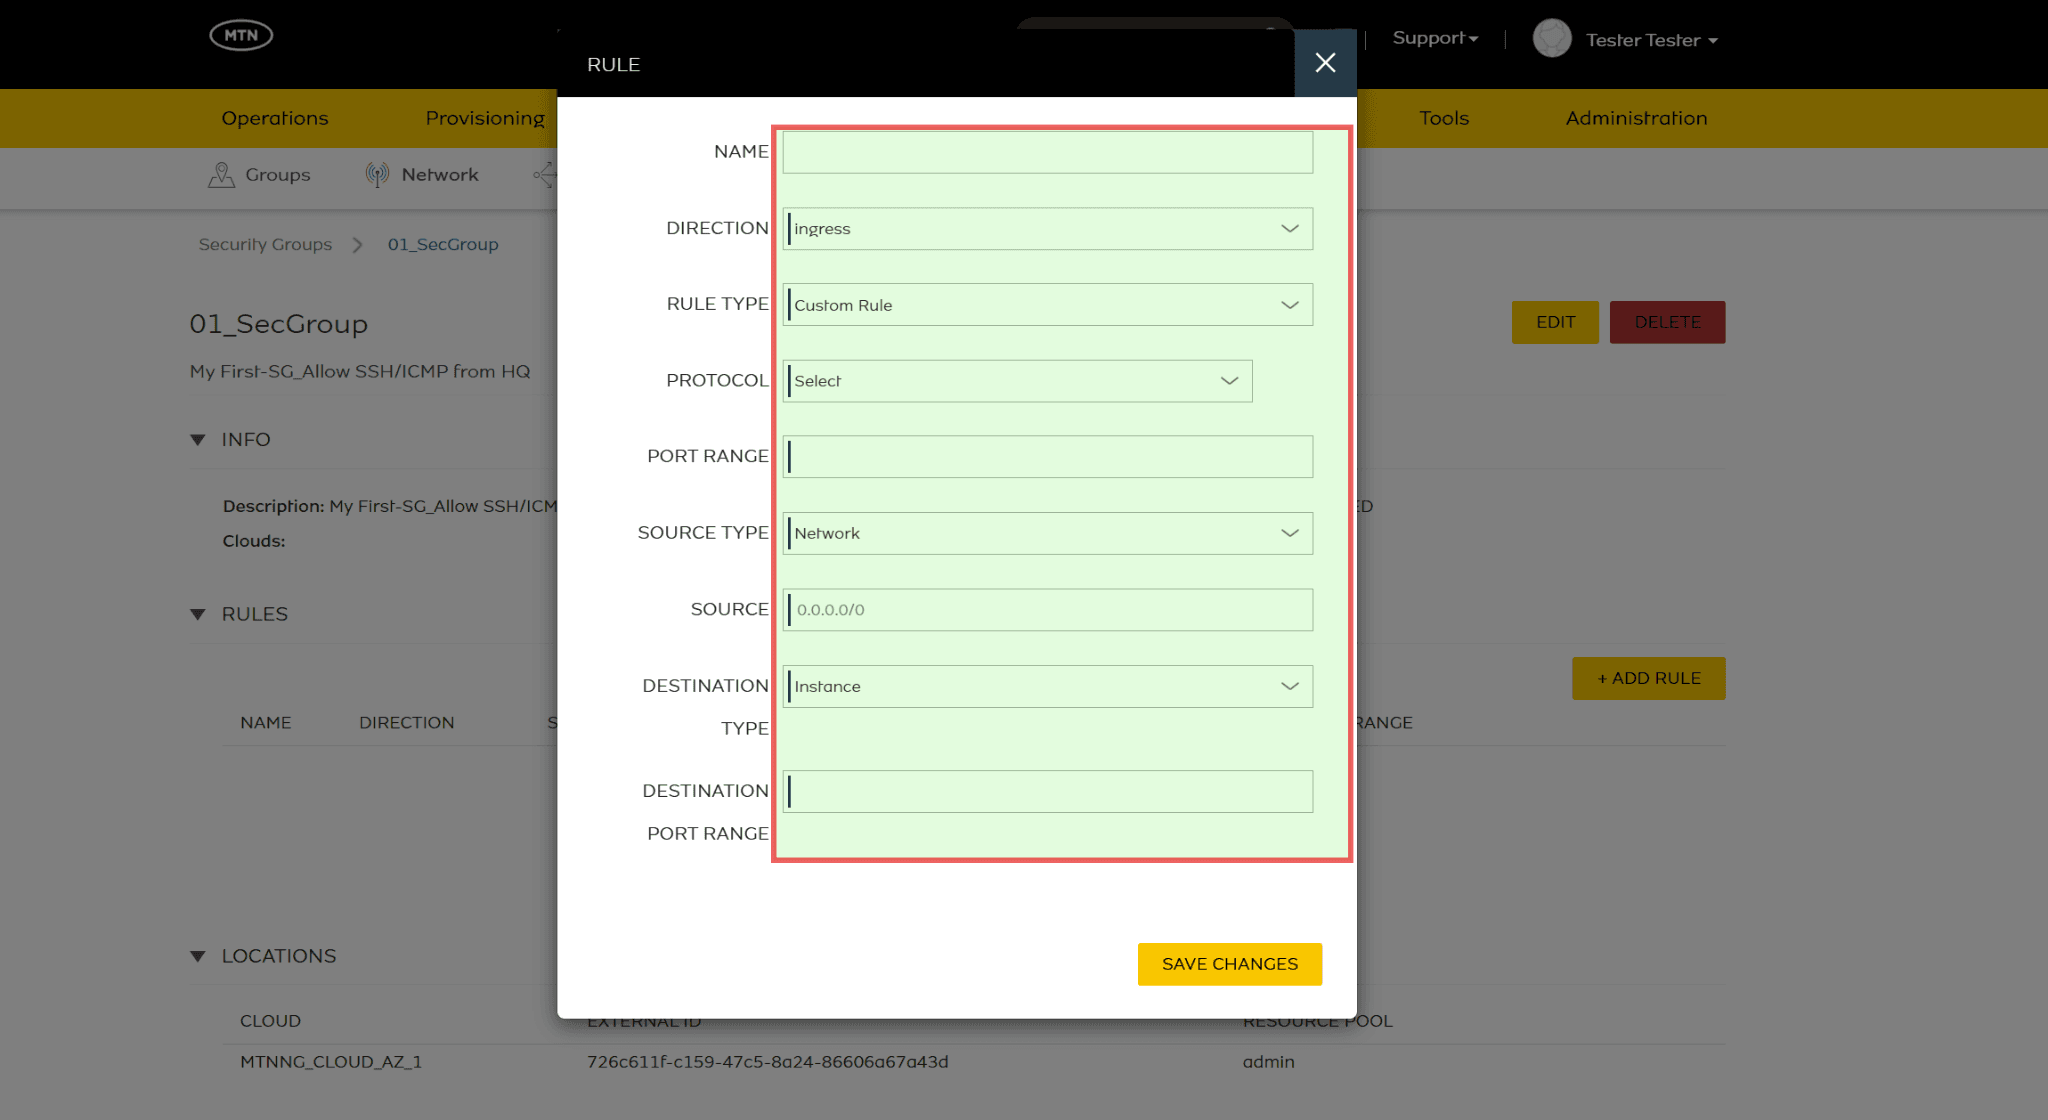
- Scroll Down to Save Changes
- Navigate to Location
- Click on +Add Location
- Select the required Cloud where the workload to be protected is provisioned.
- Click on Save Changes
Part 2 – Deploy MTN Managed Database Server
Purpose:Enable the automated deployment of the MySQL or PostgreSQL Managed Database server within the MTN Cloud environment. This process leverages Catalog Items to streamline provisioning and ensure a consistent, ready‑to‑use database platform.
- Navigate to: Provisioning > Catalog.

- Select catalog item (MTN Managed Database)

- Assign:
- Instance Configuration
- Name
- Labels
- Group
- Cloud
- Environment
- Resource Pool
- Plan
- Volumes
- Network(s)
- Security Groups (default and the security group created earlier)
- Floating IP
- Database Configuration
- Database Engine: Select PostgreSQL or MySQL
- PostgreSQL or MySQL Version (based on Database Engine selected)
- No of Nodes ( Locked at 1 as multi node is coming soon )
- Admin Username
- Admin Password
- Instance Configuration
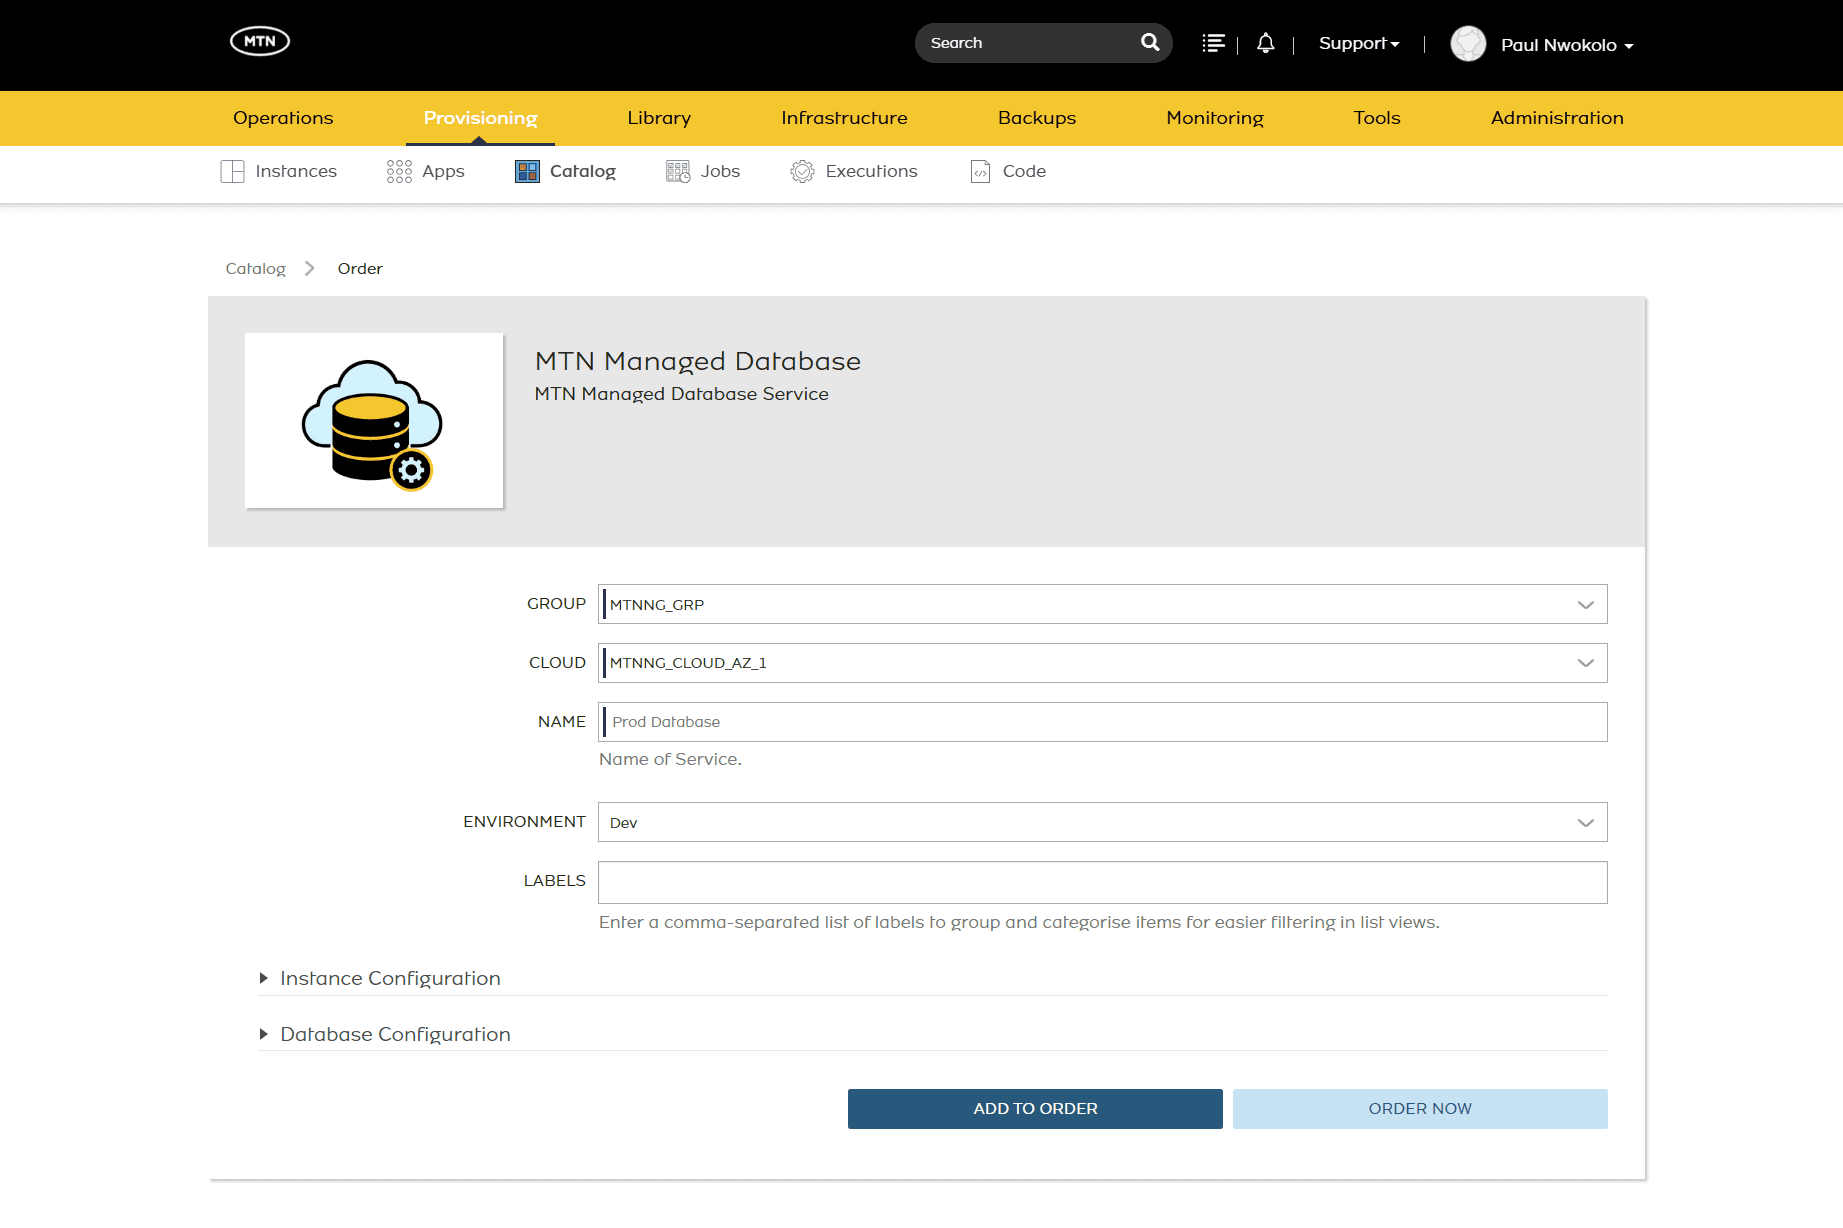
- Click Order Now
- Navigate to: Provisioning > Apps
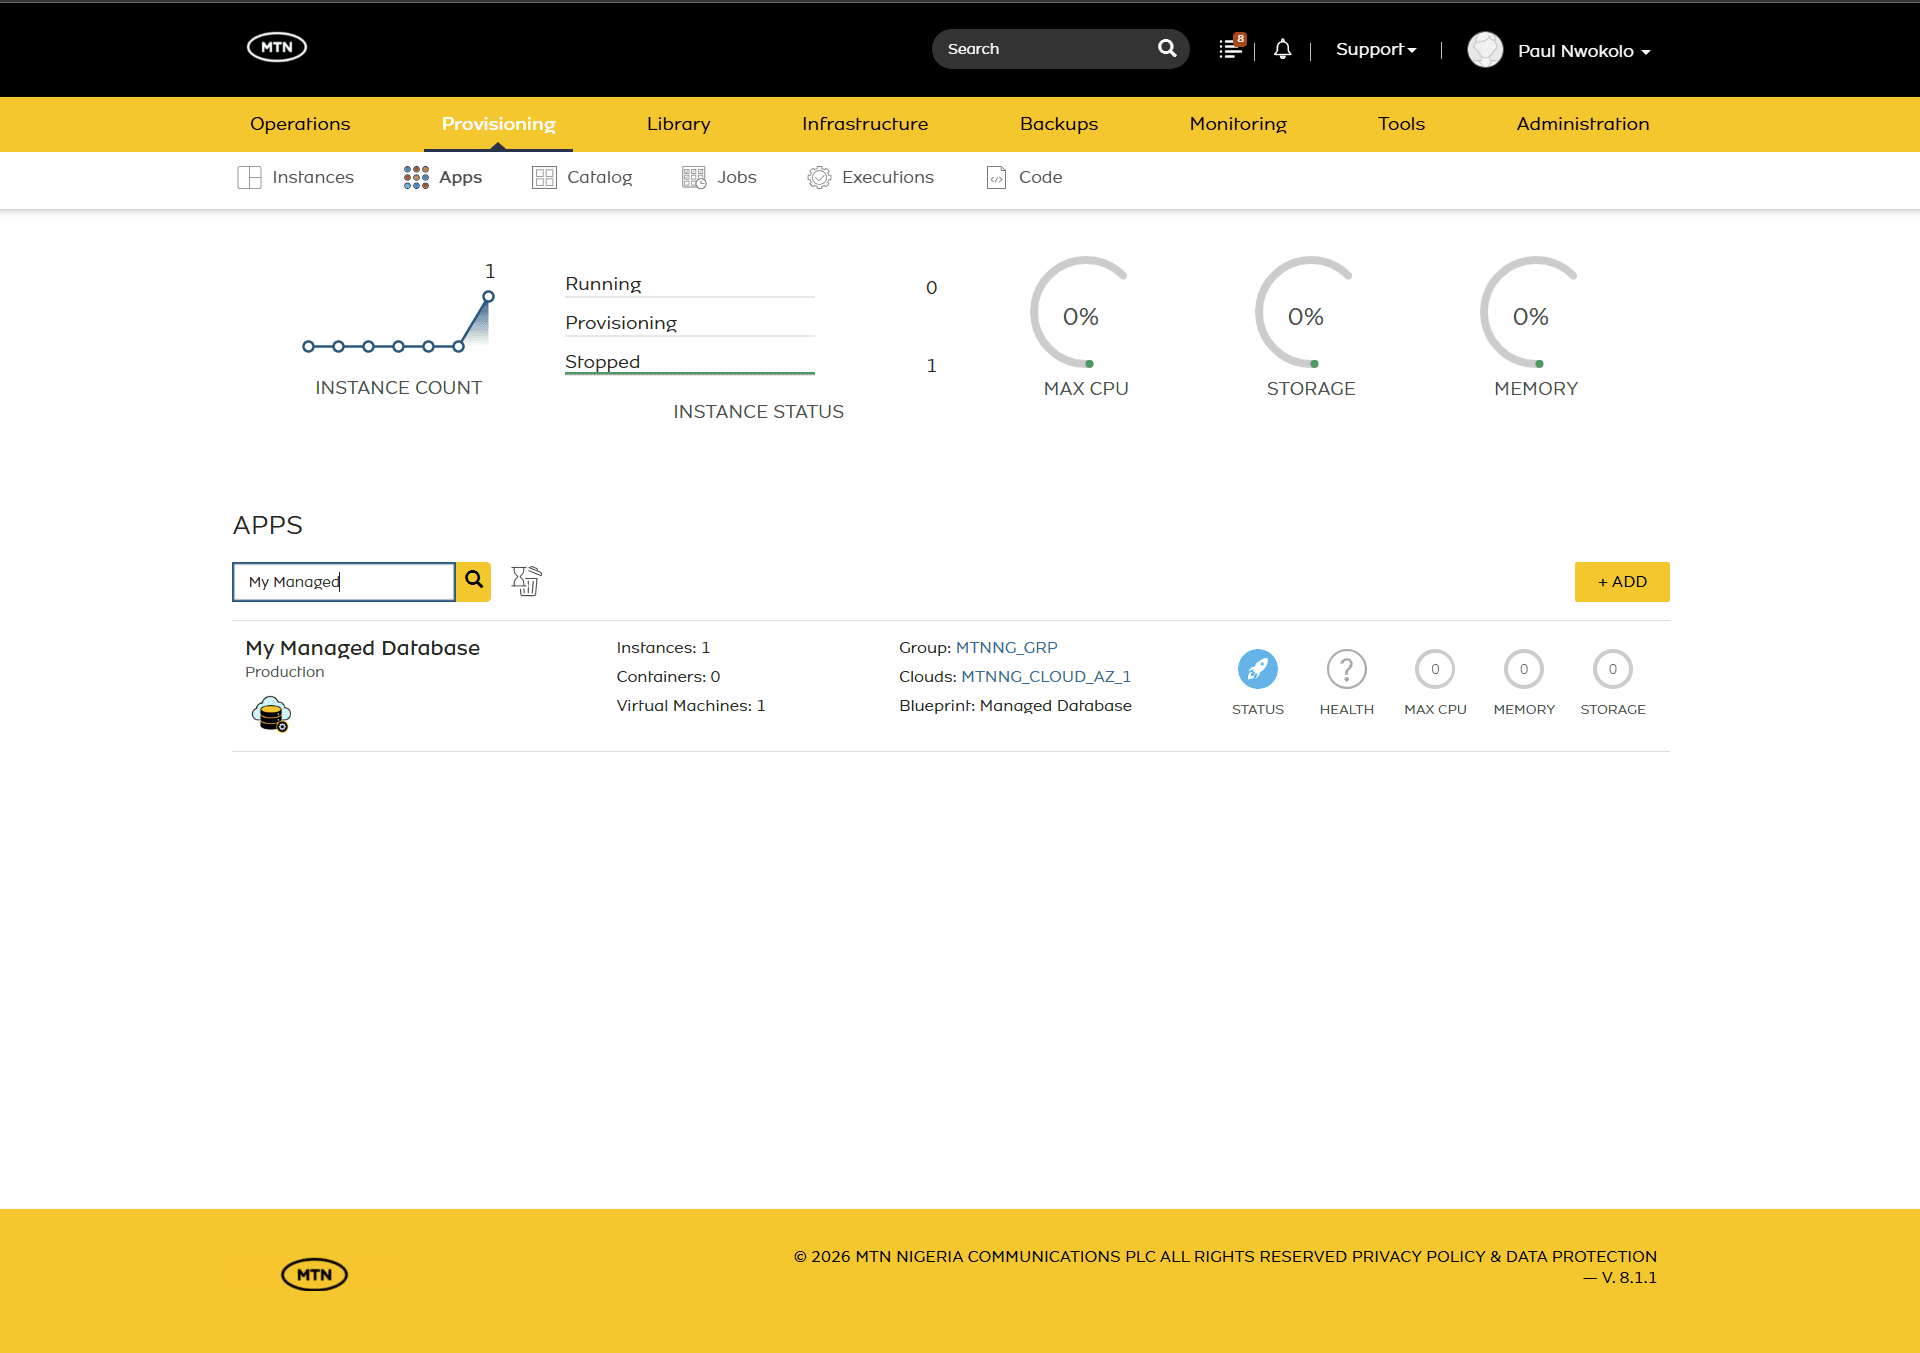
- Clicking on the application provides additional details, including the estimated provisioning time (ETA) and a list of associated instances or virtual machines.

Managed Database Extra Tabs
Beyond the standard views, the MTN Managed Database interface includes specialized tabs designed to enhance visibility, manageability, and direct interaction with your instance:
Connection Details
This displays essential connectivity parameters, such as hostnames, IP addresses, port configurations, and necessary credentials or connection strings required to link applications to the database instance.
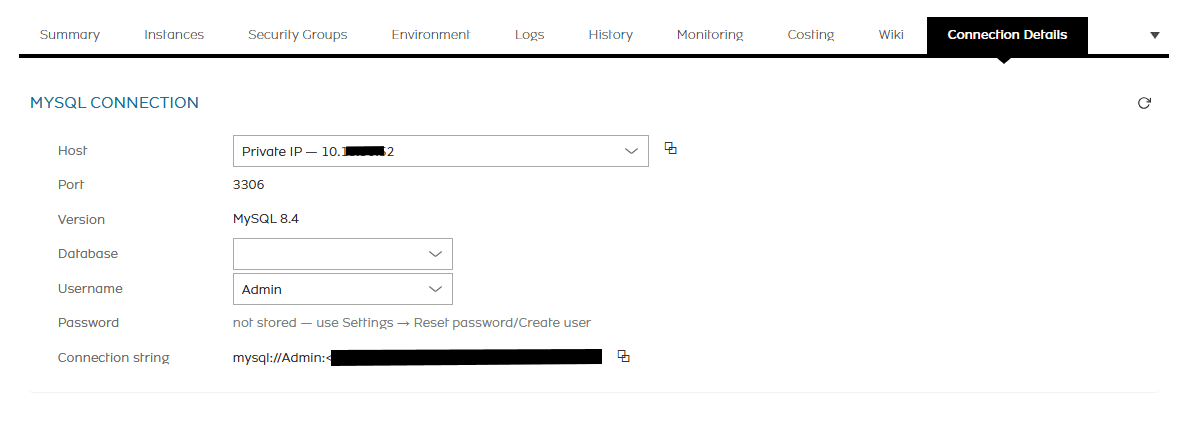
Tip: Click the refresh button to apply changes made in the settings.
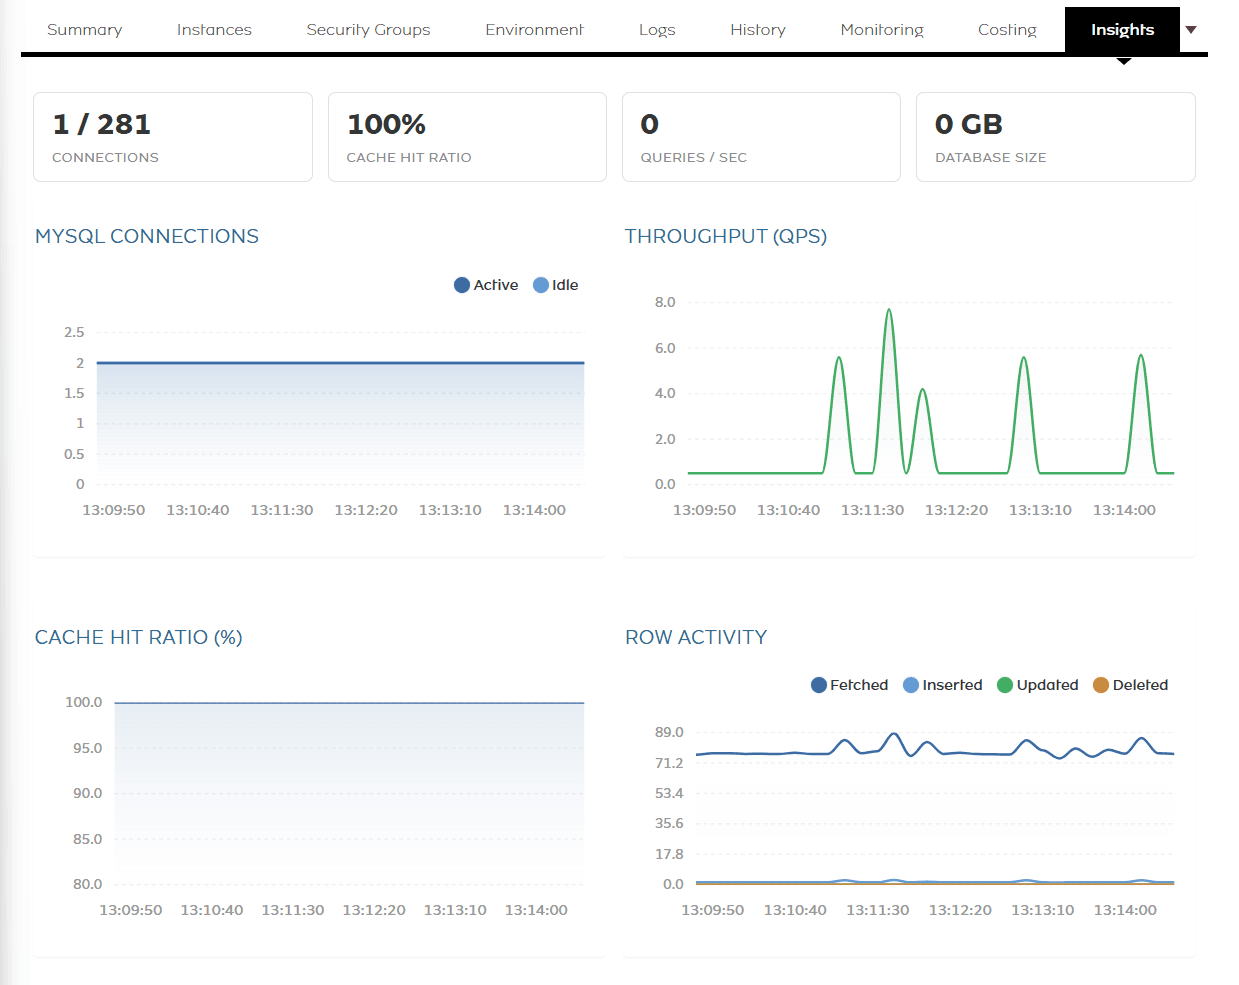
Insights
This provides comprehensive real-time performance monitoring, including metrics for Database Connections, Throughput (QPS), Queries per Second, Database Size, Cache Hit Ratio etc.
Settings
The Settings tab provides granular control over the Managed Database configurations, such as
- User Management: View existing users, or add and create new user accounts. Reset passwords for existing user accounts

Users can be added by clicking the + Add User button, which opens a wizard where you can specify the username, password, account expiry date, and whether the account is for a service or an individual.


Manage existing users by resetting passwords, setting expiration dates, locking accounts, or deleting users.

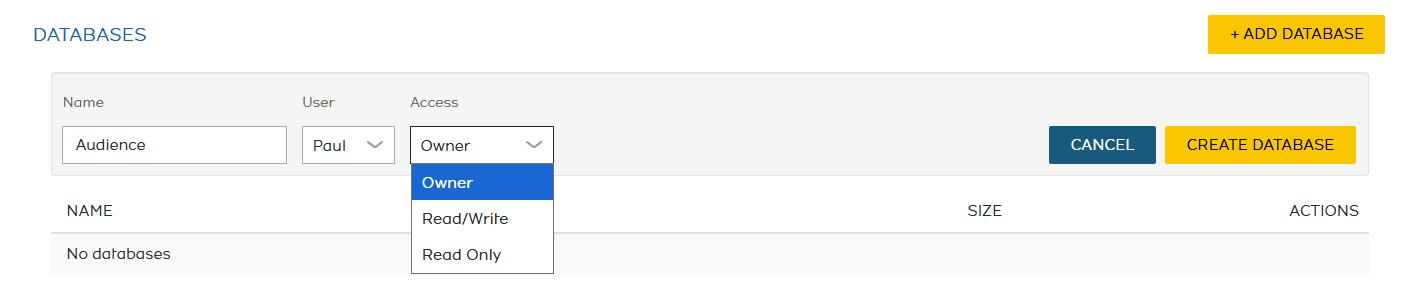
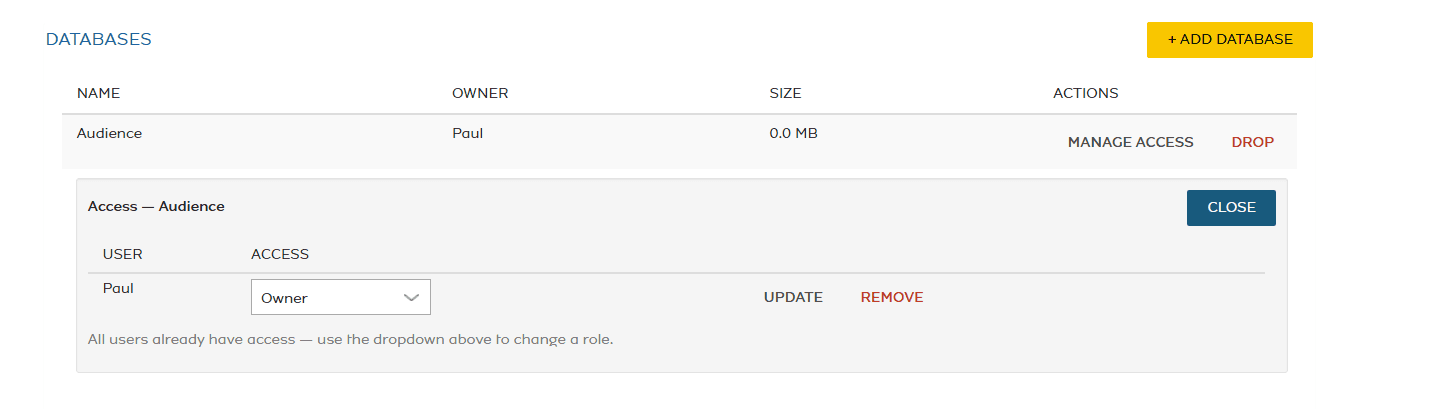
- Databases: Manage existing databases, create new ones, and assign ownership or access permissions.

To add a new database, click the + Add Database button. This opens a wizard where you can specify the database name, assign a user, and set access permissions (Owner, Read/Write, or Read Only).
Manage existing databases by managing user access and permissions either by updating or removing users with access, deleting databases

- Network/Access: Secure remote database access by configuring SSL settings and defining allowed client CIDRs (PostgreSQL only).
Select the SSL checkbox to enable secure connections for your managed database instances. To restrict remote access to PostgreSQL databases by IP, click + ADD CIDR, enter the authorized range, and click Save to apply your changes.


- Active Sessions: The Active Sessions tab provides a real-time overview of current client connections. Use the refresh button to update this information on demand.

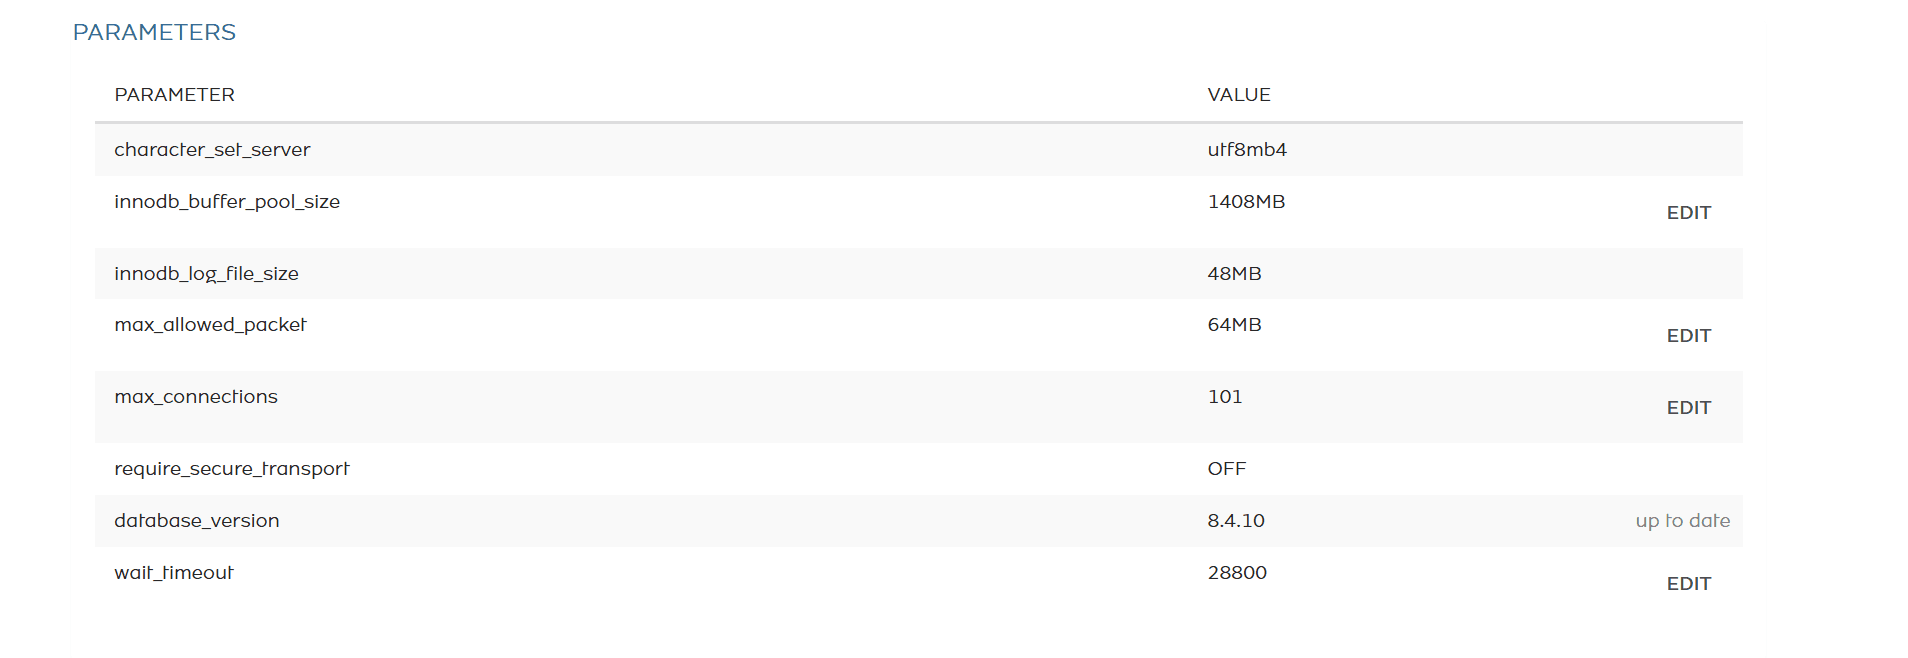
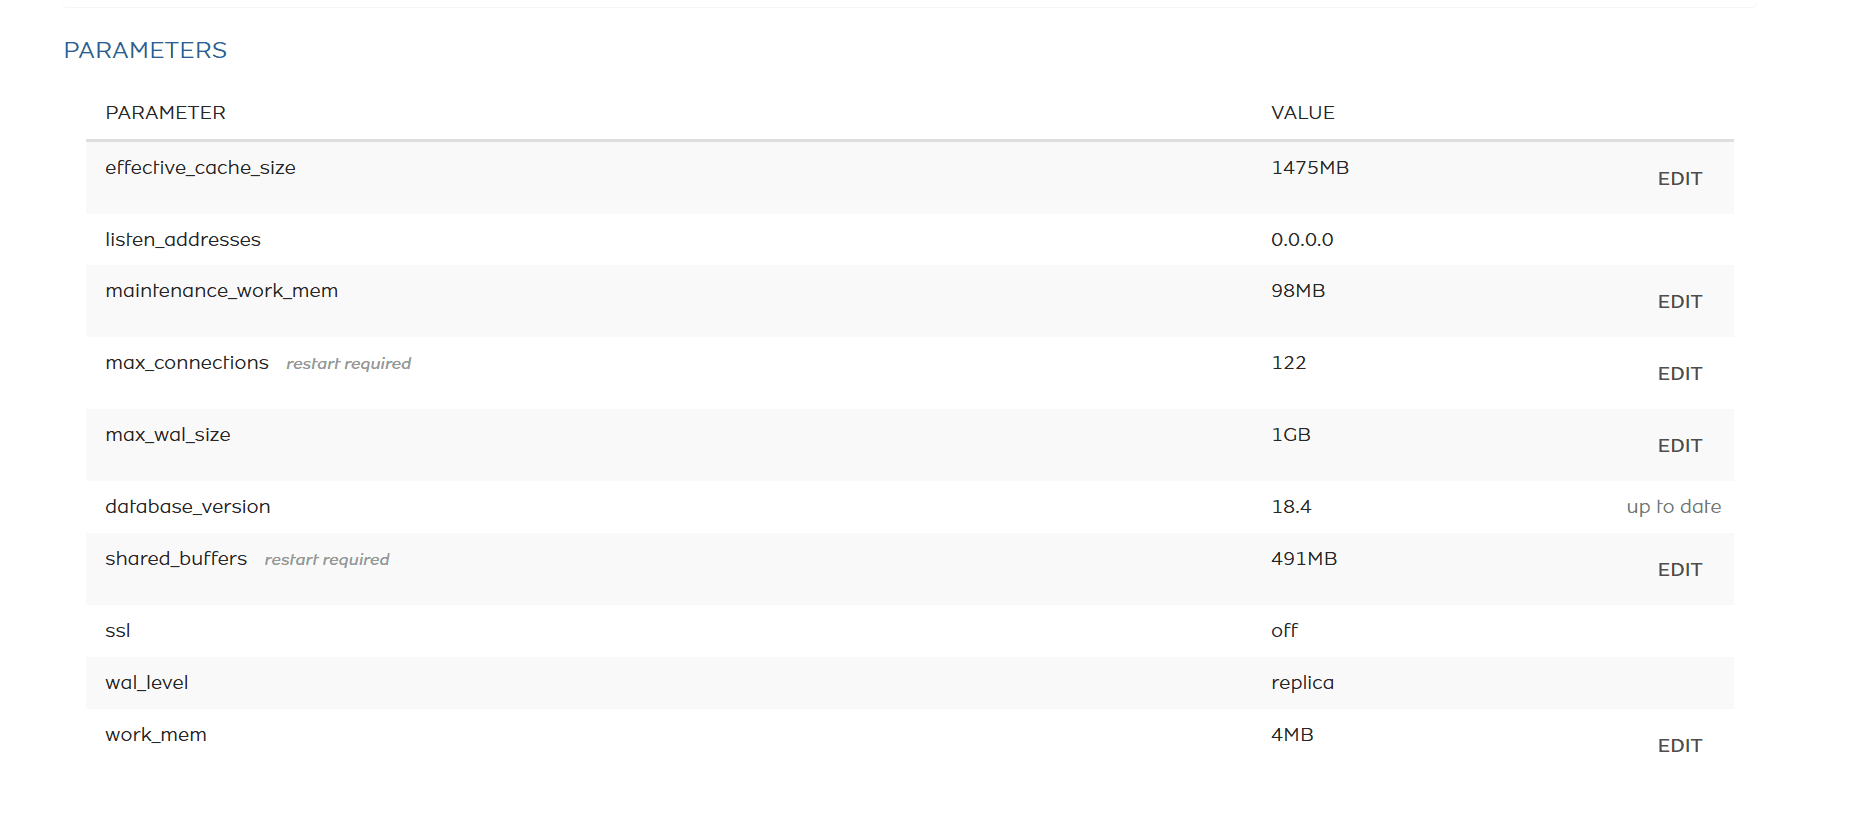
- Parameters: View and modify configurable settings and performance parameters for your MySQL or PostgreSQL managed database instance.
Managed MySQL Parameters
Managed PostgreSQL Parameters
- Monitoring & Logging: - Enable Fluent Bit, Prometheus, or both to configure comprehensive logging and monitoring for your managed database instance.

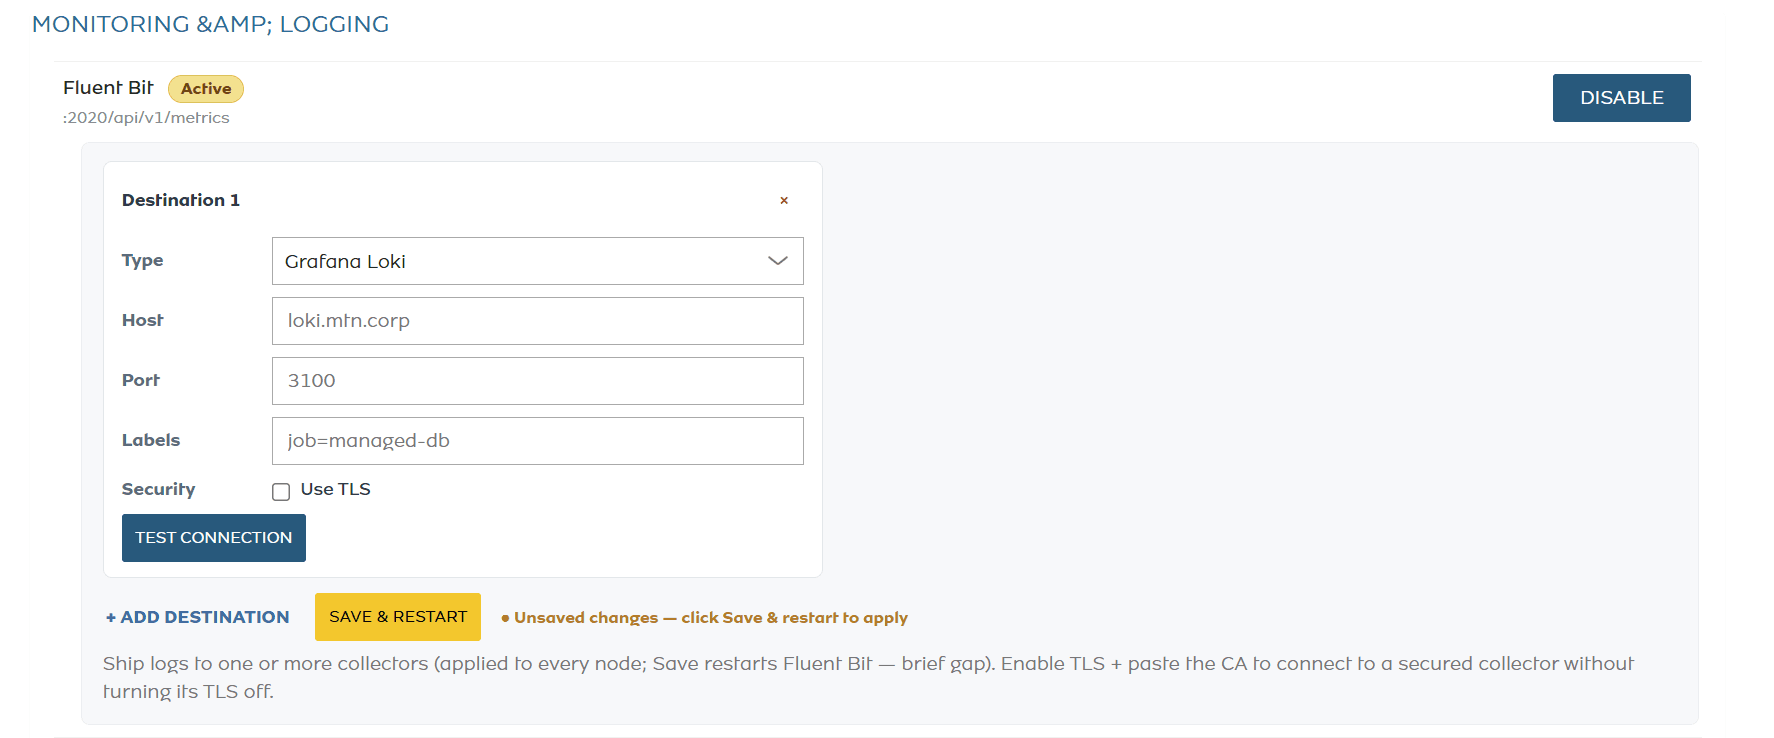
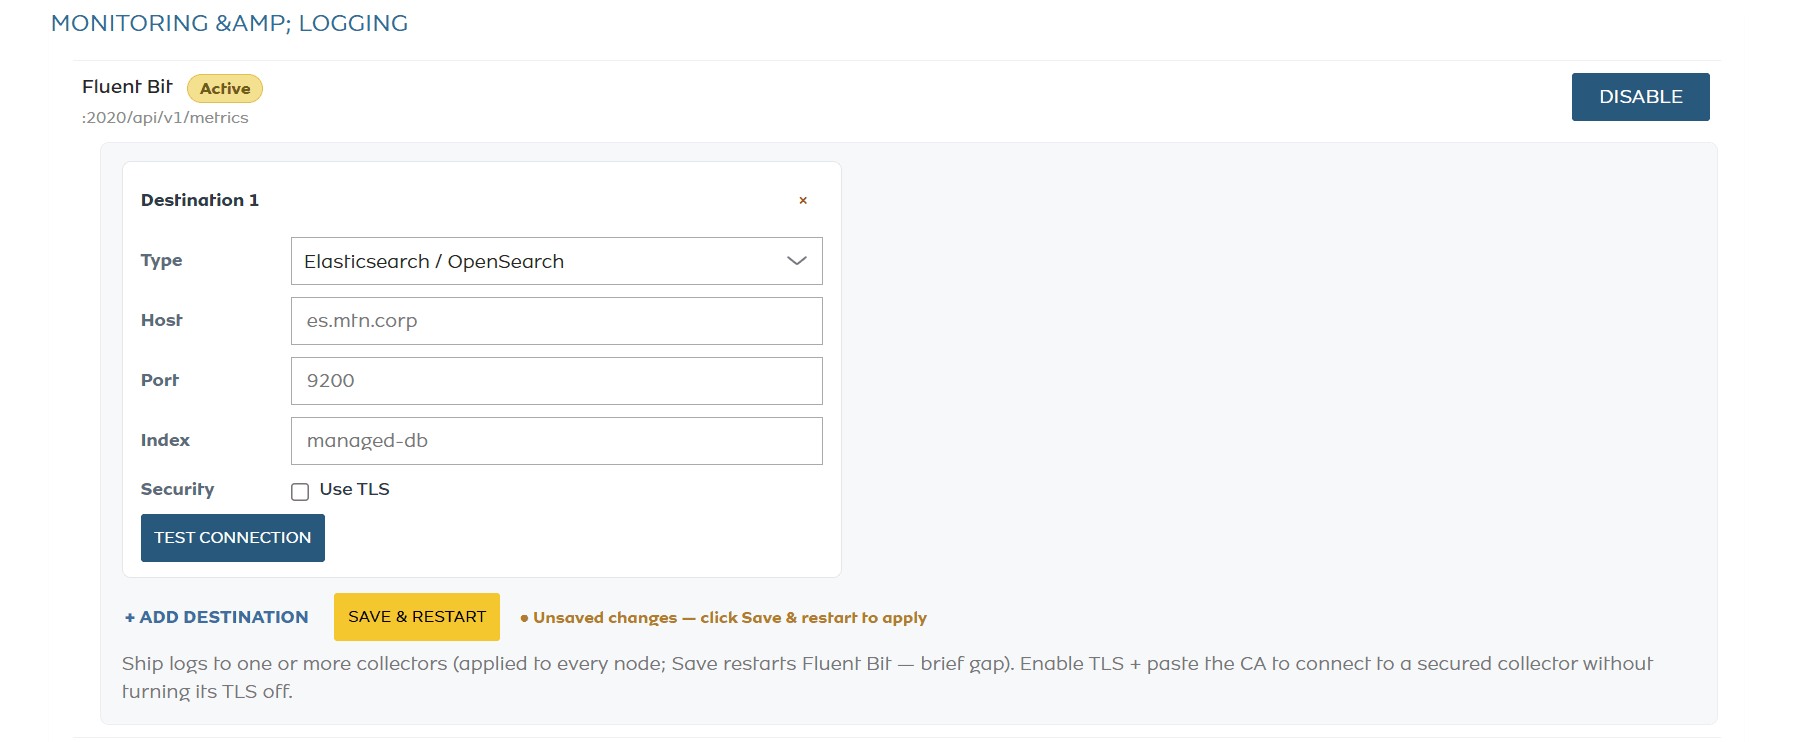
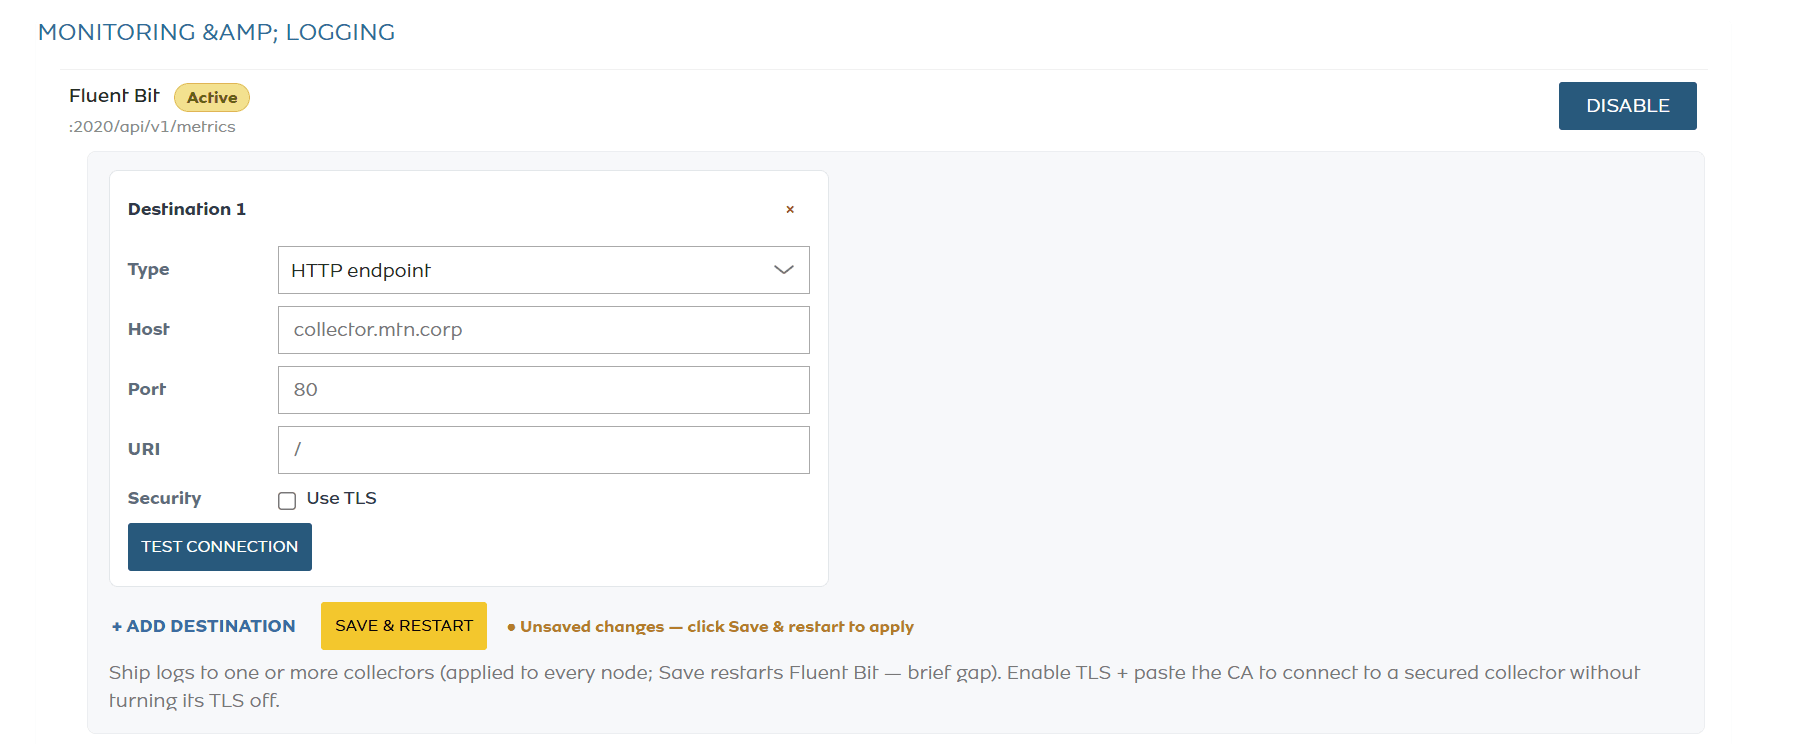
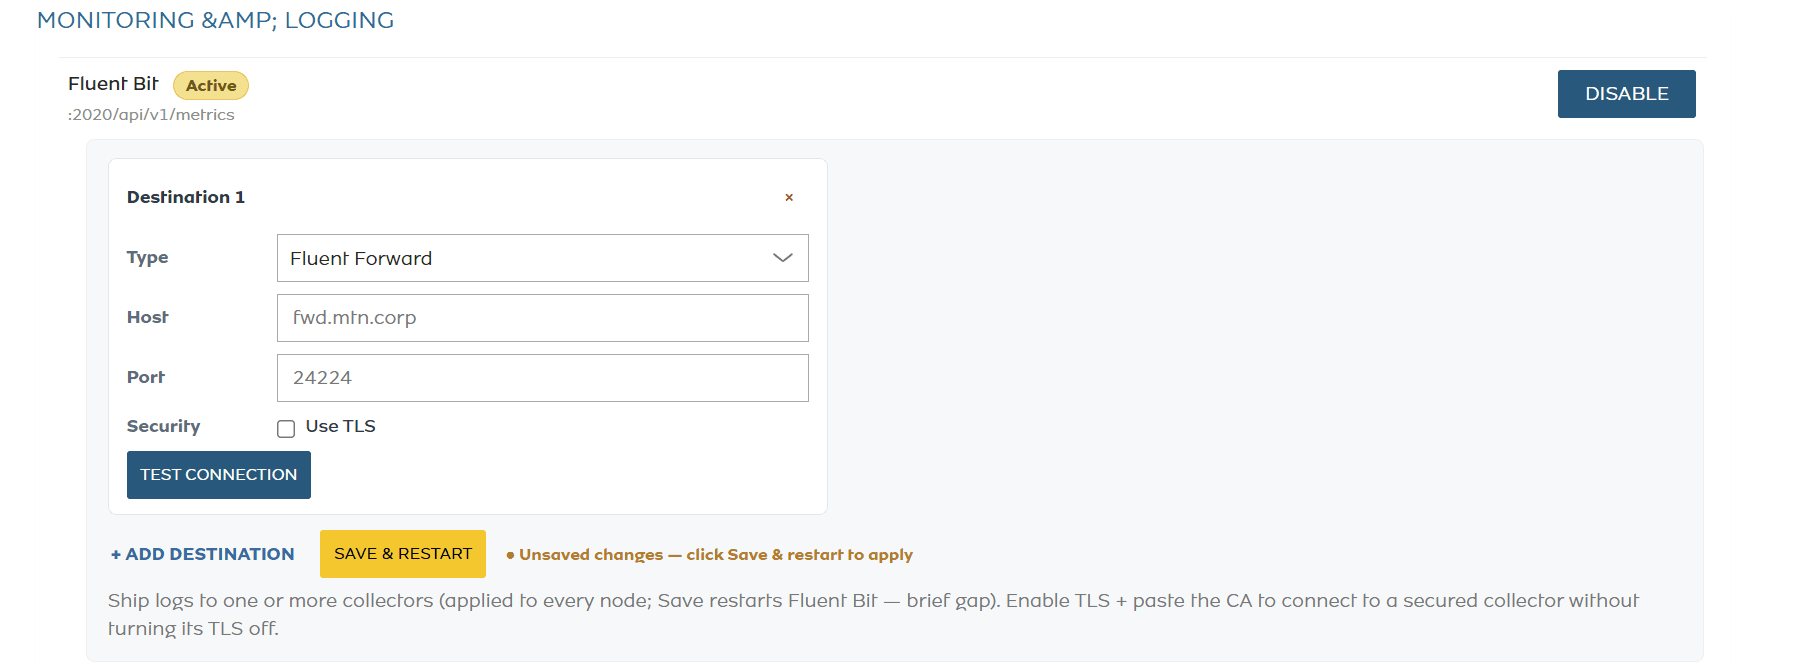
To enable Fluent Bit, click ‘Enable’ to launch the configuration wizard. Once open, select your preferred log destinations and enter the required input details. By default, logs are stored locally on each node; you can add multiple destinations to ship these logs externally.

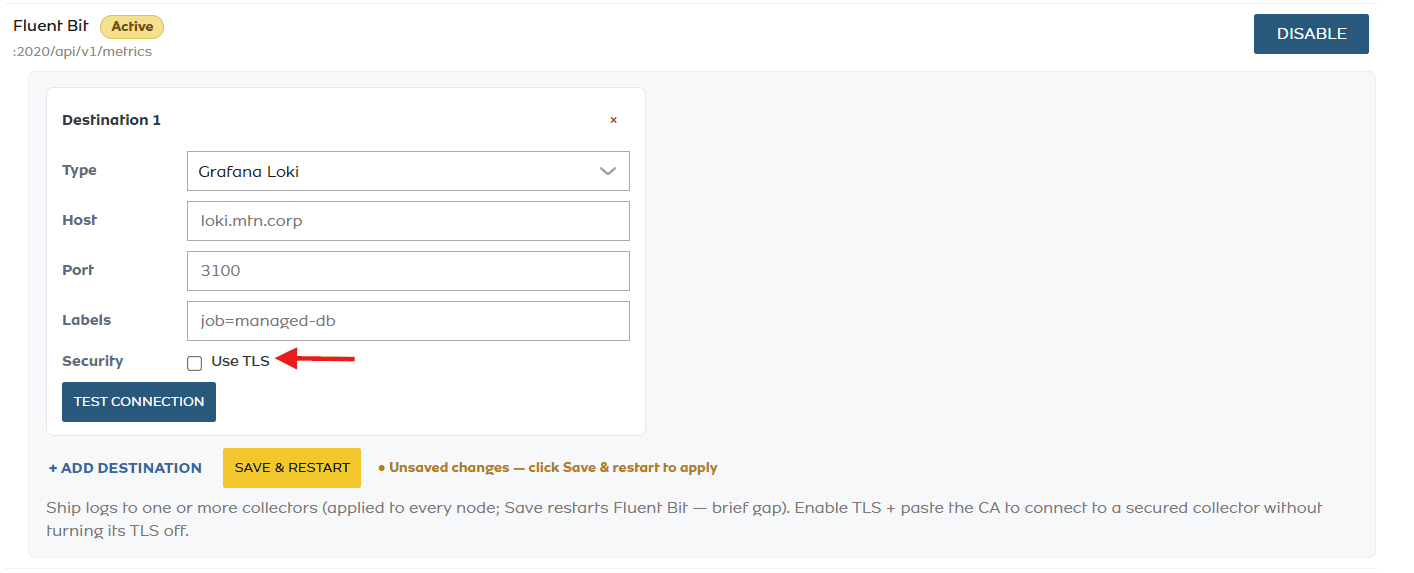
- Grafana Loki
- ElasticSearch / OpenSearch
- HTTP Endpoint
- Fluent Forward
For each destination, you can enable TLS by selecting the “Use TLS” checkbox.

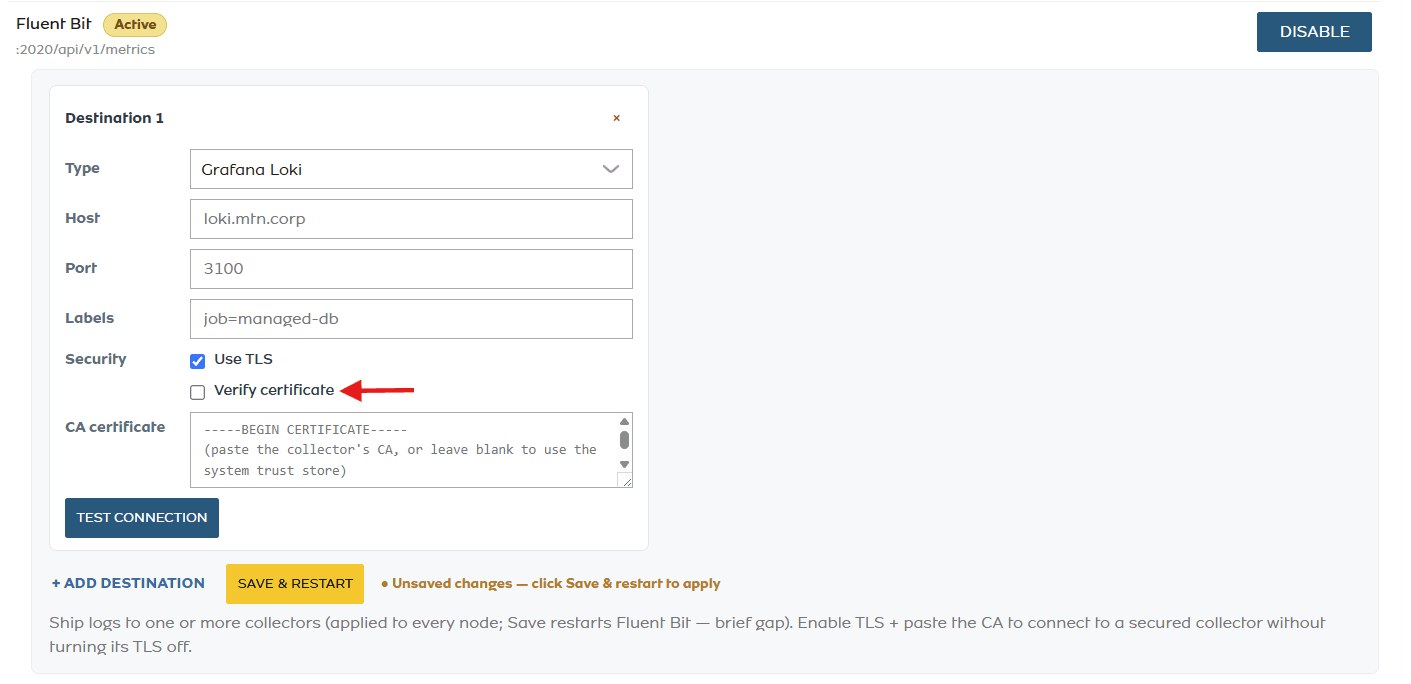
To further secure your connection, check “Verify Certificate” to validate the certificate against the collector’s hostname. Note that you must use the hostname for verification, as certificates rarely match a bare IP address.

Choose a log destination, test the configuration, and save your changes. This reconfigures the Fluent Bit output and restarts the service, which may cause a brief connection gap.

To enable Prometheus, click the ‘Enable’ button to activate prometheus

Once activated, you can view connection details for monitoring & logging services under the Connection Details tab.

Note: Getting to the prometheus webpage, your logging credentials are your admin username and admin password
SQL Editor
The SQL Editor tab provides an integrated, web-based console, allowing you to execute ad-hoc queries and perform database maintenance tasks directly within the portal.
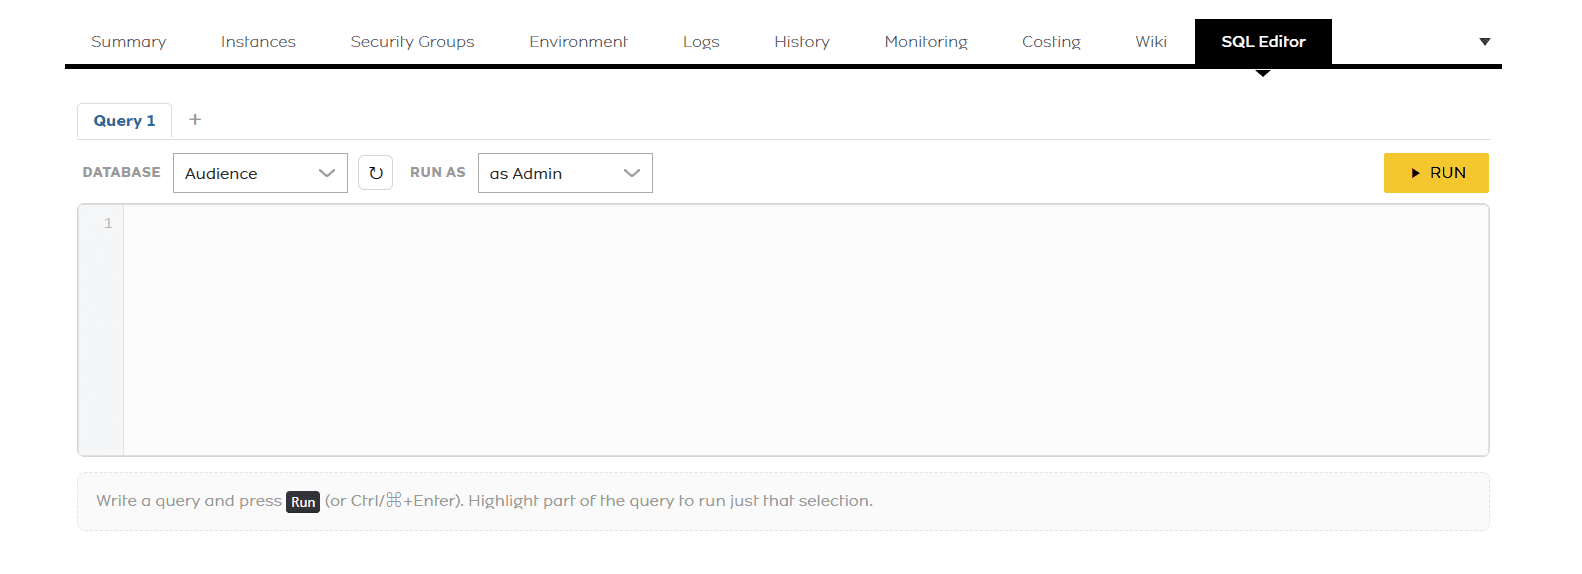
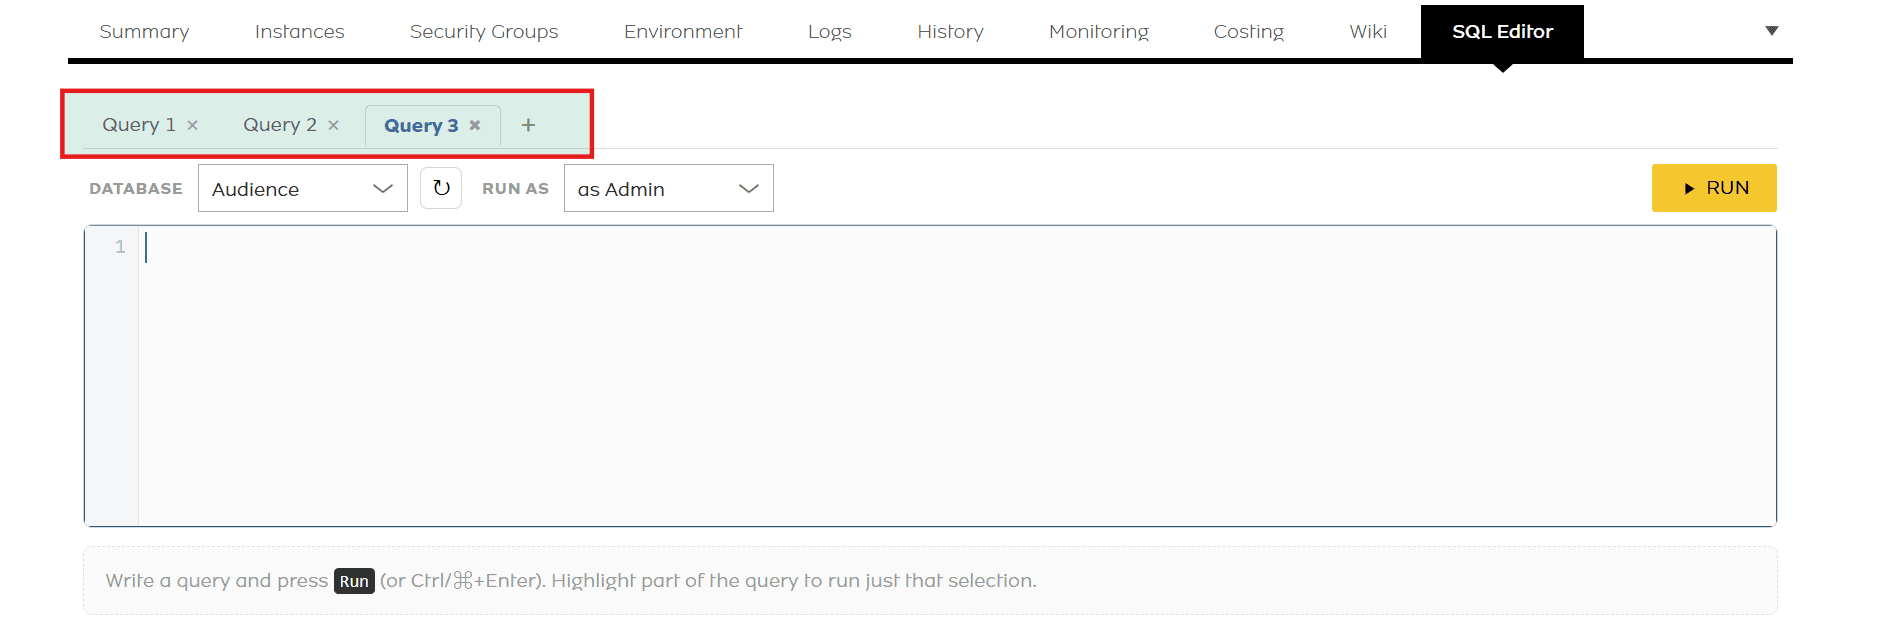
You can add multiple query tabs by clicking the plus icon.

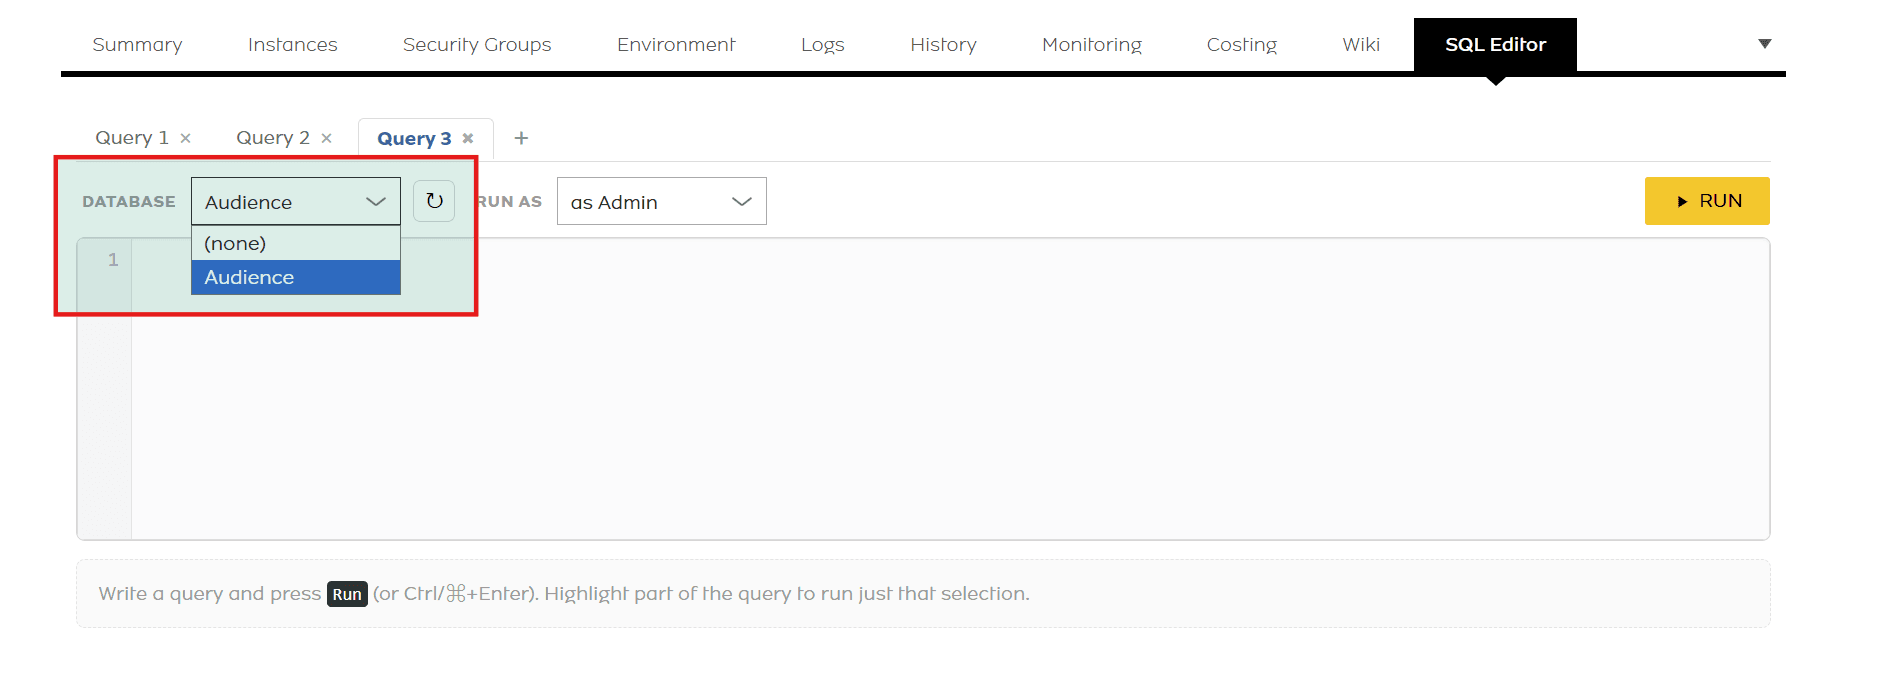
You can select the database against which you want to run queries by clicking on the dropdown menu.
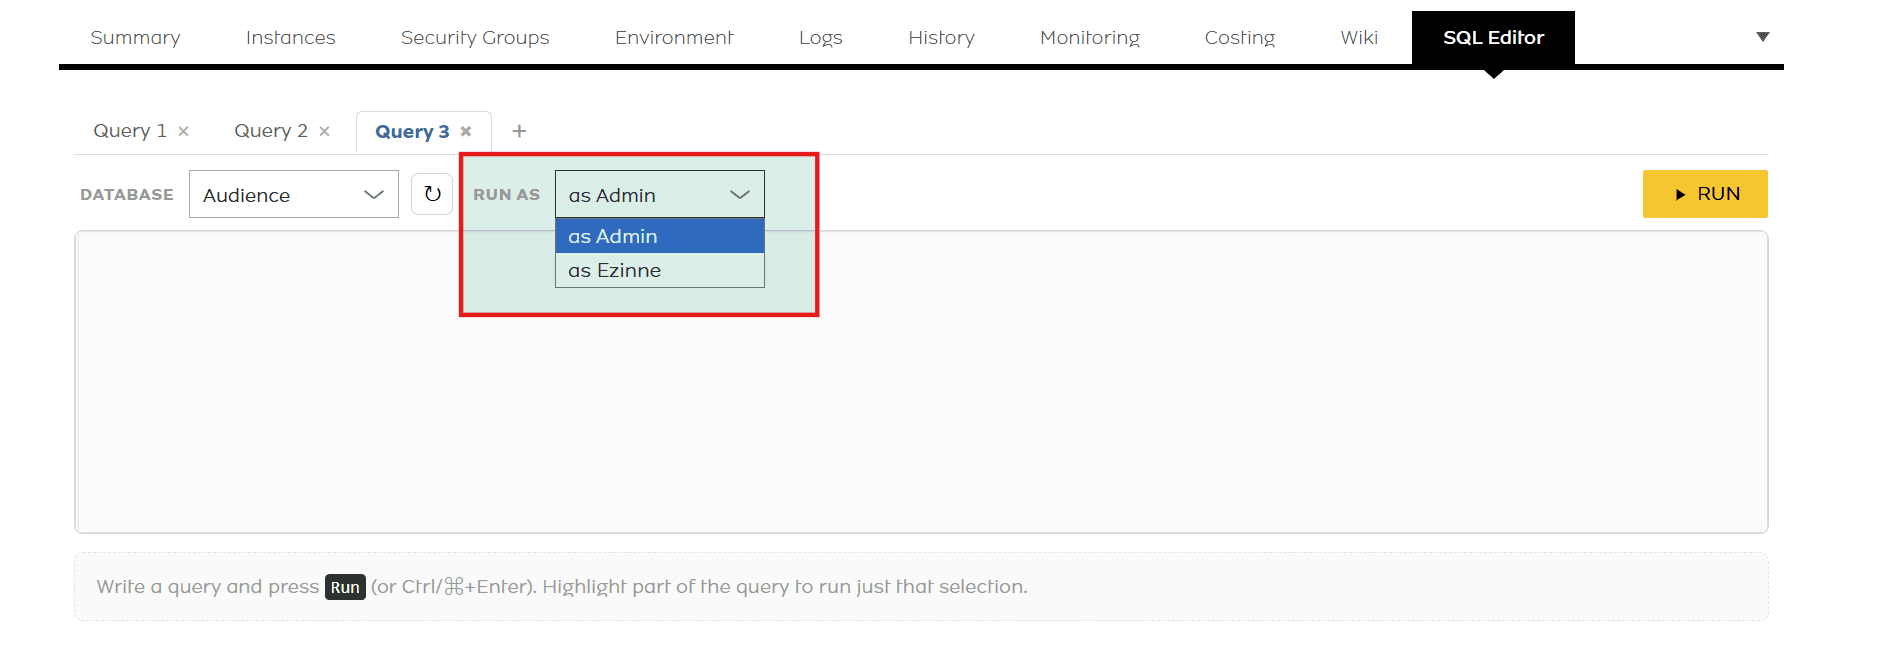
The SQL Editor allows Admin and service accounts to execute queries on their assigned databases, while the Admin account has universal access across all databases.
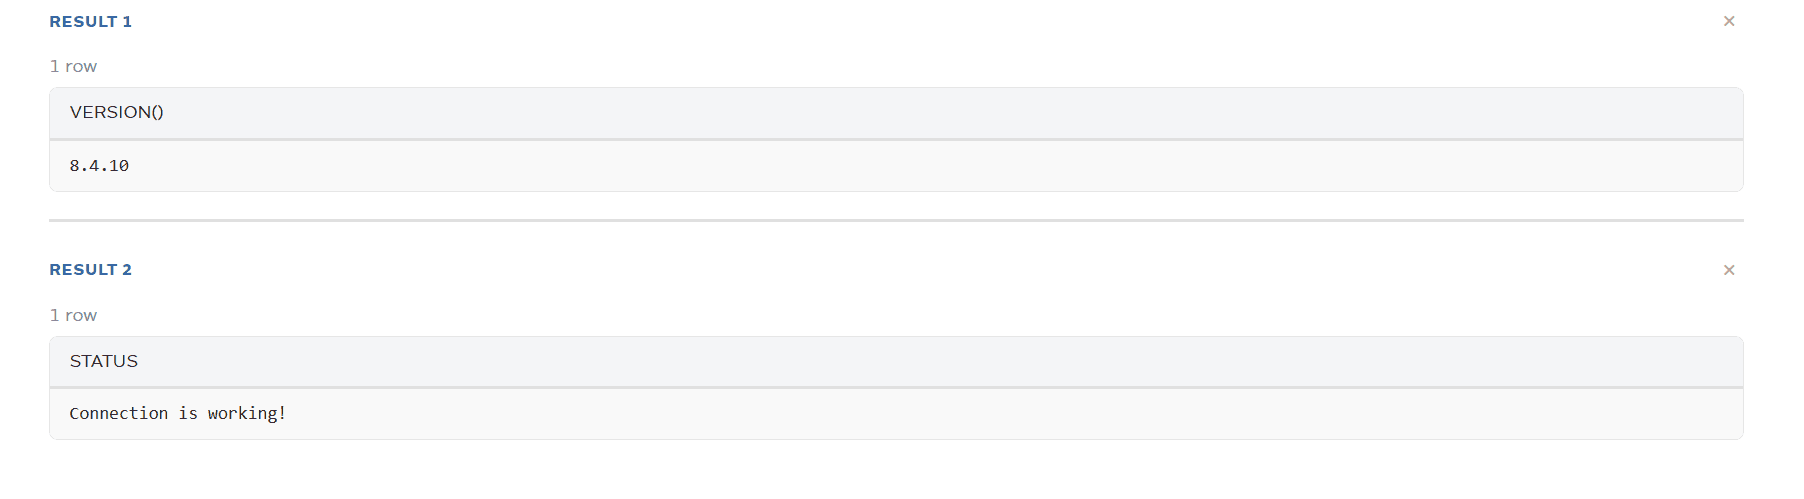
Run SQL commands in the SQL Editor by typing or pasting your queries, then clicking ‘Run’ or highlighting specific rows and clicking ‘Run Selection’.
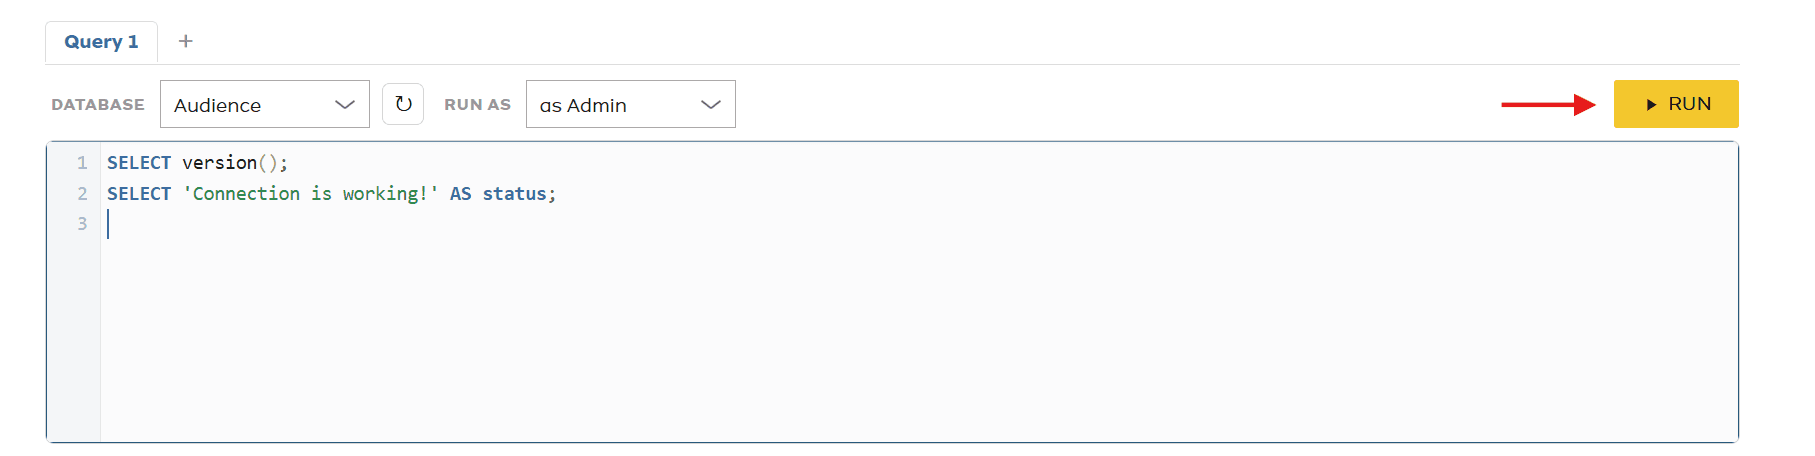
Query results are displayed in rows directly below the editor box upon execution.
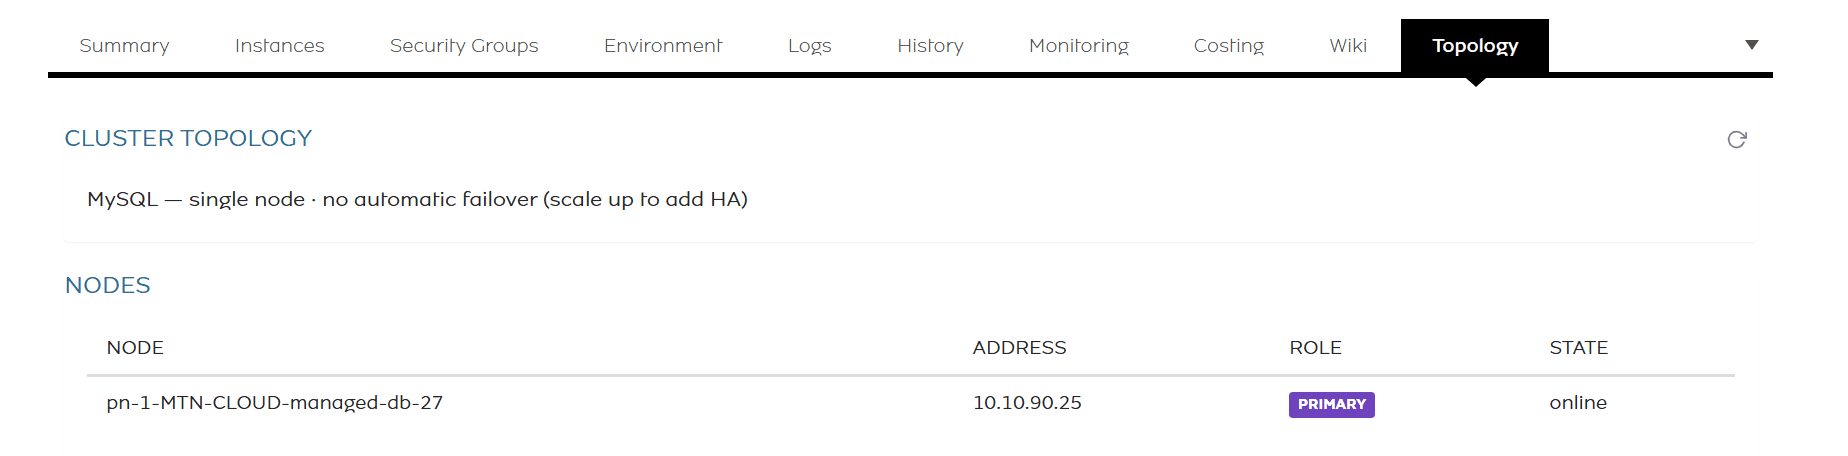
Topology
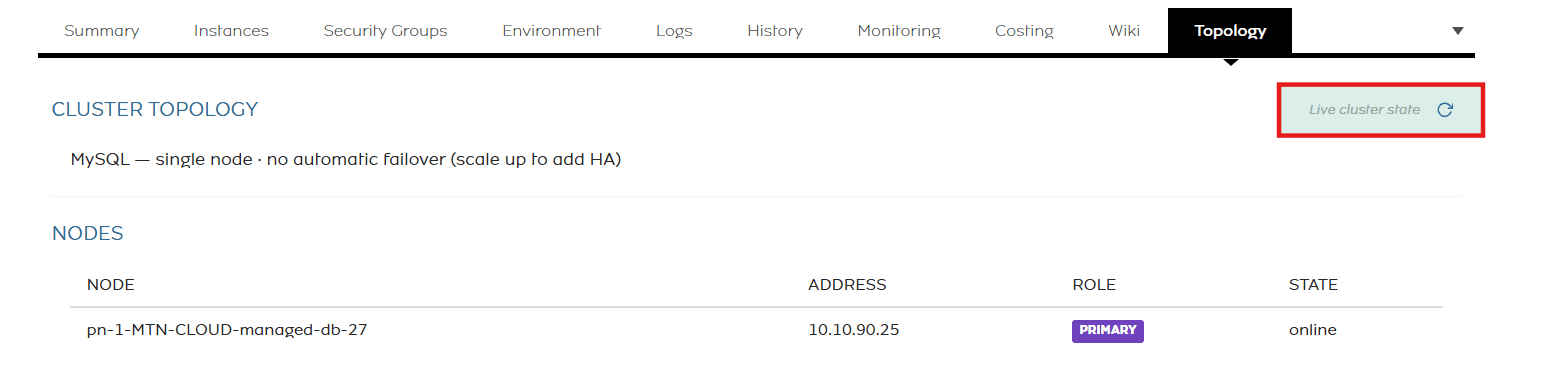
The Topology tab displays your managed database’s cluster layout, including single or multi-node configurations (multi-node support coming soon), and lists each node alongside its assigned role.
Note: Refresh to view the real-time cluster status.
Important Tips & Notes
- If you cannot see required features or if actions do not reflect, try refreshing the portal page or clearing your browser cache.
- While MTN Cloud maintains the underlying infrastructure, you retain full responsibility for data management, including schema design, query optimization, indexing, and user access control.
- Access to the MTN Managed DB service is restricted to accounts with the Customer Admin User, Customer Power User or Customer Database Admin role.