
Fortinet Provisioning Workflow on MTN Cloud
Prerequisites (if not already done)
- Have an MTN Cloud login with permissions to view Infrastructure and Provisioning.
Tip:If you don’t see your networks, or security groups when provisioning, contact support or refresh the portal.
- Have a Project (Resource Pool) Created
- Ensure that a network has been created
- Ensure that if required, a router has been created and the network in (3) above has been attached to that router.
- Plan your deployments; resource specification, network to be placed on, IP address, required inter-communication, hence security groups rules, and if a floating IP is required or not.
The Right Sequence
- Create a User (Linux/Windows): Add the required user under User Settings.
- Define Security Groups: Create a new security group specifying the ports needed for ingress and egress traffic. This new security group can be appended to the fortinet (in addition to the default) after the fortinet has been created. The default security group provides basic functionalities such as console access and instance health checks. It is highly recommended that you use this during the fortinet creation.
- Provision the Fortinet Instance: Deploy the fortinet instance, attach it to the appropriate network you have created, assign a floating IP, and ensure to apply the default security group. At this point, your fortinet instance will be ready for use. After provisioning, defined or additional security group(s) can be added to the instance.
Part 1 — Create Linux/Windows User (if not already done)
Purpose: Allow logins to instances provisioned via the console and resource ownership within MTN Cloud
- Log in to the User Account
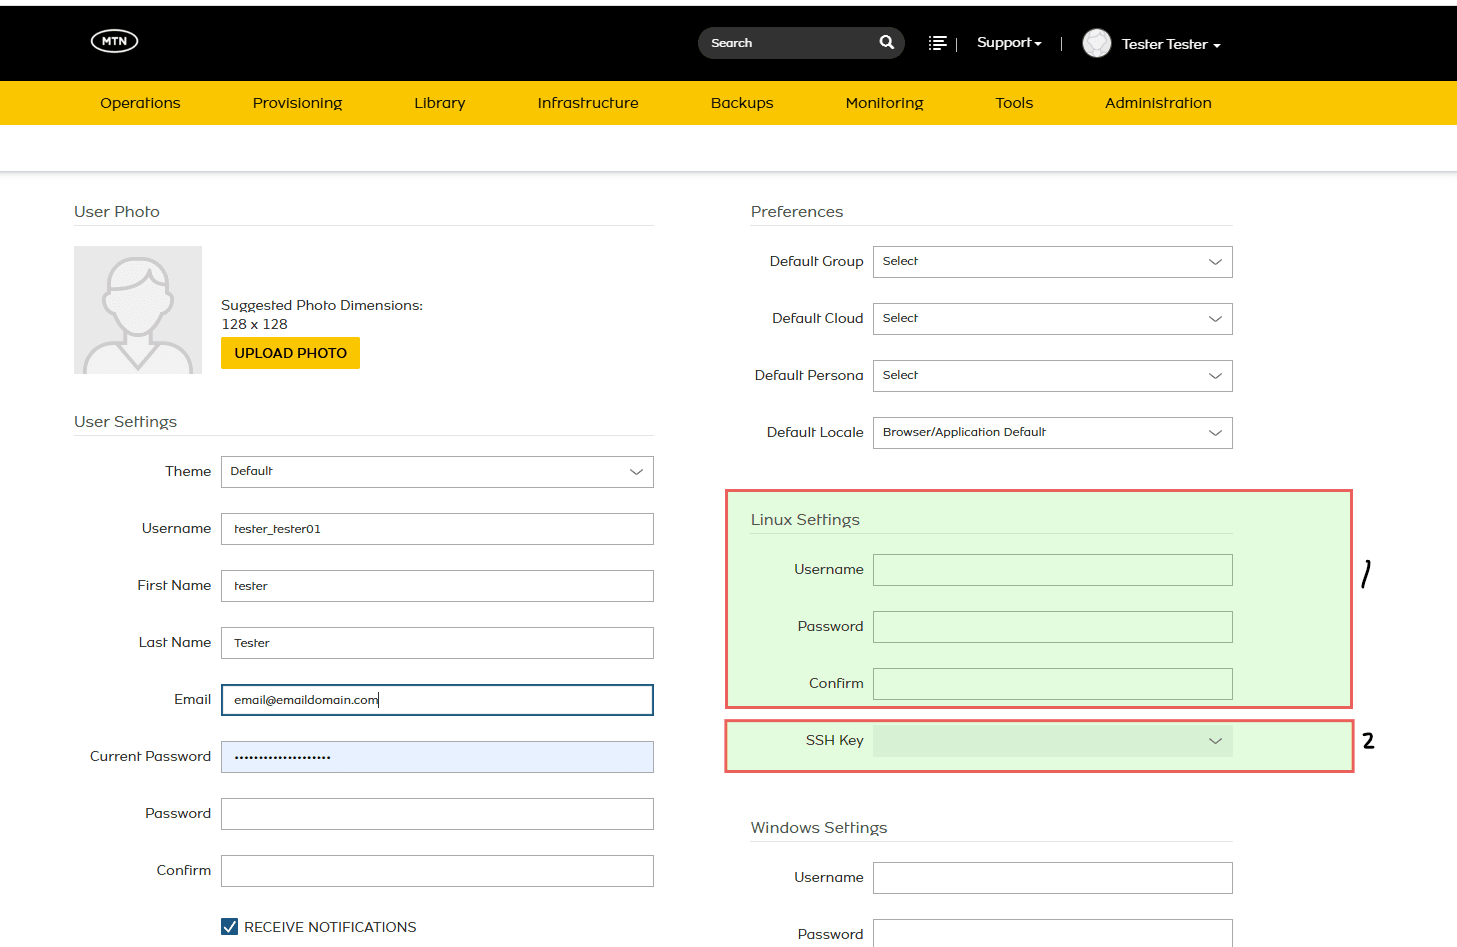
- Navigate to User Settings (can be found at the top right corner of your screen when the dropdown beside name is clicked)

- Locate Linux Settings
- Assign:
- Username
- Password
- Confirm Password
- Select an SSH key entry if you have one (optional)
- Do the same for your Windows Settings. Scroll to the bottom and Save
Part 2 — Define Security Groups
Purpose: Controls network access to(ingress) and from(egress) your fortinet.
- Navigate to: Infrastructure > Network > Security Groups


- Click +Add

- Assign:
- Name
- Description
- Scoped Cloud = MTNNG_CLOUD_AZ_1

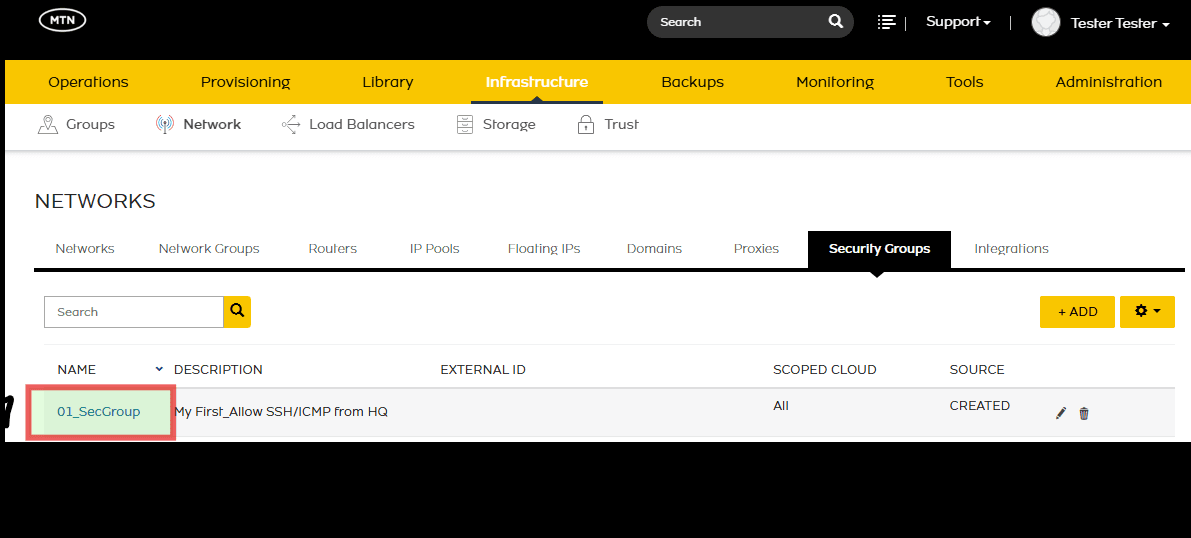
- Click the Security Group that was recently created
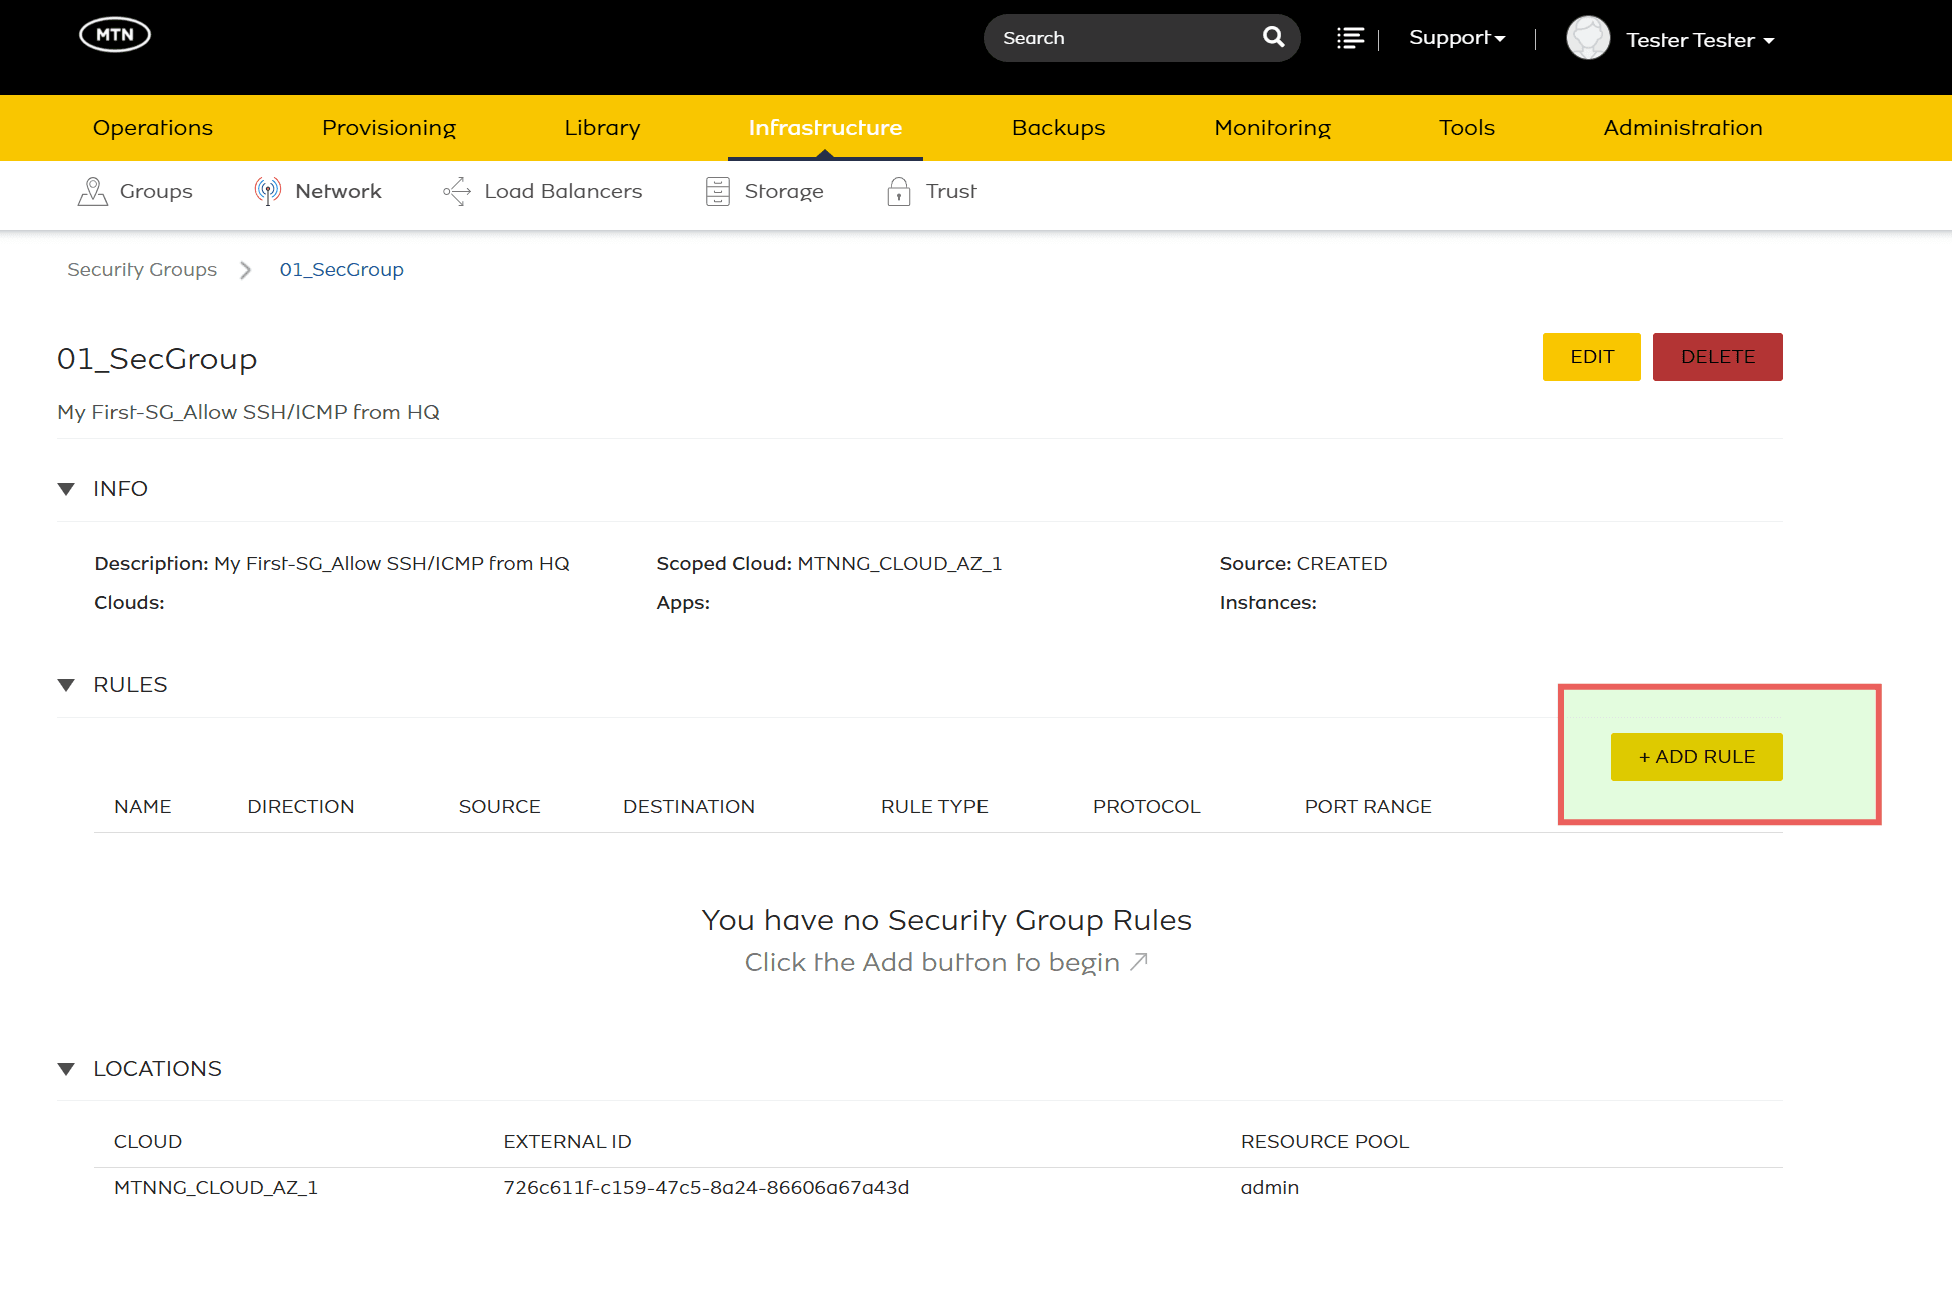
- Navigate to Rules
- Click on +Add Rules
- Assign:
- Name
- Direction = (Ingress or Egress)
- Rule Type = Custom Rule
- Protocol = (TCP, UDP OR ICMP)
- Port Range (available depending on protocol selected)
- Source Type
- Source
- Destination Type
- Destination Port Range
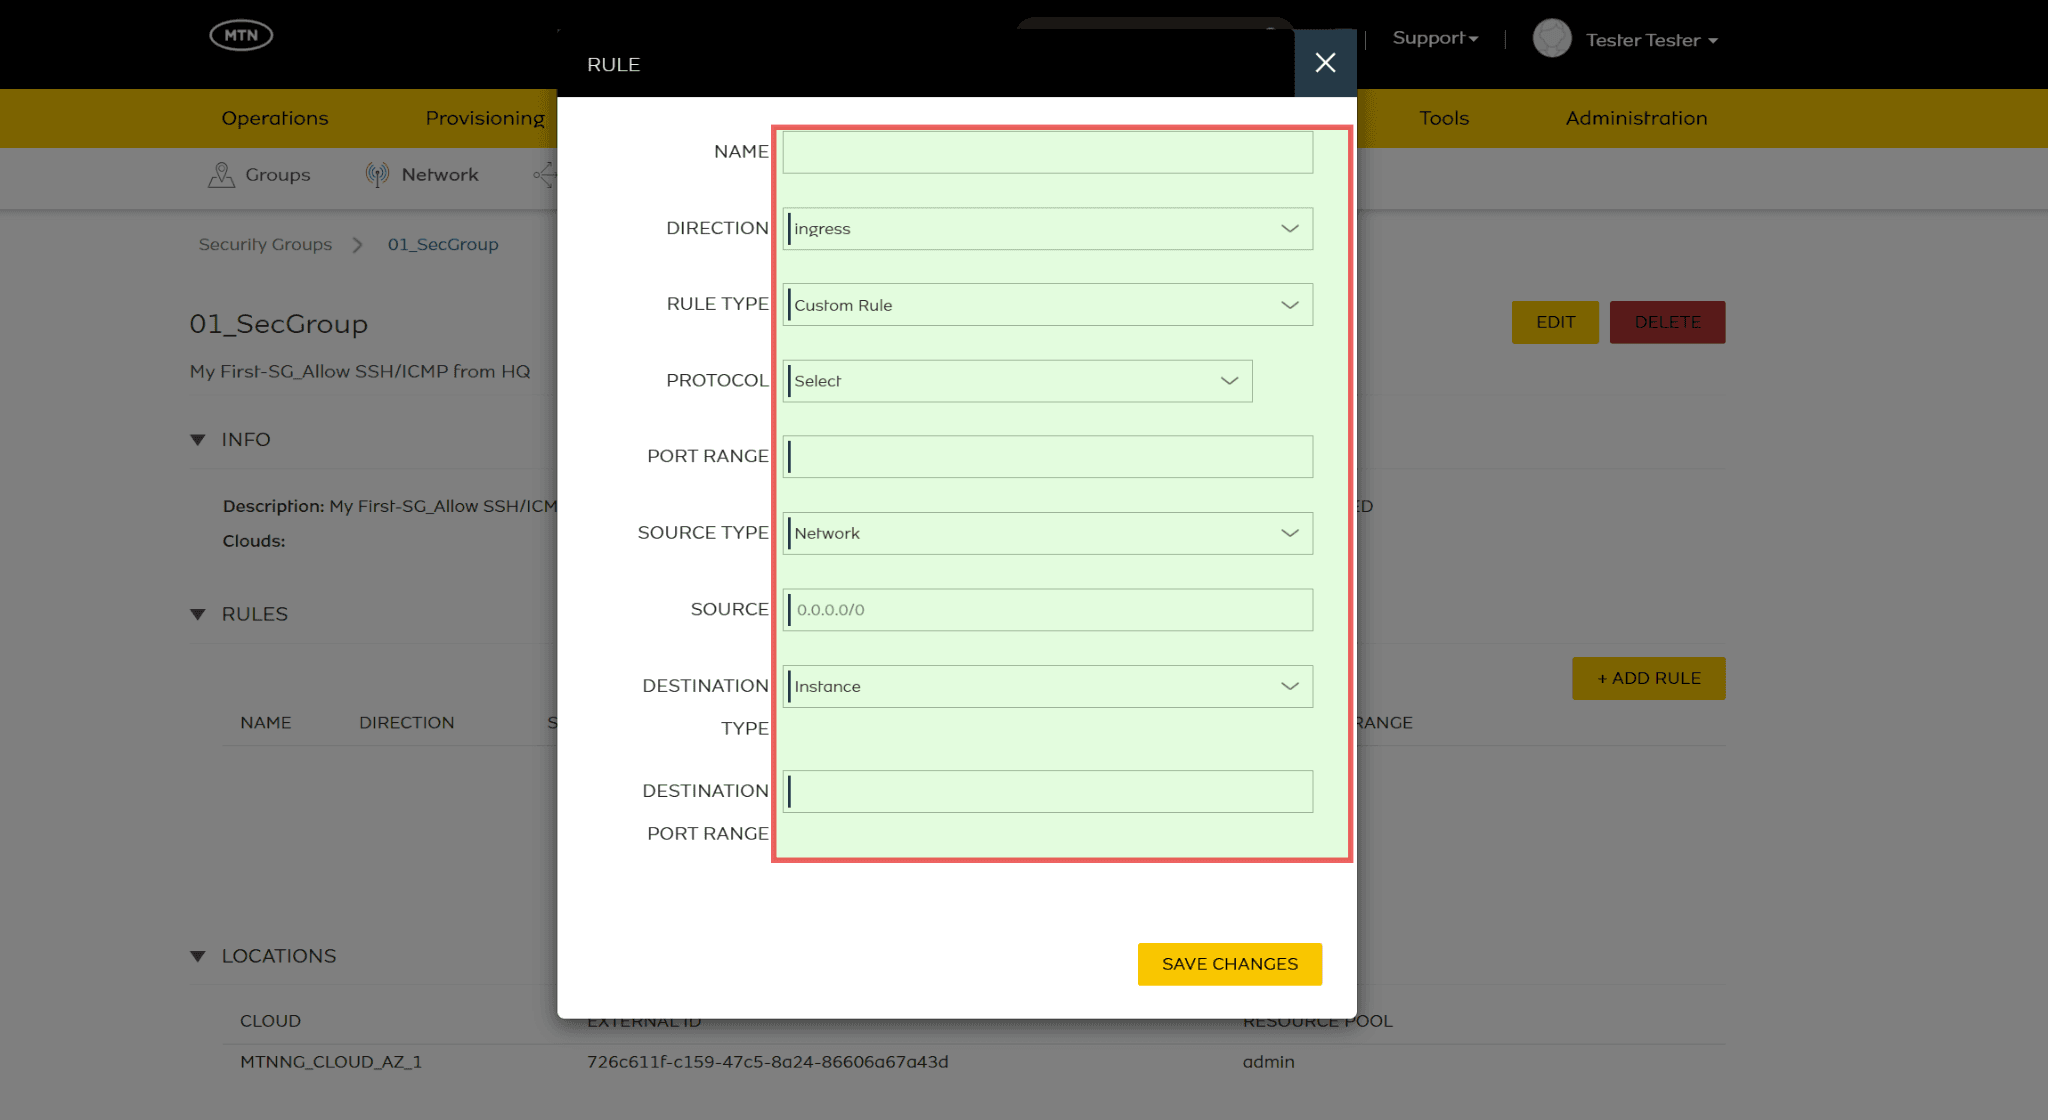
- Scroll Down to Save Changes
- Navigate to Location
- Click on +Add Location
- Select the required Cloud where the workload to be protected is provisioned.
- Click on Save Changes
Use Case: Restricting SSH Access to Only My Laptop
Scenario: You want only your laptop (with IP 200.200.113.15) to be able to have access into your fortinet. All other devices should be blocked.
Steps:
- Navigate to: Infrastructure > Network > Security Groups
- Click + Add
- Name: Laptop-SSH-Only
- Description: Allow SSH (Secure Remote Connection) only from my laptop
- Scoped Cloud: MTNNG_CLOUD-AZ1 (Important to choose the AZ) and not ALL
- Select the Laptop-SSH-Only group.
- Go to the Rules tab → click + Add Rules.
- Name: Allow-SSH-From-Laptop
- Direction: Ingress
- Rule Type: Custom Rule
- Protocol: TCP
- Port Range: 22
- Source Type: Network
- Source:200.200.113.15/32 (your laptop’s public IP)
- Destination Type: Instance
- Destination Port Range: 22
- Save Changes.

- Go to the Rules tab → click + Add Rules.
- Name: Allow-GUI-From-Laptop
- Direction: Ingress
- Rule Type: Custom Rule
- Protocol: TCP
- Port Range: 443
- Source Type: Network
- Source:200.200.113.15/32 (your laptop’s public IP)
- Destination Type: Instance
- Destination Port Range: 443
- Save Changes.
- Go to the Rules tab → click + Add Rules.
- Name: Allow-SNMP-From-Laptop
- Direction: Ingress
- Rule Type: Custom Rule
- Protocol: UDP
- Port Range: 161
- Source Type: Network
- Source:200.200.113.15/32 (your laptop’s public IP)
- Destination Type: Instance
- Destination Port Range: 161
- Save Changes.
- Go to the Rules tab → click + Add Rules.
- Name: Allow-ICMP-From-Laptop
- Direction: Ingress
- Rule Type: Custom Rule
- Protocol: ICMP
- Source Type: Network
- Source:200.200.113.15/32 (your laptop’s public IP)
- Destination Type: Instance
- Save Changes.
- Go to the Rules tab → click + Add Rules.
- Name: Allow-FGFM(IPV4)-From-Laptop
- Direction: Ingress
- Rule Type: Custom Rule
- Protocol: TCP
- Port Range: 541
- Source Type: Network
- Source:200.200.113.15/32 (your laptop’s public IP)
- Destination Type: Instance
- Destination Port Range: 541
- Save Changes.
- Go to the Rules tab → click + Add Rules.
- Name: Allow-FGFM(IPV6)-From-Laptop
- Direction: Ingress
- Rule Type: Custom Rule
- Protocol: TCP
- Port Range: 542
- Source Type: Network
- Source:200.200.113.15/32 (your laptop’s public IP)
- Destination Type: Instance
- Destination Port Range: 542
- Save Changes.
- Attach the Laptop-SSH-Only group to your fortinet in addition to the default SG.
Result: Only your laptop can successfully have access into the fortinet instance on the open ports. All other SSH attempts will be denied.
Part 3 — Provision the Fortinet Instance (BYOL)
Once your security group, and network are ready, you can provision your fortinet in MTN Cloud Console by following these steps:
- Navigate to: Provisioning → Catalog.

- Click Fortinet Firewall

Complete the form.
- Select the Group and Cloud where the fortinet will be deployed (e.g., MTNNG_Cloud_AZ_1).
- Choose the appropriate Environment for the fortinet (e.g., Development, Staging, Production).
- Select a Plan that defines the fortinet’s CPU and memory resources.
- Select the required volume capacity.
- Select Resource Pool (Project) initially created.
- From the list, select any Network you have created.
- Assign Floating IPs (based on the selection made during router creation for the network selected).
- First, assign the default Security Group available to manage necessary firewall rules and traffic access. Then add the Security Group that was created initially.
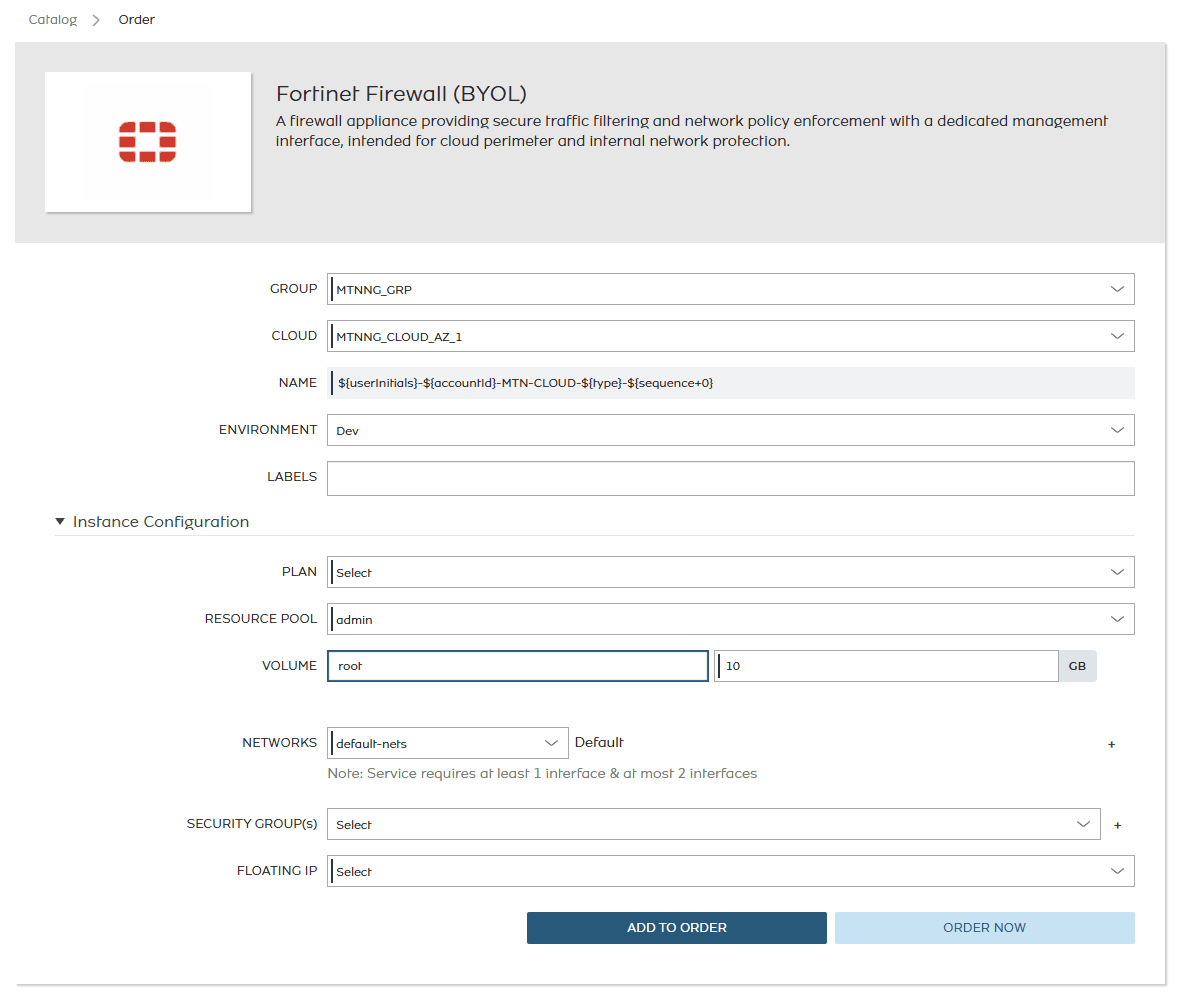
- Click ‘Order now’ to launch the fortinet. MTN Cloud will begin provisioning and display the instance status once deployment is complete.

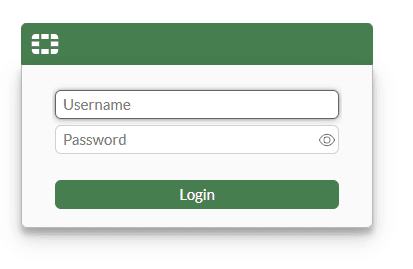
- To login to the GUI, for the default credential username & password;
Username: admin
Password: Password@123
Note: it is recommended that the default password is changed and the credential is stored properly.
Final Notes
- Naming conventions: Use consistent names for keys, networks, and instances.
- Documentation: Keep a record of IPs, credentials, and assigned resources.
- BYOL:This is a ‘Bring Your Own Licence’ instance.
- Security Groups: Regularly review and update rules to follow the principle of least privilege.
- You may reuse the Security Groups and Username/Password for subsequent fortinet installation - based on your security considerations,