
MTN NFS Provisioning Workflow on MTN Cloud
Overview
This guide covers ordering, updating, and deleting a self-service NFS (Network File System) export on the MTN Cloud Platform via the Service Catalog. NFS exports provide a shared, network-mounted file system that tenant instances can attach to for shared read/write access to files.
Why it matters:
- Shared Storage Access: NFS exports provide a network-mounted file system that multiple tenant instances can mount simultaneously for shared read/write access to the same files.
- Full Lifecycle Self-Service: A single catalog form handles creation, updates, and deletion of an export — the mode is controlled entirely by the Update Only and Delete Only checkboxes, with no separate tooling required.
- Granular Access Control: A comma-separated Client IPs allow-list restricts which hosts can mount the export; leaving it blank permits all IPs.
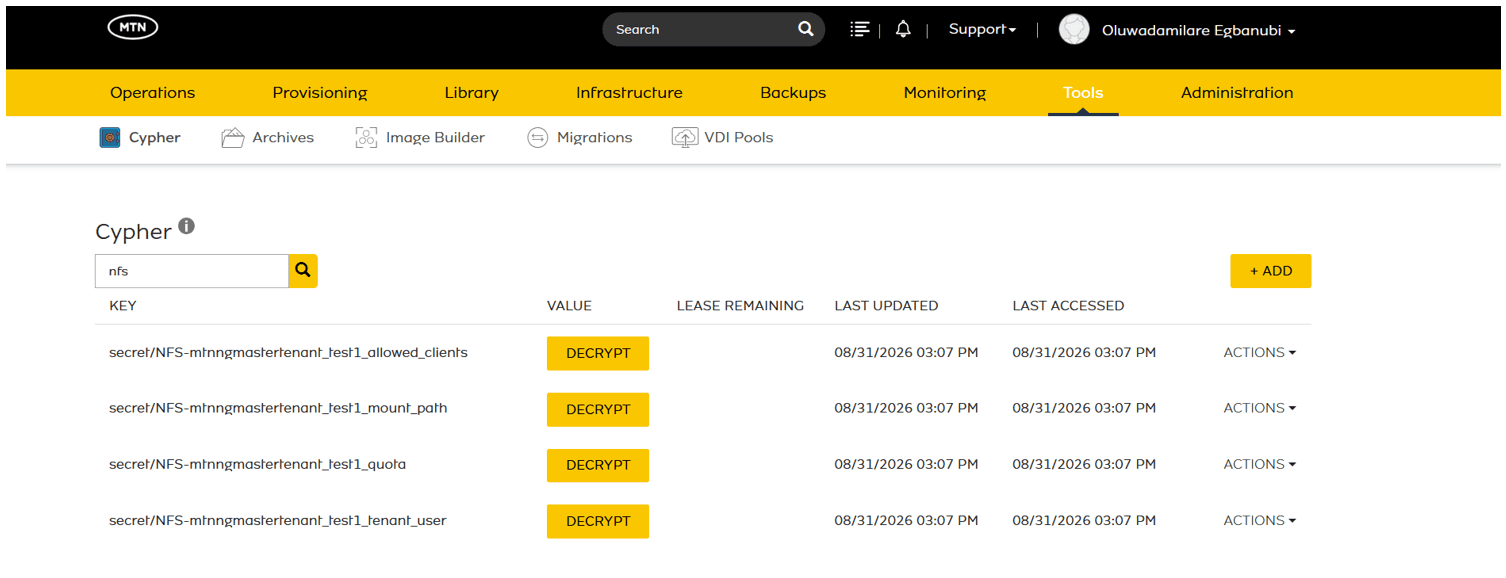
- Centralized Reference Storage: Post-provisioning details — mount path, quota, allowed IPs, and tenant user — are written to Cypher (under Tools) for secure reference, in addition to being emailed to the requester.
Prerequisites
Before you begin, ensure you have:
- An active MTN Cloud Console login with the appropriate permissions to view the Provisioning (Catalog) and Tools (Cypher) tabs.
Tip: If you do not see required features and resources, please refresh the portal or contact support.
- A planned NFS export strategy: a unique volume name, the required storage quota (GB), and which client IPs should be permitted to mount it.
Step 1 — Select Catalog Item
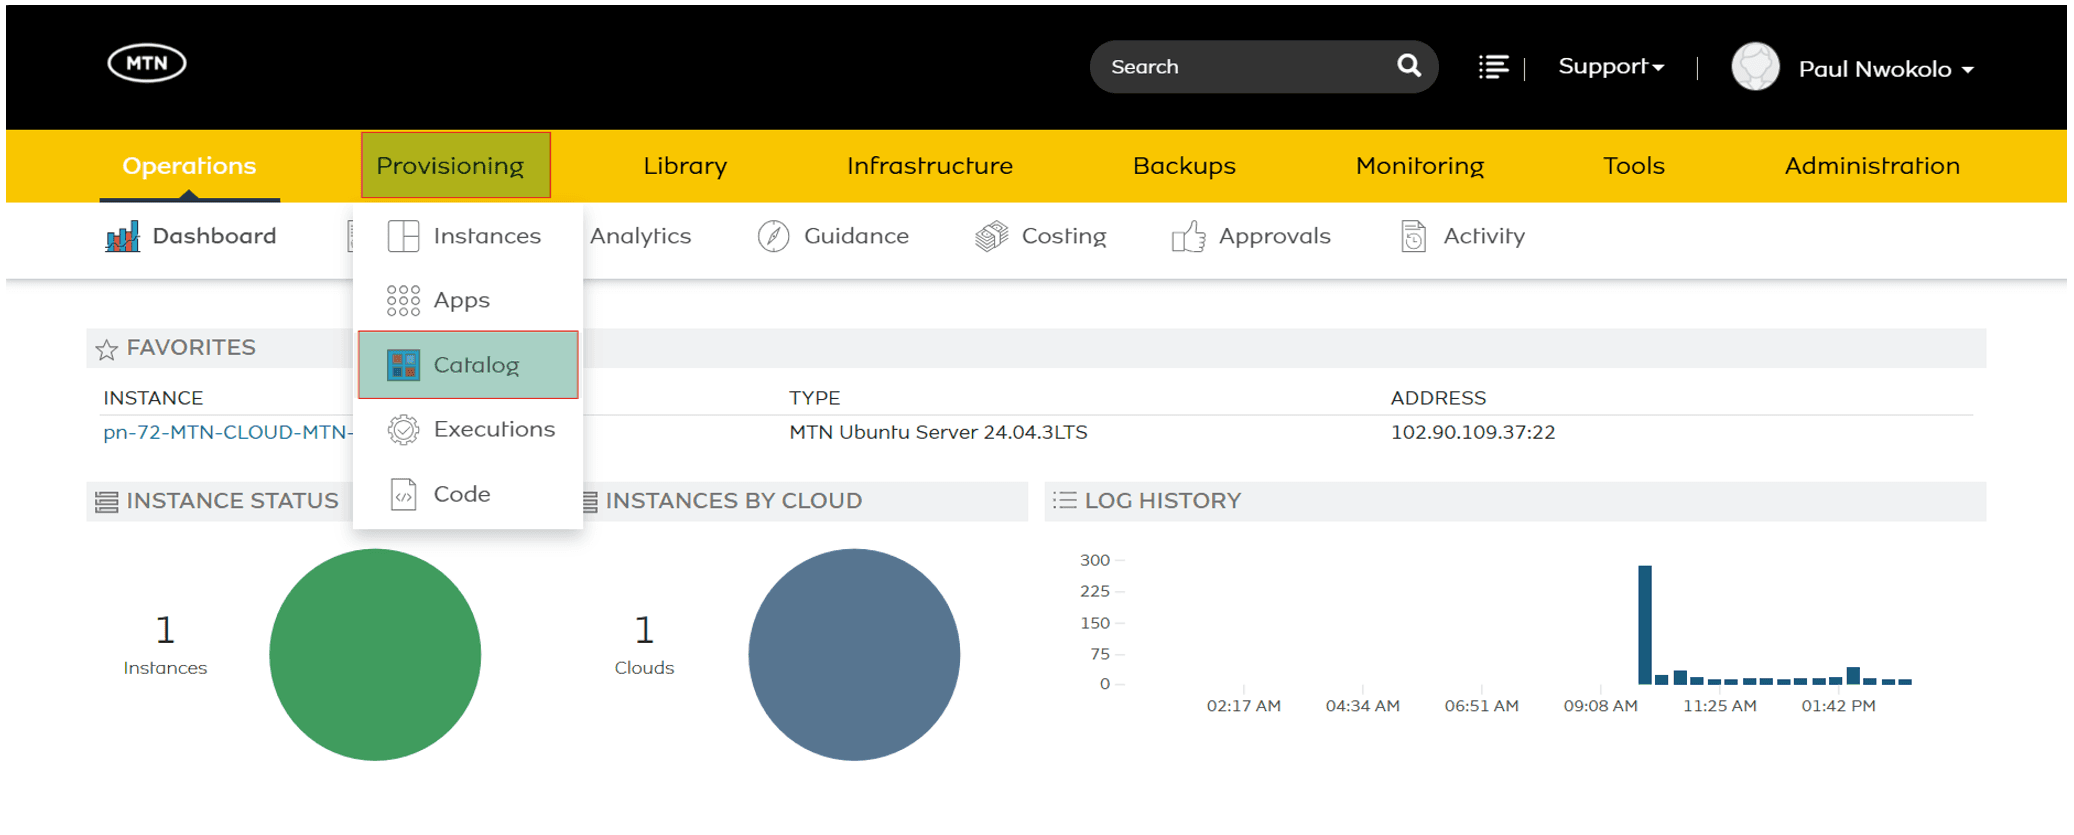
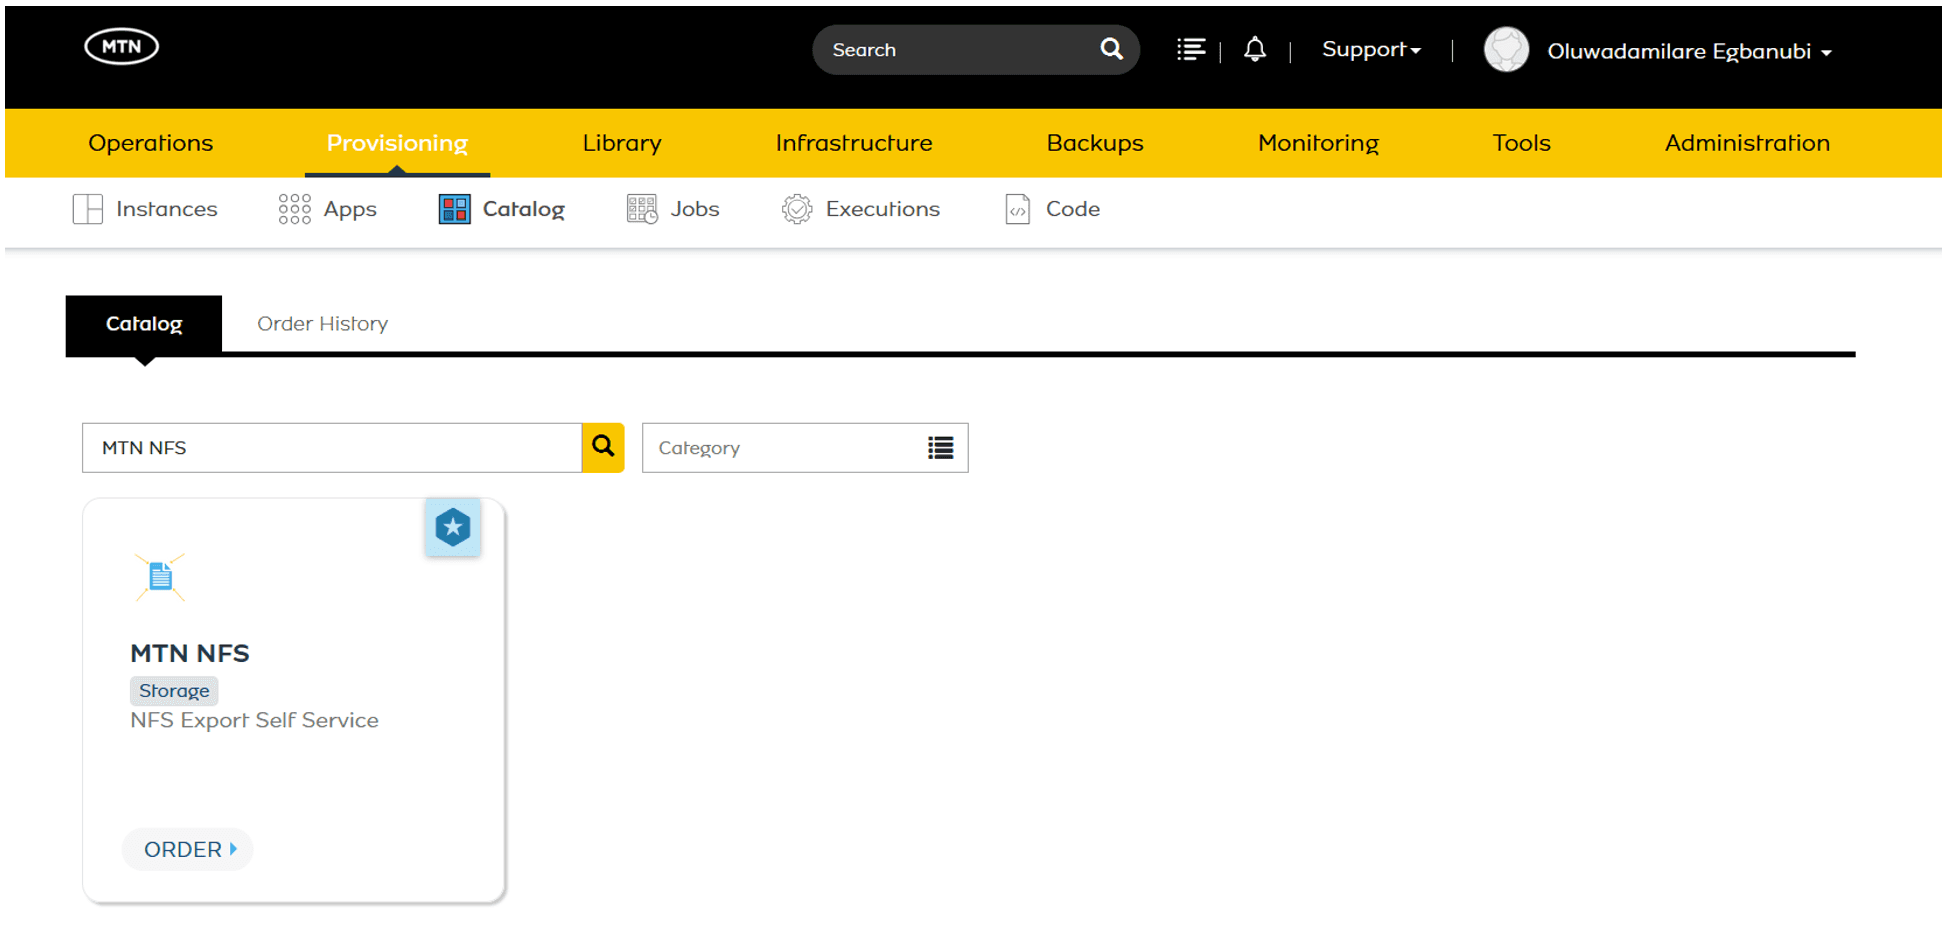
Navigate to the Provisioning tab and click on Catalog. Search for and select the MTN NFS catalog item.
Step 2 — Configure the Order Form
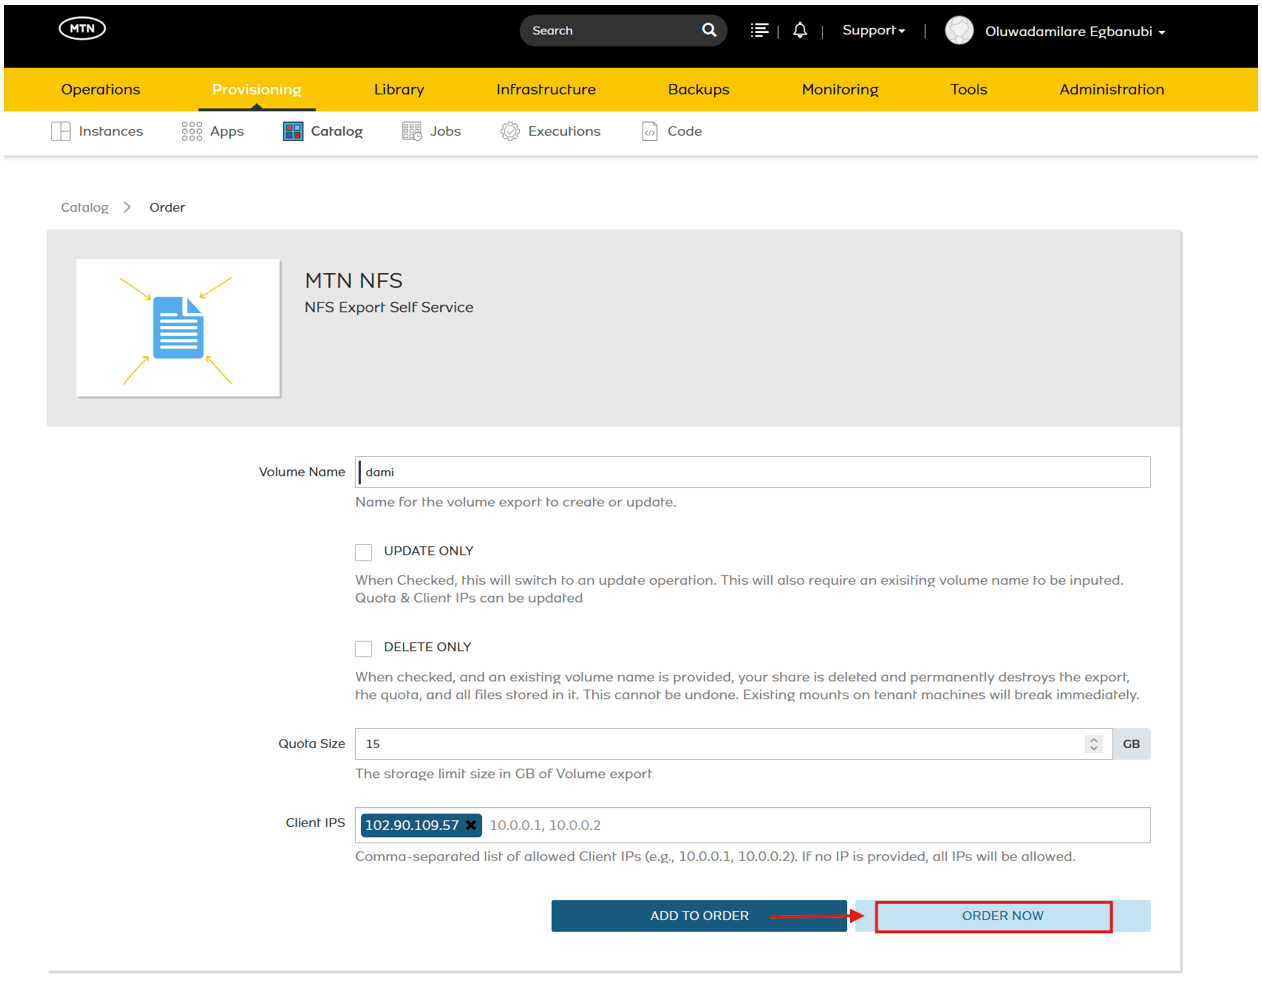
The checkboxes at the top of the order form determine which mode the request runs in — leaving both unchecked means a new export is being created.
General Configuration:
- Volume Name: Enter a unique name for the export to create, or the exact name of an existing export to update or delete.
- Update Only: Check this to switch the form into update mode. Requires the existing volume name; allows the Quota and/or Client IPs to be changed.
- Delete Only: Check this to permanently delete an existing export. This destroys the export, its quota, and all files stored in it, and cannot be undone.
- Quota Size (GB): The storage limit for the volume export. Note: quota size can only be increased, never decreased.
- Client IPs: A comma-separated list of allowed client IPs (e.g., 10.0.0.1, 10.0.0.2). Leave blank to allow all IPs.
Click Order Now to submit the request.
Step 3 — Verify and Manage
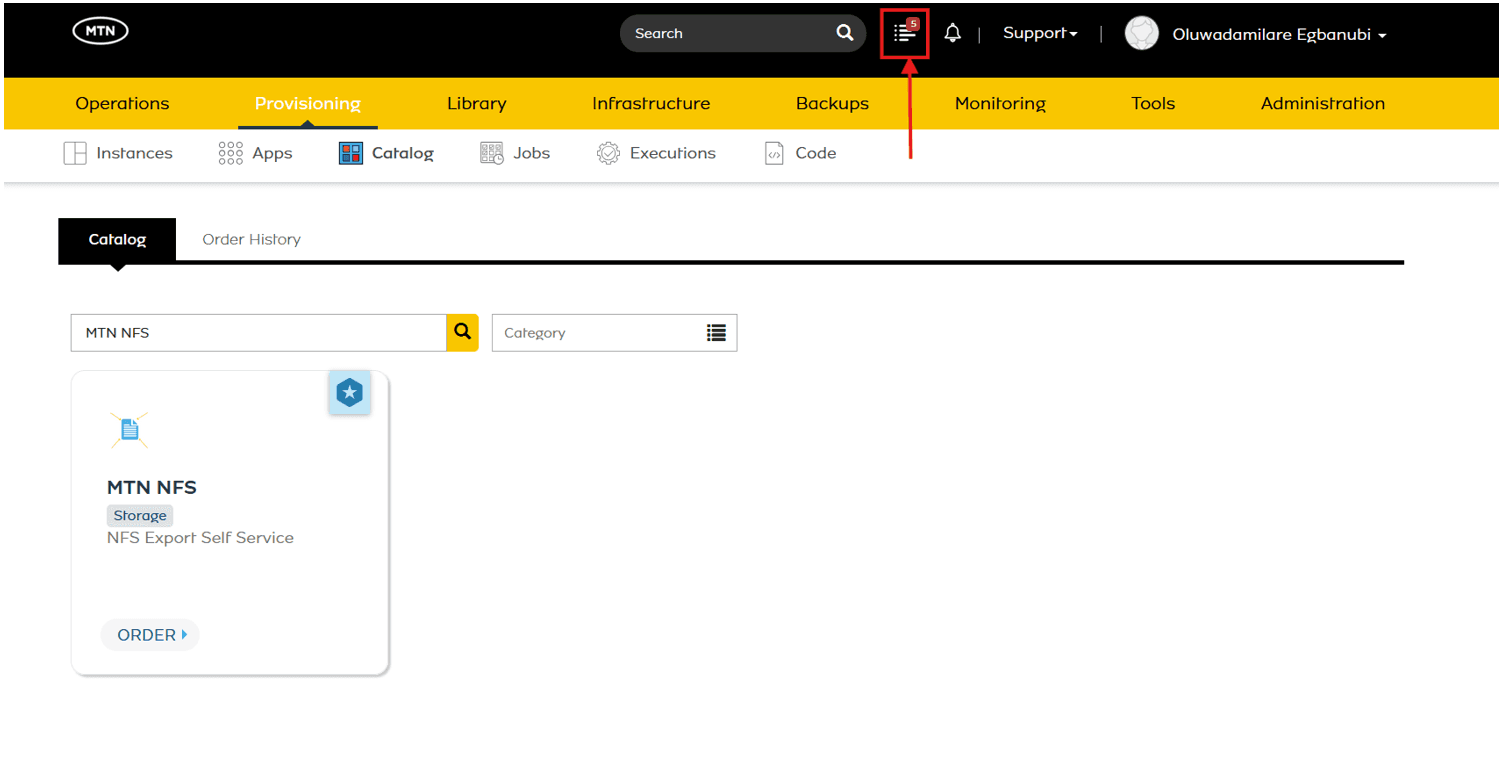
Progress of the NFS volume creation can be tracked via the progress icon in the top navigation bar.
Once complete, the allowed Client IPs, NFS volume mount path, volume quota, and tenant user are available for reference in Cypher (under Tools).
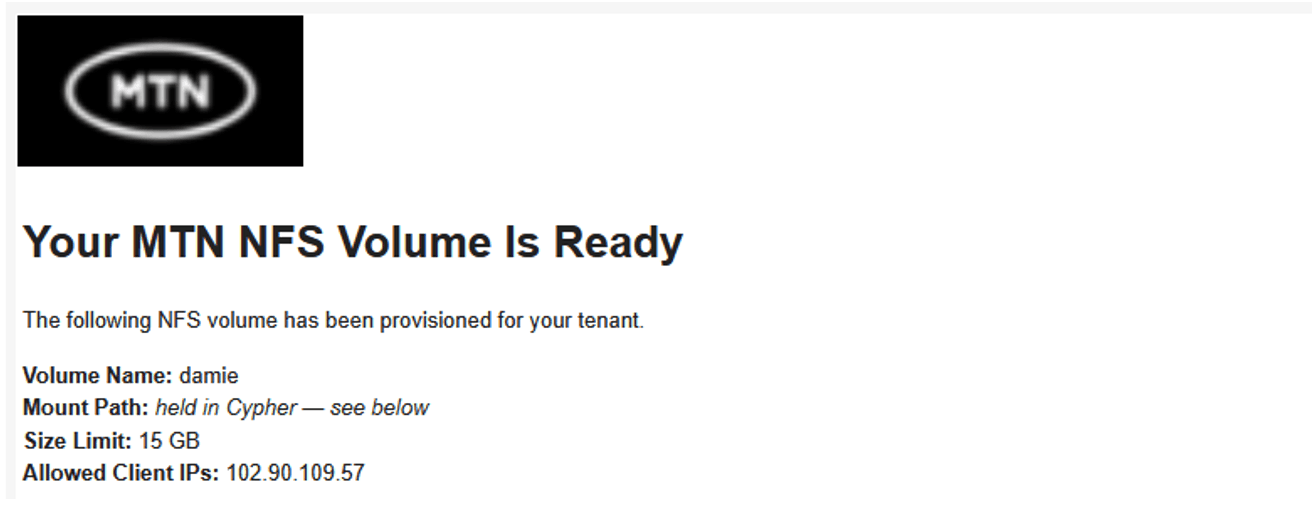
A confirmation email containing the volume name, mount path reference, size limit, and allowed client IPs is also sent to the requester.
Once the details have been verified, the NFS volume can be mounted and used by tenant instances.
Quick Reference — Create, Update, and Delete
To Create a new NFS Export:
- Enter a unique Volume Name.
- Leave Update Only and Delete Only unchecked.
- Enter the required Quota Size (GB).
- Enter a comma-separated Client IPs list to restrict access. Leave blank to allow all IPs.
To Update an Existing NFS Export:
- Enter the existing Volume Name.
- Check Update Only.
- Check Update Quota and/or Update IP depending on what needs to change, and fill in the corresponding field(s).
- Click Order Now.
To Delete an Export:
- Enter the existing Volume Name.
- Check Delete Only.
- Click Order Now.
Note: Deletion permanently destroys the export, its quota, and all files stored in it. This cannot be undone, and any tenant machines with an active mount will lose access immediately. Confirm the volume name carefully before submitting.
Important Tips and Notes
- Deletion Is Permanent: Checking Delete Only destroys the export, its quota, and all stored files with no way to undo it, and breaks any active tenant mounts immediately.
- Quota Increases Only: The storage quota for an existing export can only be increased, never decreased.
- Client IP Access: Leaving Client IPs blank allows all IPs to mount the export; a comma-separated list restricts access to only those hosts.
- Email Notifications — Creation: The requester receives the mount path, size, permitted addresses, and mount instructions. Other tenancy users receive a provisioning notification with the requester's details.
- Email Notifications — Update: The requester receives the before/after values and resulting cluster state. Other tenancy users receive a summary of changes and any access impact.
- Email Notifications — Deletion: The requester receives the deleted resource details, final capacity figures, and deletion timestamp. Other tenancy users receive a deletion warning and notification that associated mounts are no longer accessible.
- Reference Lookup: If the original email isn't available, allowed Client IPs, mount path, quota, and tenant user can always be retrieved from Cypher (Tools > Cypher).