
MTN WireGuard SSL VPN Provisioning Workflow on MTN Cloud
Before You Start (prerequisites)
- Have an MTN Cloud login with permissions to view Provisioning (Instances and Catalog) and Infrastructure (Network).
Tip:If you don’t see required features and resources, contact support or refresh the portal.
- Define a Security Group
- Plan your deployments
The Right Sequence
- Create Security Group: Establish a controlled network boundary by defining allowed inbound and outbound traffic to secure deployed resources
- Deploy MTN WireGuard SSL VPN:Implement a fast WireGuard‑based SSL VPN Instance on the MTN Cloud to enable secure, reliable remote access via Catalog Items or Instance Tab.
- SSL VPN Web Setup:Configure the browser‑based management interface to simplify user administration, monitoring, and security adjustments.
Important Note: Ports 51820 (UDP), 53, and 443 must be added as inbound rules in the personal security group and applied to the SSL VPN server in addition to the default security group.
Part 1 — Create Security Group
Purpose: Controls network access to (ingress) and from (egress) your VM.
- Navigate to: Infrastructure > Network > Security Groups


- Click +Add

- Assign:
- Name
- Description
- Scoped Cloud = MTNNG_CLOUD_AZ_1
- Click the Security Group that was recently created
- Navigate to Rules
- Click on +Add Rules
- Assign:
- Name
- Direction = (Ingress or Egress)
- Rule Type = Custom Rule
- Protocol = (TCP, UDP OR ICMP)
- Port Range (available depending on protocol selected)
- Source Type
- Source
- Destination Type
- Destination Port Range

- Scroll Down to Save Changes
- Navigate to Location
- Click on +Add Location
- Select the required Cloud where the workload to be protected is provisioned.
- Click on Save Changes
Part 2 — Deploy MTN WireGuard SSL VPN
Purpose: Orchestrate the automated deployment of a high-performance, WireGuard-based SSL VPN within the MTN Cloud environment. This process leverages Catalog Items to simplify the provisioning process.
- Navigate to: Provisioning > Catalog.

- Select catalog item (MTN WireGuard SSL VPN)

- Assign:
- Group
- Cloud
- Environment
- Name
- Resource Pool
- Plan
- Volumes
- Network(s)
- Security Groups (default and the security group created earlier)
- Floating IP

- Click Order Now
- Navigate to: Provisioning > Instances–

- Select the WireGuard SSL VPN instance to view additional details.

- Once provisioning is complete, open the Console tab to retrieve the URL for the SSL VPN service.

- The instance also includes a reverse proxy, allowing secure access to the Web UI from the internet. Its URL is provided below.

Additional Deployment Method
The instance can also be provisioned via the Instances tab—the same way you would normally create an instance or virtual machine—by selecting the MTN WireGuard SSL VPN instance type.

Part 3 — SSL VPN Web Setup
With your security group created and your WireGuard SSL VPN instance deployed, open the provided URL in a web browser.

- Click on advanced and select continue
- Follow the setup process to complete the configuration.
- Click on Continue
- Input
- Username
- Password (min 12 Characters)
- Click on No (I do not have an existing setup)
- Host (Public IP Address of the WireGuard SSL VPN Instance)
- Port (51820)
- Sign In


- Use the username and password you created earlier.

Onboarding Clients
End users connect by importing a generated WireGuard configuration file or scanning a QR code on mobile devices. This section demonstrates how Windows and macOS, or Linux users, connect to the WireGuard VPN server instance.
Important Note: Allowed IPs is the fundamental traffic filter within a WireGuard configuration. It operates as a unique hybrid between a network router and a security firewall. It essentially defines the specific CIDR ranges authorised for a particular peer. Common Use Cases include:
- 0.0.0.0/0 (Full Tunnel): Routes all internet traffic through the VPN server.
- 10.8.0.0/24 (Split Tunnel): Routes only VPN-internal traffic; keeps local internet/SSH active.
- Custom Subnets (e.g., 10.253.253.0/24): Routes traffic to specific private cloud networks or data centres.
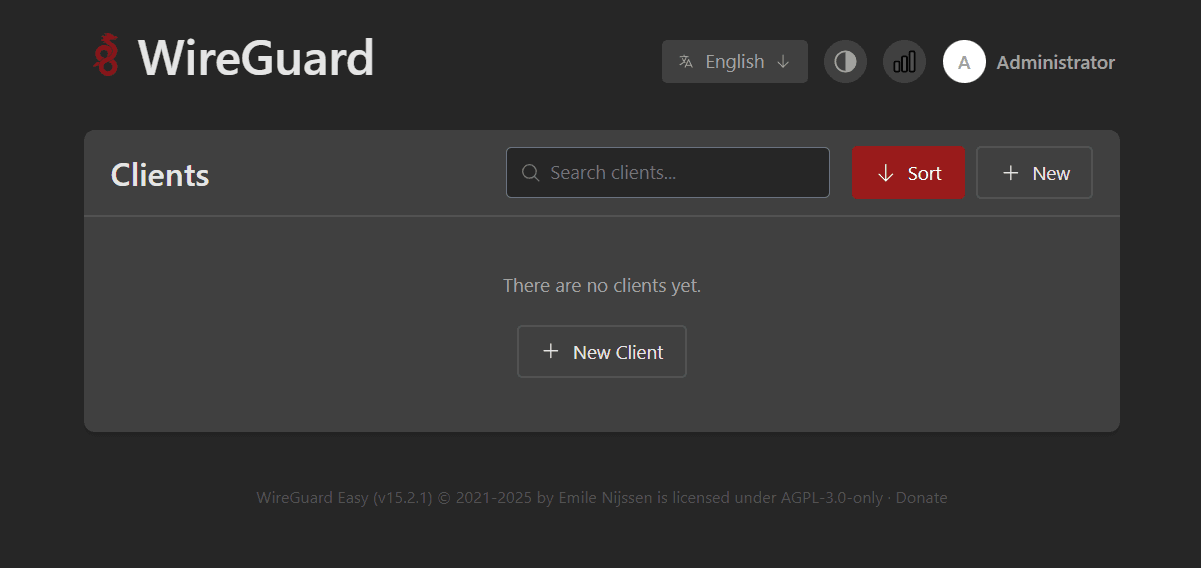
The steps for both categories include:
- Download and install WireGuard via https://www.wireguard.com/install/
Windows & macOS Users
- Import or download the conf file via wireguard server web ui for respective clients.
- Open WireGuard Application

- Click on Import Tunnel(s) from file
- Locate and select the desired .conf file, then click Open.
- Edit the .conf file to match your desired settings or preferences.
- To start the VPN connection, click Activate.

Linux Users
- Install openresolv to enable WireGuard to use the server’s DNS
- Sudo apt install openresolv -y
- Download or import the config from the WireGuard server web UI (e.g., clientname.conf), move it to the default WireGuard directory and rename it to match the network interface name, typically wg0.conf.

- Secure the file permissions so only root can read the private keys:
- sudo chmod 600 /etc/wireguard/wg0.conf
- Edit the .conf file to match your desired settings or preferences.
- Bring Up the VPN Tunnel:
- sudo wg-quick up wg0
- Verify the Connection
- sudo wg show
- Enable on Boot (Optional)
- sudo systemctl enable wg-quick@wg0
Important Tips & Notes
- This service manages VPN clients through a secure web interface, automatically generates client keys and configuration files, and provides real-time visibility into client connections and traffic usage.
- The Web UI is accessed through a Traefik reverse proxy, which also provides its own management interface. The username is “Administrator,” and the password is also “Administrator.”
- End users connect by importing a generated WireGuard configuration file or scanning a QR code on mobile devices, with no manual key handling required.
- If the WireGuard VPN blocks internet access immediately after a client connects, restart the WireGuard services on the server. In some cases, it may take more than one restart before connectivity is restored, so repeat the restart until it works. Run the following commands:
- cd /etc/docker/containers/wg-easy
- sudo docker compose restart