
SSL Install and Uninstall Workflow on MTN Cloud
Overview
This guide covers the installation and uninstallation of Let’s Encrypt SSL certificates on instances provisioned within the MTN Cloud Platform. Let’s Encrypt is a free, automated, and open certificate authority that provides SSL/TLS certificates to enable HTTPS encryption for your web applications.
Why it matters:
- Free SSL Certificates: Let’s Encrypt provides free, trusted SSL certificates, eliminating the cost associated with traditional certificate authorities.
- Automated Management: Certificates are automatically issued, installed, and renewed through a simple workflow, reducing administrative overhead and the risk of expiration.
- Enhanced Security: Encrypts traffic between your web server and users, protecting sensitive data from interception and improving your security posture.
- SEO and Trust: HTTPS is a ranking factor for search engines and displays the padlock icon in browsers, increasing user trust and confidence in your website.
- Simplified Operations: The MTN Cloud workflow abstracts the complexity of certificate management, making it accessible to users without deep SSL expertise.
Prerequisites
Before you begin, ensure you have:
- An active MTN Cloud Console login with the appropriate role (full permissions) to Library (Automation) and Provisioning (Instances), e.g., the Customer Admin User role.
- Running instances or virtual machines with a web server (e.g., Apache, Nginx) that will host the SSL certificate.
- A registered domain name with a DNS record pointing to the correct server (public IP or floating IP).
- The DNS record must have had sufficient time to propagate before running the workflow.
Tip: If you do not see Let’s Encrypt features with the appropriate user role(s), please contact support or refresh the portal.
Important Notes
- DNS Propagation: Ensure the domain’s DNS record points to the correct server and has had sufficient time to propagate before running the MTN Let’s Encrypt SSL installation.
- Security Group Rules: Ports 80 (HTTP) and 443 (HTTPS) must be added as inbound rules in your personal security group and applied to the instance, in addition to the default security group.
- Linux Only: For Catalog-based installation, select only a Linux instance in the Resource field.
Phase 1 – Install MTN Let’s Encrypt SSL
Purpose: Install a Let’s Encrypt SSL certificate on an existing Linux instance using the Service Catalog for a guided provisioning experience.
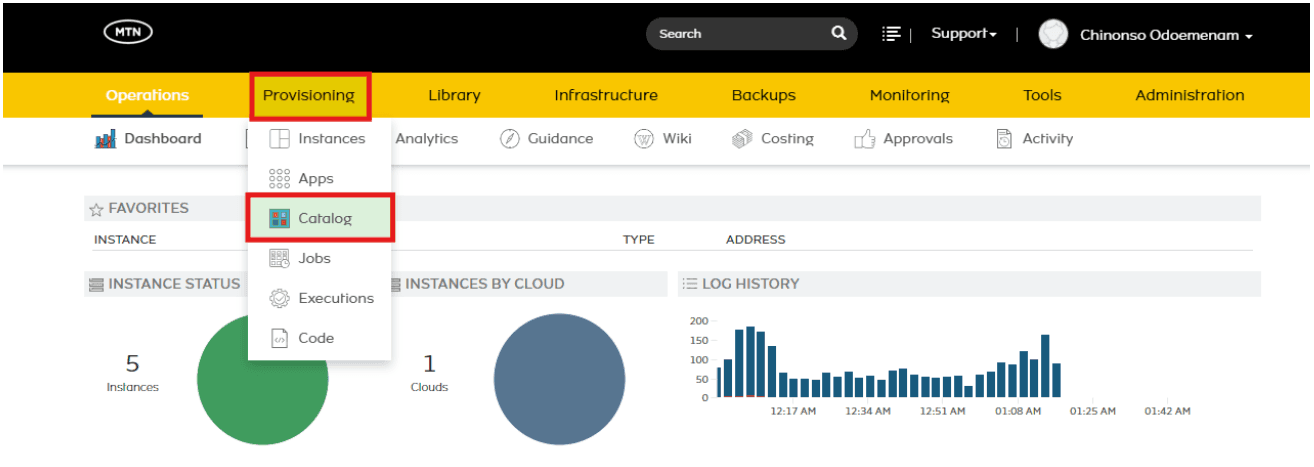
Step 1 – Navigate to Catalog
Navigate to Provisioning > Catalog.
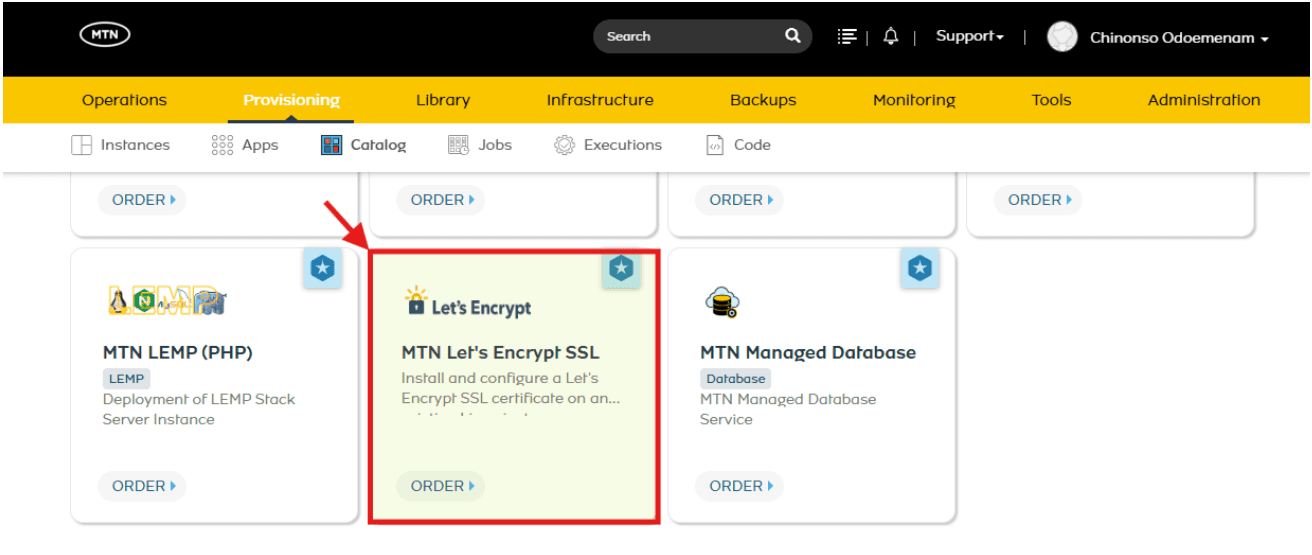
Step 2 – Select Catalog Item
Select the catalog item MTN Let’s Encrypt SSL.
Step 3 – Configure Deployment
Fill in the following details in the order form:
- Domain Name: Enter the domain(s) you want SSL installed on. You can enter one domain, or several, separated by commas or spaces (e.g., example.com, www.example.com).
- Admin Email (Optional): Enter an email address to receive an alert if auto-renewal fails in the future.
- Enable Staging Certificate: Check this box only if you are testing on a non-production server. This issues a test certificate that browsers will not fully trust, making it safe for practice.
- Context Type: Select Instance.
- Resource: Input the VM Name of the target instance.
- Click Order Now.
Important: Select only a Linux instance in the Resource field.
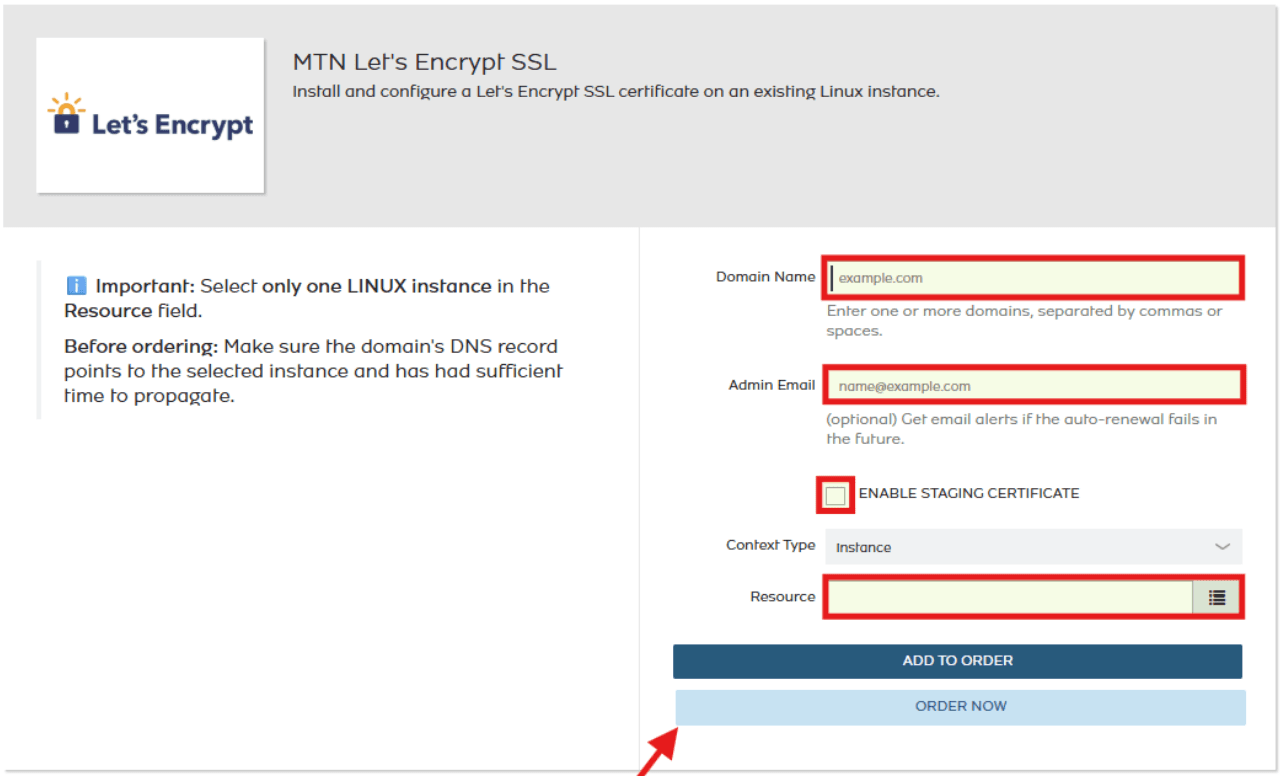
Note: Before ordering, ensure that the domain’s DNS record points to the selected instance and has had sufficient time to propagate.
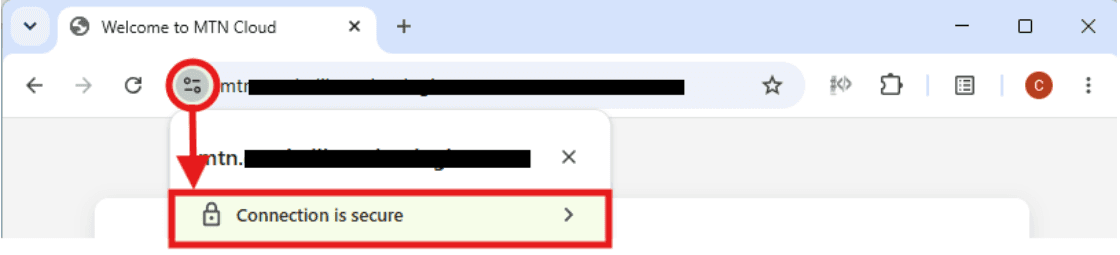
Step 4 – Verify SSL Installation
Once the installation finishes:
- Open the domain in a web browser.
- Confirm that SSL shows as active (the padlock icon appears in the address bar).
- Verify the connection is secure.
Phase 2 – Install from the Instance
Purpose: Install a Let’s Encrypt SSL certificate directly from a running instance using the automated workflow.
Step 1 – Select the Target Instance
- Navigate to Provisioning > Instances.
- Click the specific instance on which you want to install the SSL certificate.
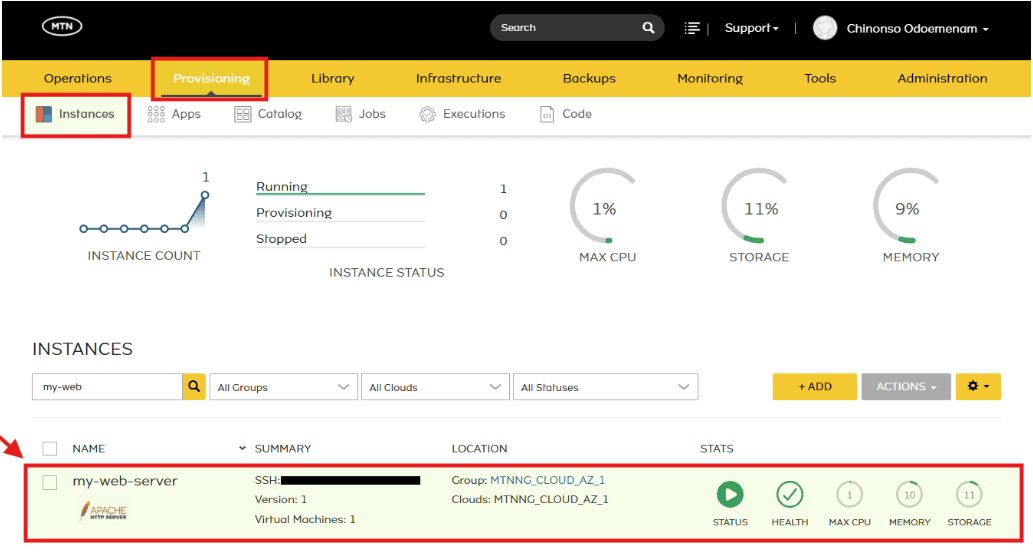
Step 2 – Run the Install Workflow
- Click the Actions dropdown menu (located in the top right or next to the instance status).
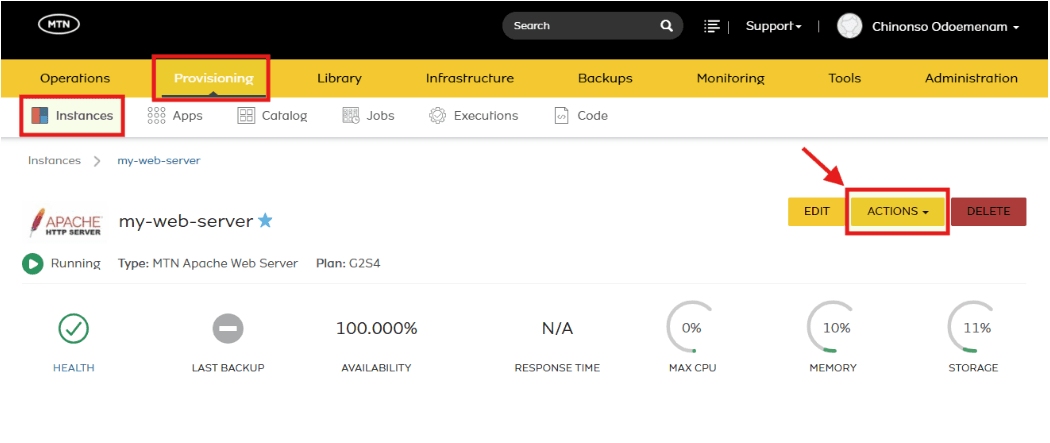
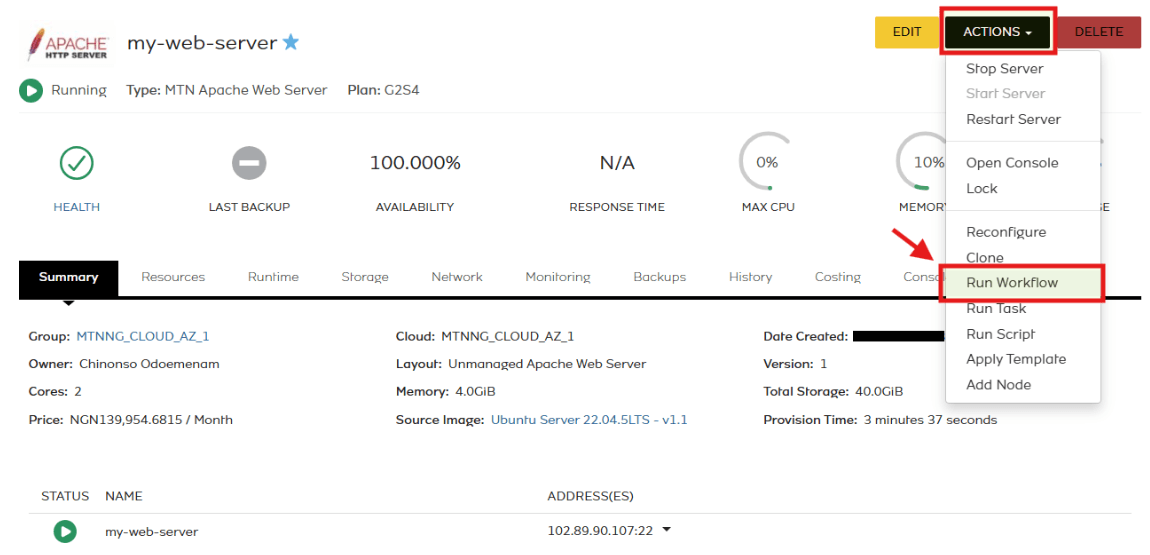
- Locate and select Run Workflow from the available options.
- Search for “Install Let’s Encrypt SSL Git” and click it.
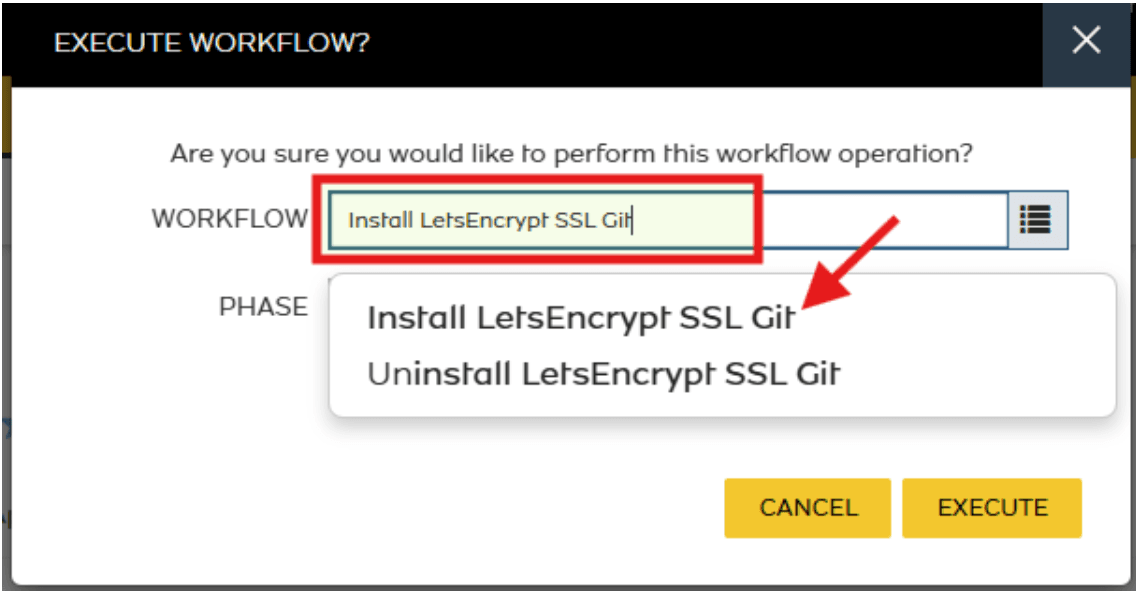
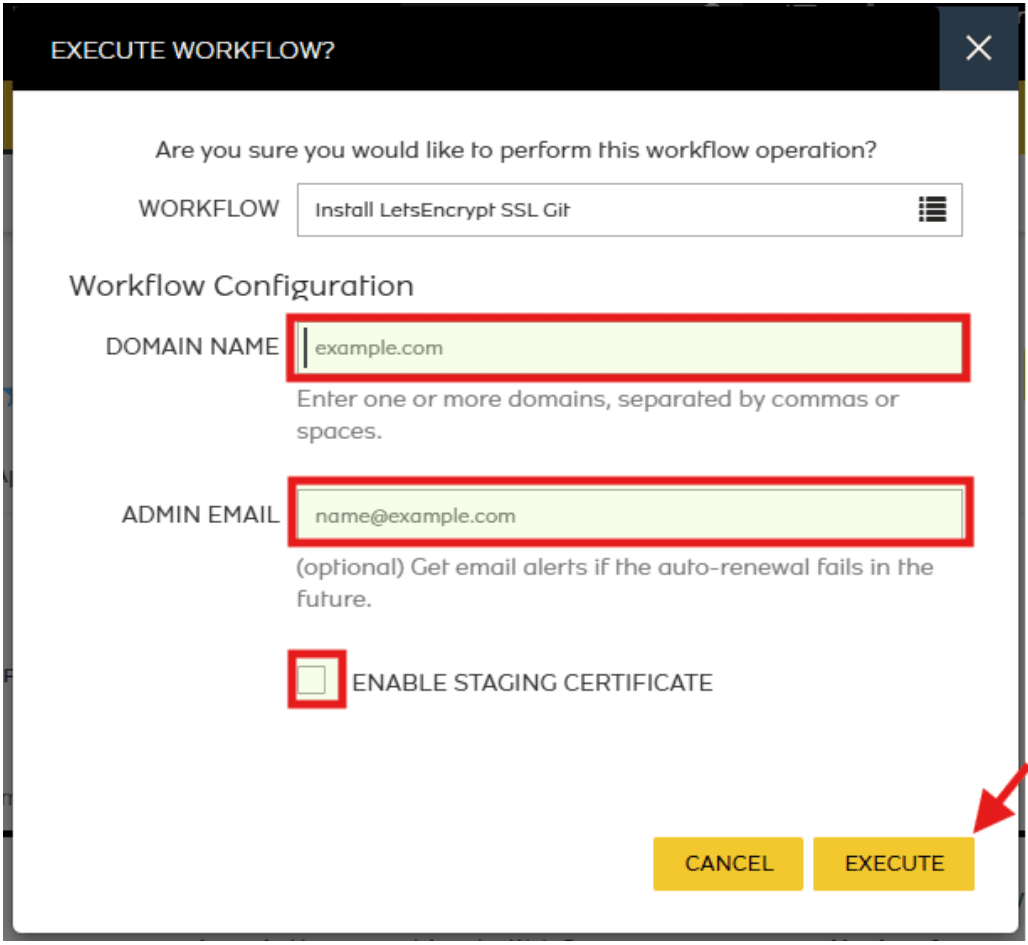
Step 3 – Configure Workflow Parameters
Fill in the form using the same fields described in Phase 1, Step 3:
- Domain Name: Enter the domain(s) you want SSL installed on (comma- or space-separated).
- Admin Email (Optional): Enter an email address for auto-renewal failure alerts.
- Enable Staging Certificate: Check only for non-production testing.
Click Execute.
Step 4 – Verify SSL Installation
Once the installation finishes:
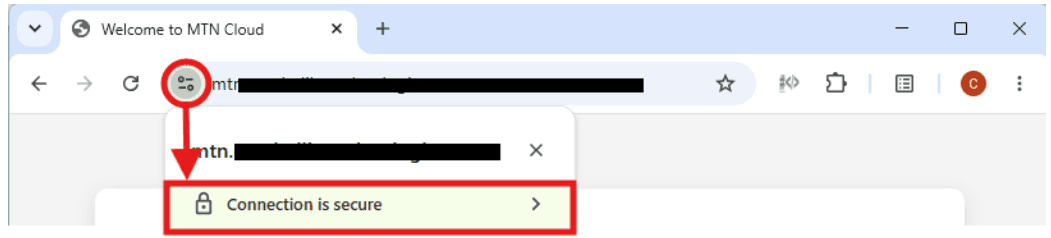
- Open the domain in a web browser.
- Confirm that SSL shows as active (the padlock icon appears in the address bar).
Phase 3 – Uninstall from the Instance
Purpose: Remove a Let’s Encrypt SSL certificate from a target instance, either for a specific domain or completely.
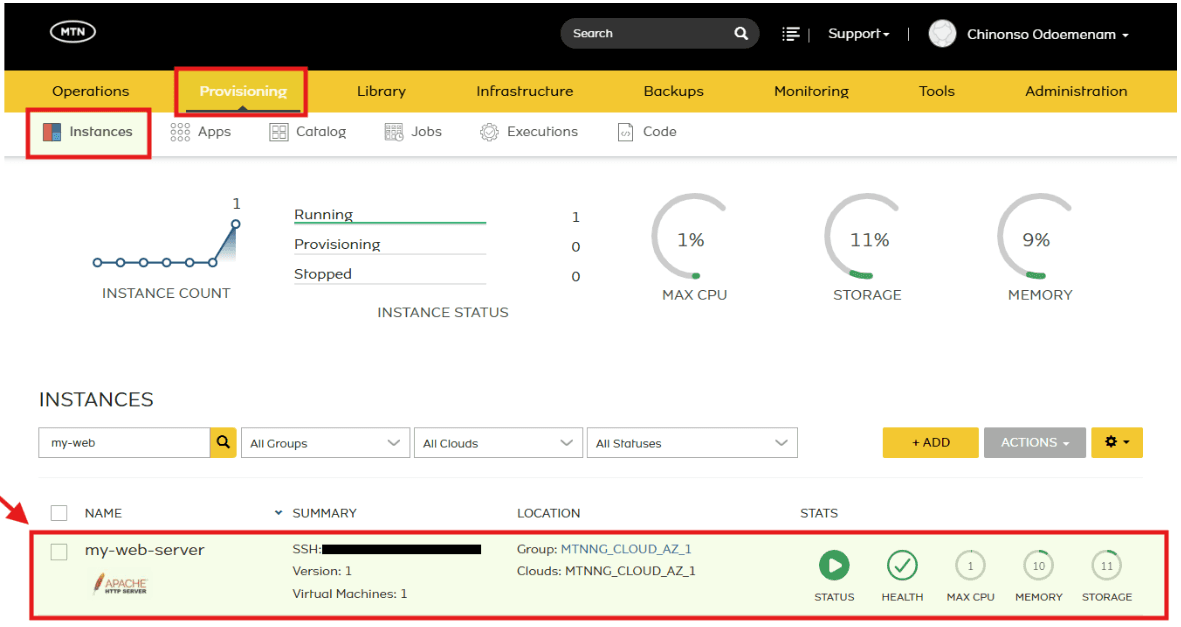
Step 1 – Select the Target Instance
- Navigate to Provisioning > Instances.
- Click the specific instance from which you want to remove the SSL certificate.
Step 2 – Run the Uninstall Workflow
- Click the Actions dropdown menu.
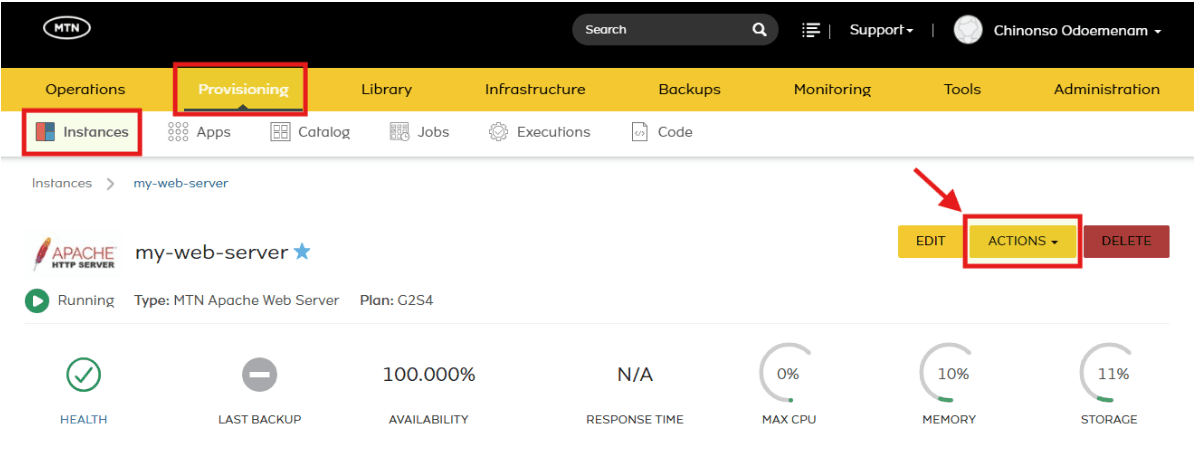
- Locate and select Run Workflow from the available options.
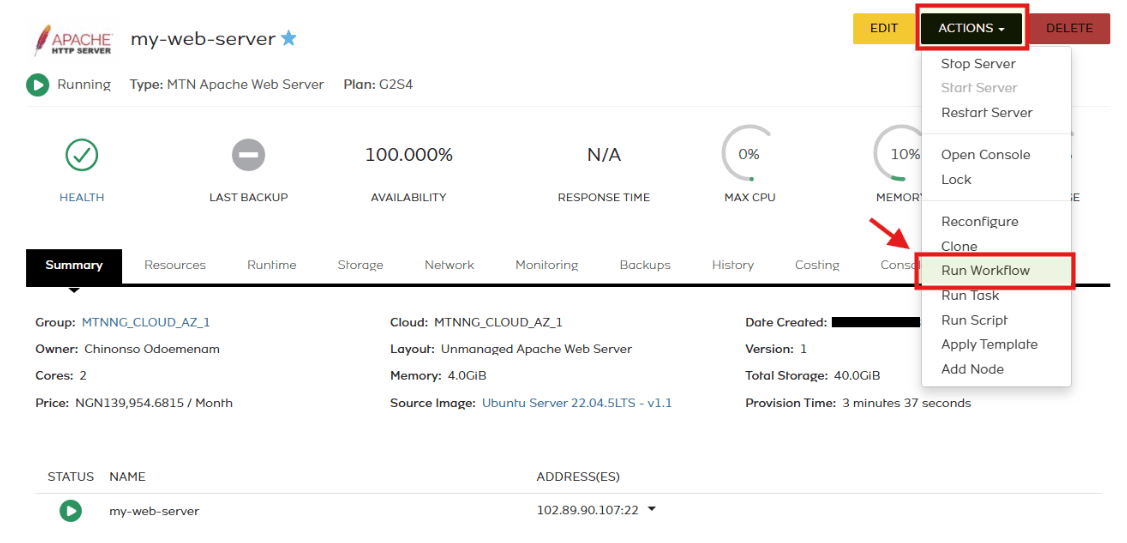
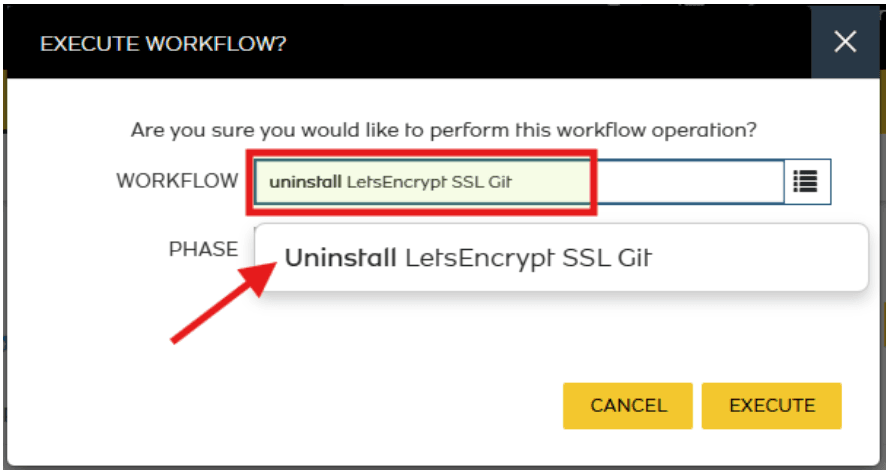
- Search for “Uninstall LetsEncrypt SSL Git” and click it.
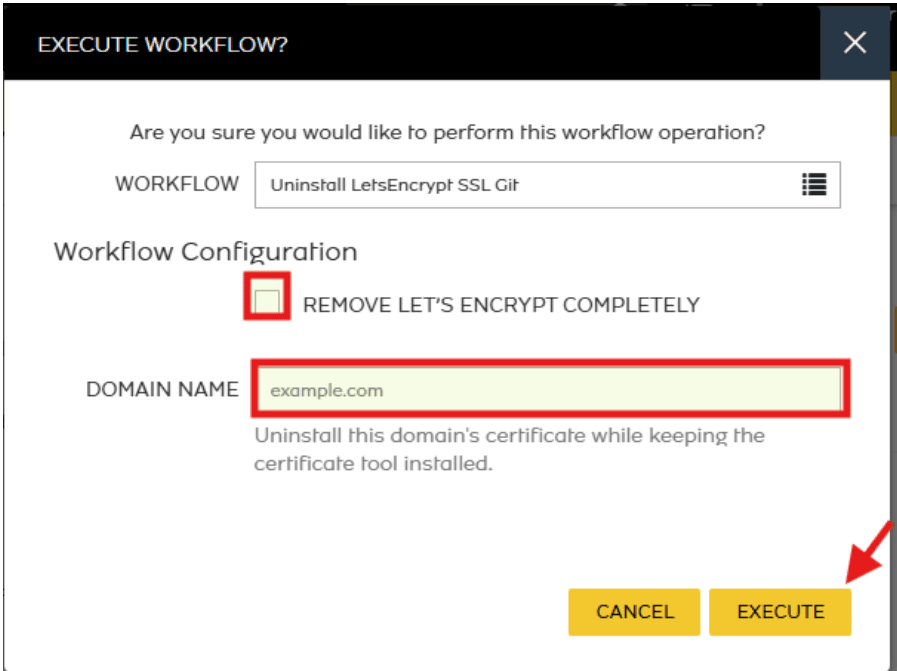
Step 3 – Configure Uninstall Parameters
A form will pop up with the following options. Fill in the form and click Execute:
- Remove Let’s Encrypt Completely: When this is on, it removes every domain’s certificate on this server, plus the certificate software itself. Use this only when you are done using SSL on this server entirely.
- Domain Name: This field only appears when the option above is off. Type the single domain whose SSL you want removed. This leaves the certificate software installed and every other domain on the server untouched.
Step 4 – Verify SSL Removal
Once the uninstallation finishes:
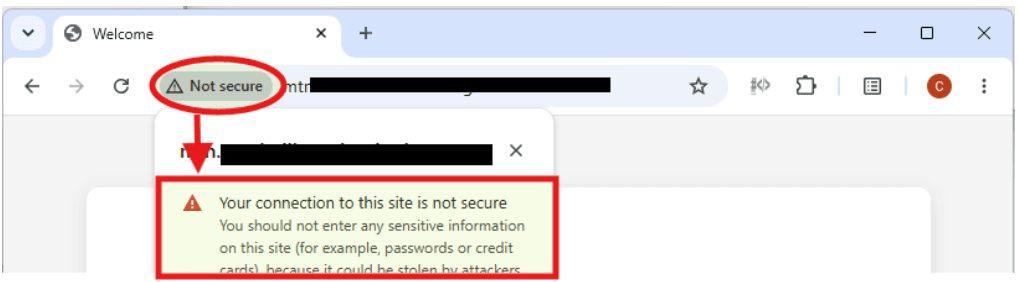
- Open the domain in a web browser.
- Confirm that it now shows as “Not Secure”.
Important Tips and Notes
- DNS Prerequisites: Before installing SSL, ensure that your domain’s DNS record points to the correct server (public IP or floating IP) and has fully propagated. DNS propagation can take up to 48 hours, though it is often much faster.
- Security Group Configuration: Ports 80 and 443 must be open in your security group for Let’s Encrypt to validate domain ownership and for HTTPS traffic to reach your server. Refer to the Security Group Creation documentation for detailed steps.
- Linux Instances Only: When installing via the Catalog, ensure you select only a Linux instance in the Resource field. Windows instances are not supported by this workflow.
- Staging Certificates: Use the staging certificate option only for testing purposes. Staging certificates are not trusted by browsers and are intended for validating your configuration without consuming Let’s Encrypt rate limits.
- Auto-Renewal: Let’s Encrypt certificates are valid for 90 days. The workflow automatically configures renewal, but ensure that your Admin Email is set correctly to receive alerts if renewal fails.
- Complete Uninstall: Use the “Remove Let’s Encrypt Completely” option only when you no longer need SSL on the server. This removes all certificates and the certificate management software.
- Selective Uninstall: If you only want to remove a specific domain’s certificate, leave the complete removal option off and enter the domain name. This preserves certificates for other domains on the same server.
- Verification: Always verify the SSL installation or removal by opening the domain in a browser and checking the security status.
- Troubleshooting: If the workflow fails or the certificate is not issued, verify:
- DNS records are correct and propagated.
- Ports 80 and 443 are open in the security group.
- The domain is correctly spelled.
- The web server is running and accessible.
- Reusability: You can run the install workflow multiple times to add SSL certificates for additional domains on the same server.