
Apache Web Server Provisioning Workflow on MTN Cloud
Overview
This guide covers the automated deployment of a cloud-optimized Apache HTTP server on the MTN Cloud Platform. This service allows you to host reliable web applications using either the Service Catalog or the standard Instance provisioning wizard.
Why it matters:
- Ease of Management: Each instance includes integrated server management commands for checking status, restarting, or stopping the service directly via the terminal.
- Flexibility: You can deploy web applications quickly and then customize them by uploading your own content to the /var/www/html/ directory.
Prerequisites
Before you begin, ensure you have:
- An active MTN Cloud Console login with the appropriate permissions (e.g., Customer Admin User role) to view the “Provisioning” and “Infrastructure” tabs
- A pre-configured Security Group to manage inbound/outbound traffic. Refer to Security_Doc4_Security_Groups_V1.0
- A planned deployment strategy (e.g., specific IP needs or naming conventions)
Important Note: You must include an inbound rule in your security group for Port 80 (or your custom Apache port) to ensure the web server is accessible.
Phase 1: Deploy MTN Apache Web Server
Step 1 – Select Catalog Item
Navigate to Provisioning > Catalog and select the MTN Apache Web Server catalog item

Figure 1: Accessing the Catalog from the Provisioning dashboard.

Figure 2: The Catalog view displaying the “MTN Apache Web Server” option for ordering
Step 2 – Configure Deployment
Fill in the following details in the order form:
- Group & Cloud: Select your assigned group and cloud.
- Name & Environment: Provide a unique name and select the environment.
- Resource Pool & Plan: Choose the appropriate Resource Pool and service Plan.
- Networking: Assign your Network and define the Web Server Port (default is 80).
- Security Groups: Select both the Default security group and the Security Group created using the dedicated guide.

Figure 3: The deployment order form requires group, cloud, and security group configuration.
Click Order Now to initiate the deployment
Step 3 – Verify and Manage
Navigate to Provisioning > Instances to view your running server.
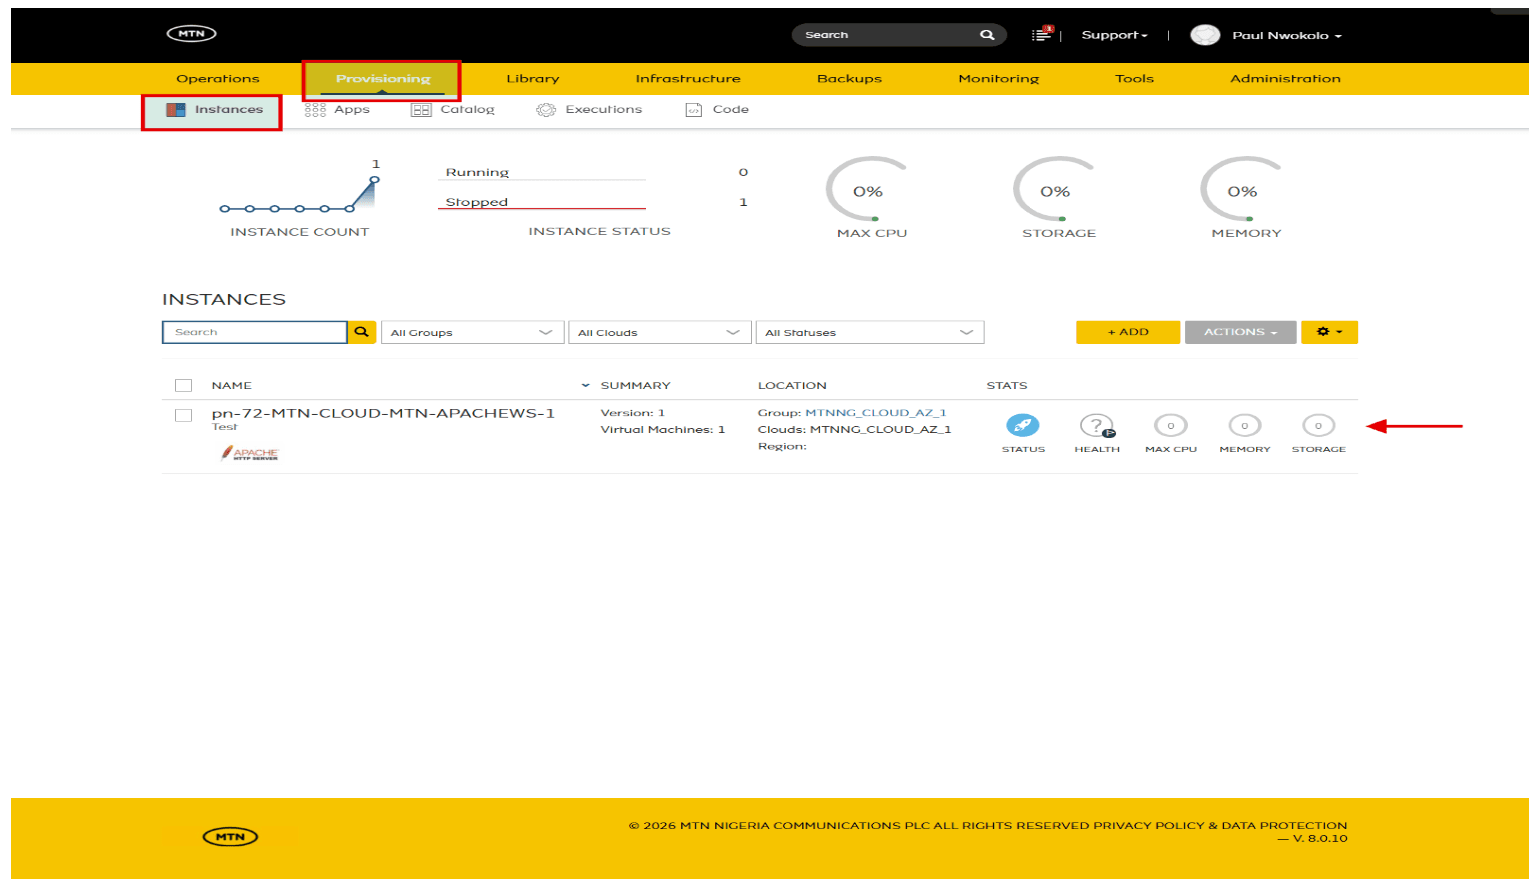
Figure 4: Instance view showing the status and health of the provisioned Apache web server
Once the status shows as running, expand the Addresses section and select the provided HTTP link to confirm the web server is live.

Figure 5: Instance details view showing the HTTP address link for verification.
If the Apache web service uses a custom port, verify it by entering the instance’s public IP followed by that port in your browser.

Figure 6: The verification page confirming the Apache Web Server is up and running
When you open the Console tab or connect to the instance remotely, you’ll see key details about the newly provisioned Apache web server.

Figure 7: Console view showing server details and some management commands.
Additional Deployment Method
The instance can also be provisioned via the Instances tab—the same way you would normally create an instance or virtual machine—by selecting the MTN Apache Web Server instance type.
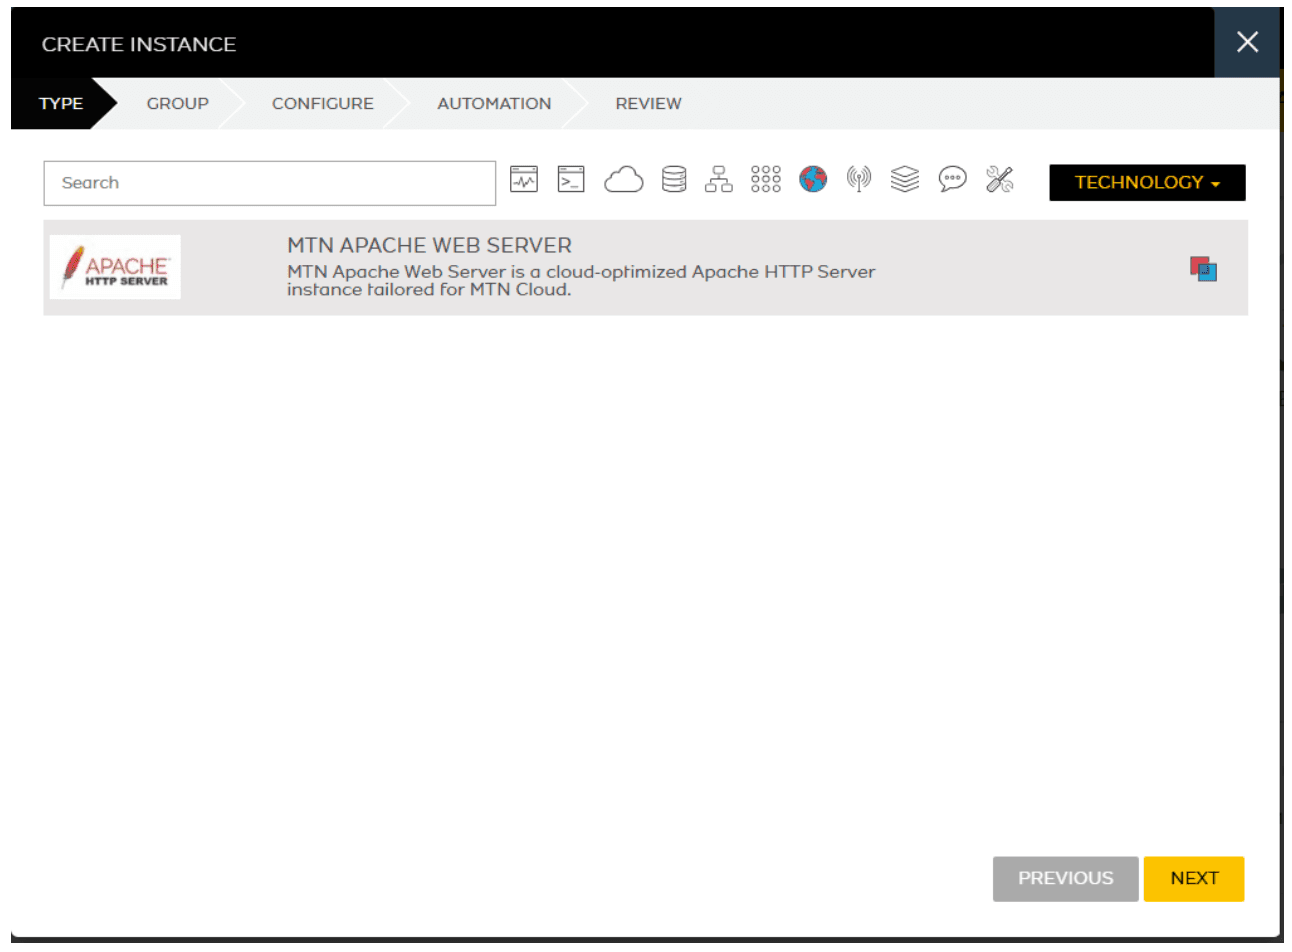
Figure 8: Deploying via the Instance tab
Important Tips and Notes
- The web server is accessible over HTTP by default. If HTTPS is required, you can install certificates and enable SSL modules through standard Apache configuration files.
- End users access hosted content directly through the instance’s public HTTP endpoint, with no additional client configuration required